Work with Branches in Jira
With the Testomat.io Jira Plugin, you can manage branches directly from Jira. This allows you to organize your tests and suites for different features or releases. Namely, you can:
- Add new branches to the existing project
- Switch between branches, including the Main branch
- Make changes within existing branches
How To Create a New Branch
Section titled “How To Create a New Branch”- Click on the Branches button
- Enter a branch name or leave it as the issue name
- Press Enter
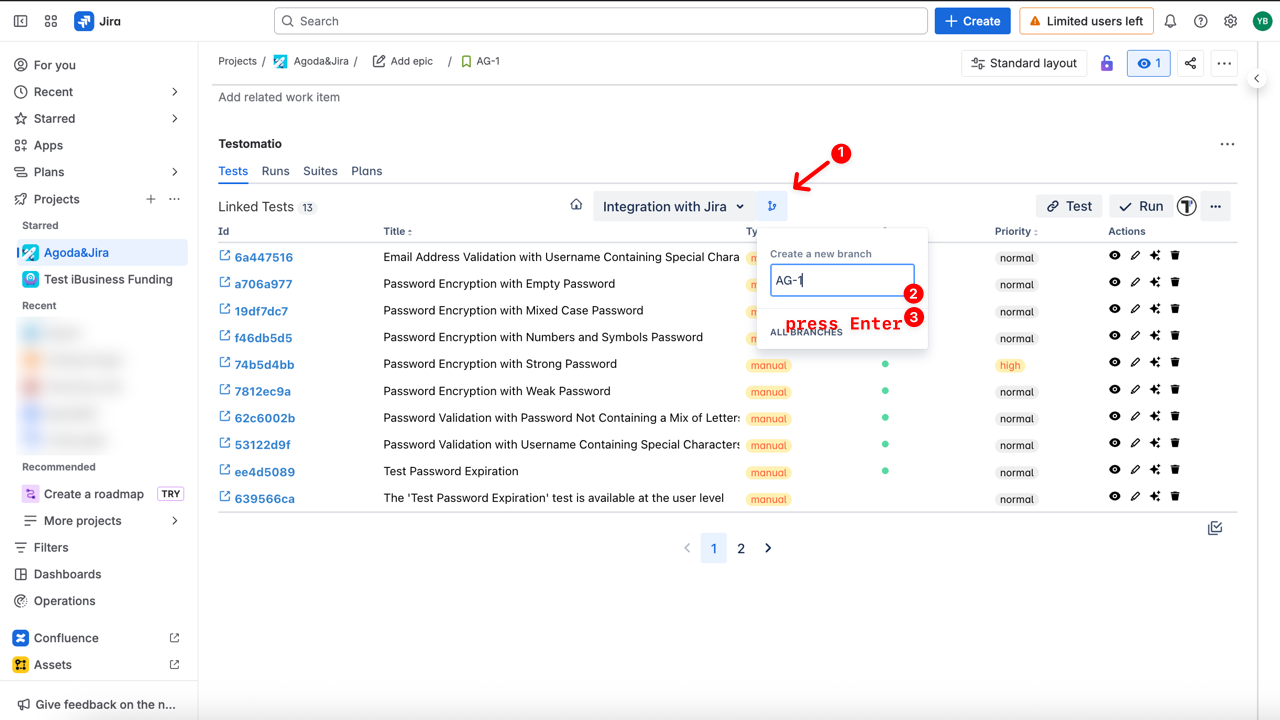
Your branch has been created successfully, and you are automatically switched to the newly created branch.

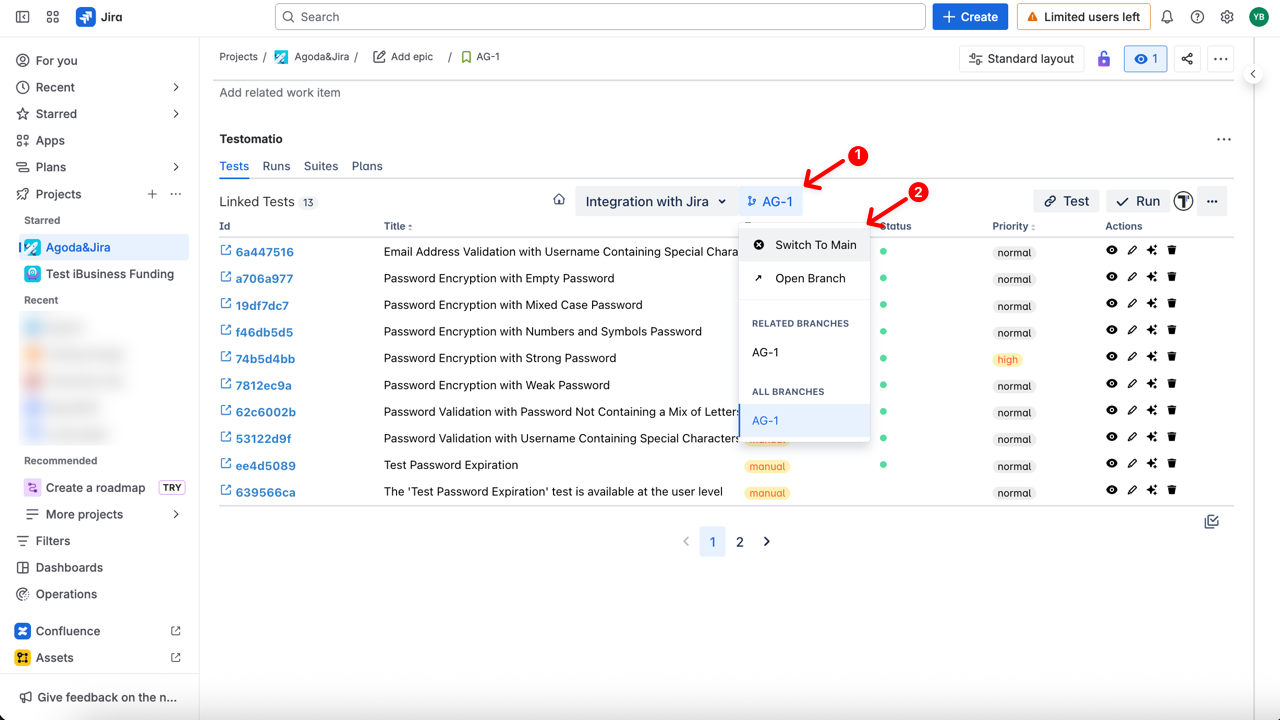
How to Switch Between Branches
Section titled “How to Switch Between Branches”You can switch between branches and Main.
- Click on the Branches button
- Select the branch you want to switch to (e.g., Switch to Main)
How To Work Within Branches
Section titled “How To Work Within Branches”Within a branch, you can perform all actions available in Jira Plugin after logging in:
- View linked tests and suites
- Edit tests and suites directly
- Unlink items if needed
- Edit BDD Feature Files
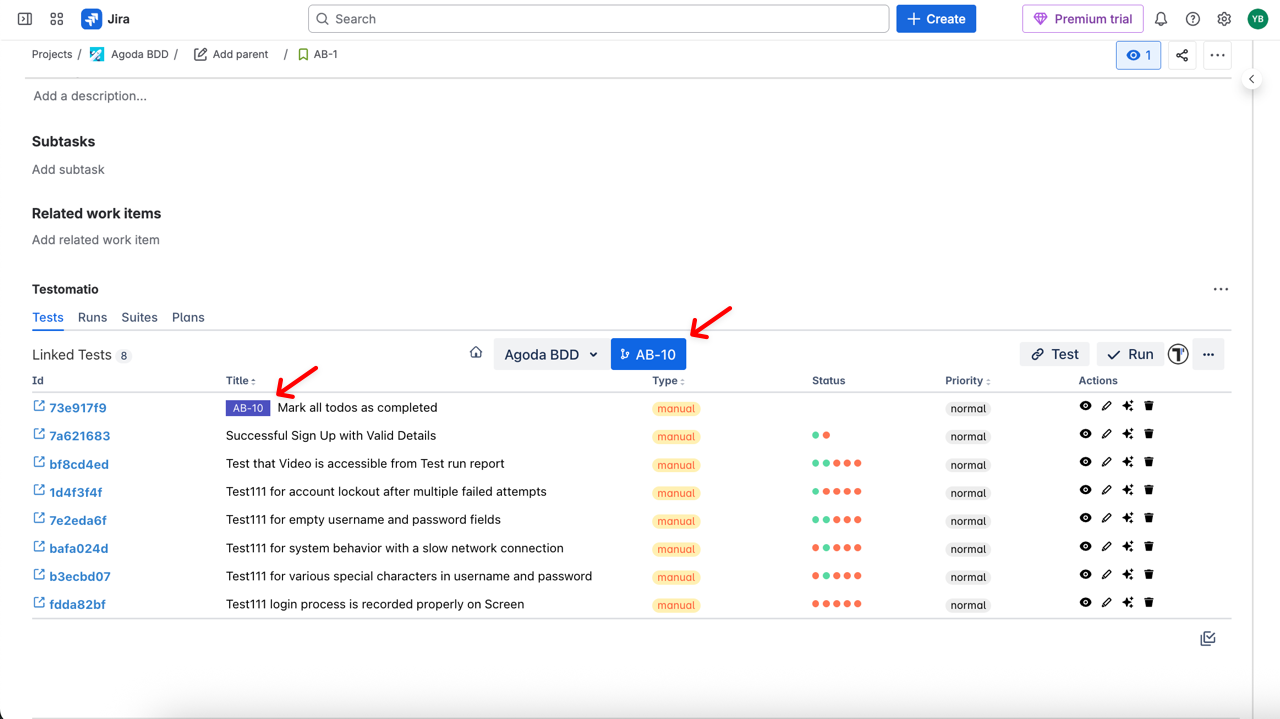
Tests and suites related to the current branch will be marked with a badge showing the branch name.
Learn more about what you can do after logging in.