Custom SAML
SAML providers can have different UI and different terms. In this section we will try to narrow down what configuration should be done to integrate any custom SAML provider without getting into the details.
On the SAML provider side, you will need to create a new SAML application for Testomat and put the following values:
- Name:
Testomat, basically the name of the application on provider’s side. - ACS URL (or Reply URL, SSO URL, etc):
https://app.testomat.io/users/saml/auth - Entity ID:
https://app.testomat.io/users/saml/metadata
Testomat.io will need user attributes like name and email to receive from SAML provider.
Create attributes:
email→ email is used to identify the user on Testomat.io side.name→ this will be a full name or a display name. If your SAML provider stores a first name and last name, usefirst_nameandlast_nameattributes instead.
We will need the following information from SAML provider to proceed with configuration on Testomat.io side. All of these values should be generated by service provider:
- Certificate file (X509 or Base 64)
- IdP Entity ID (or just Entity ID)
- Sign in URL (or Login URL)
Add users into SAML connection to ensure that they will be able to login to Testomat.io
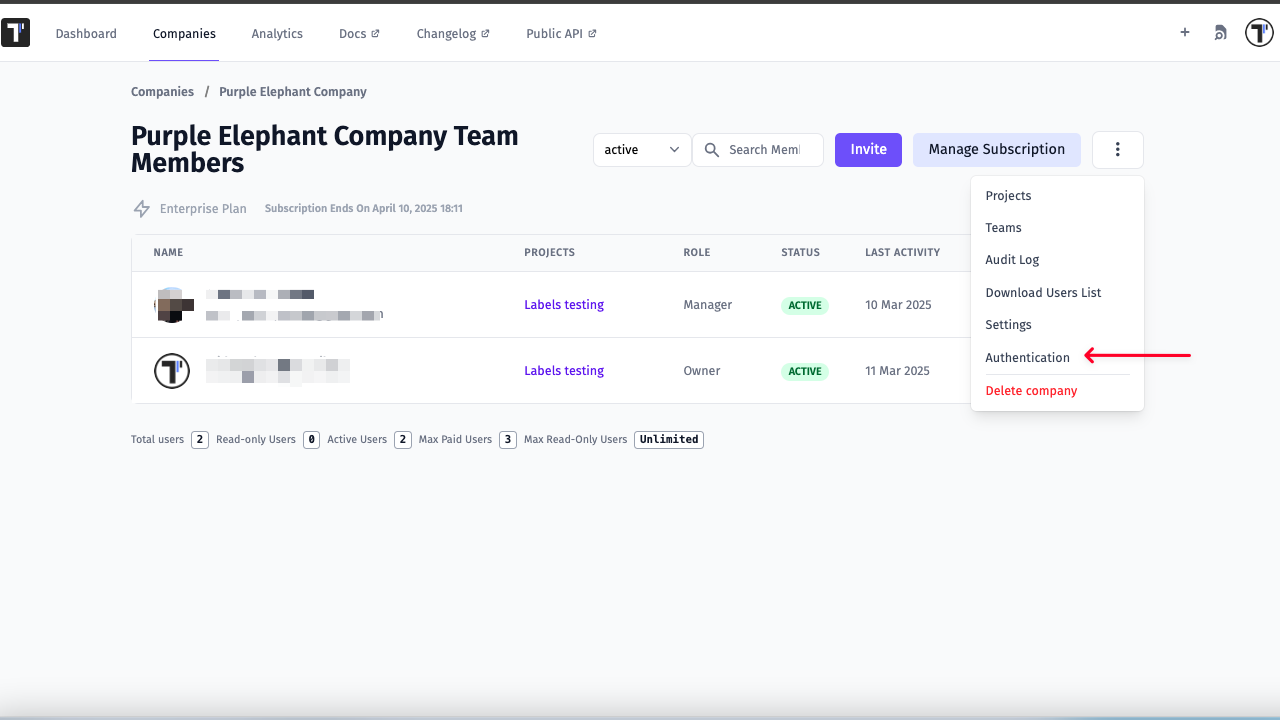
Now, open Company page in Testomat.io and select Authentification option

If you don’t see Single Sign On option, check that you are an owner of this company
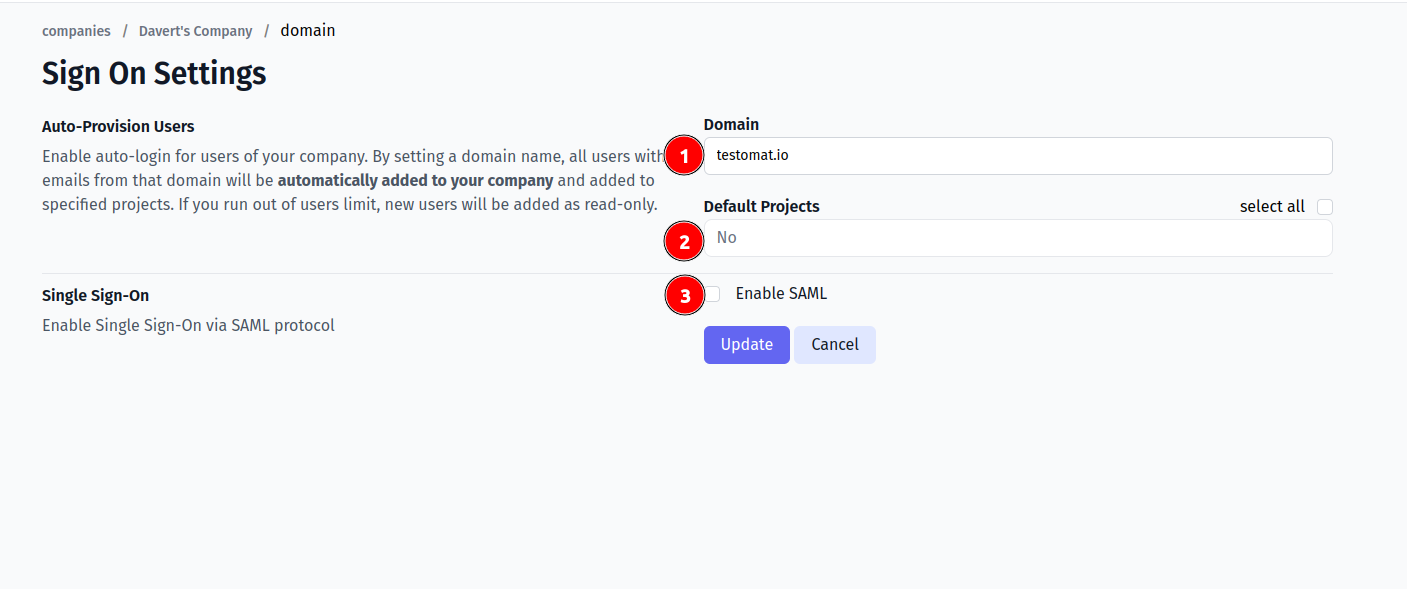
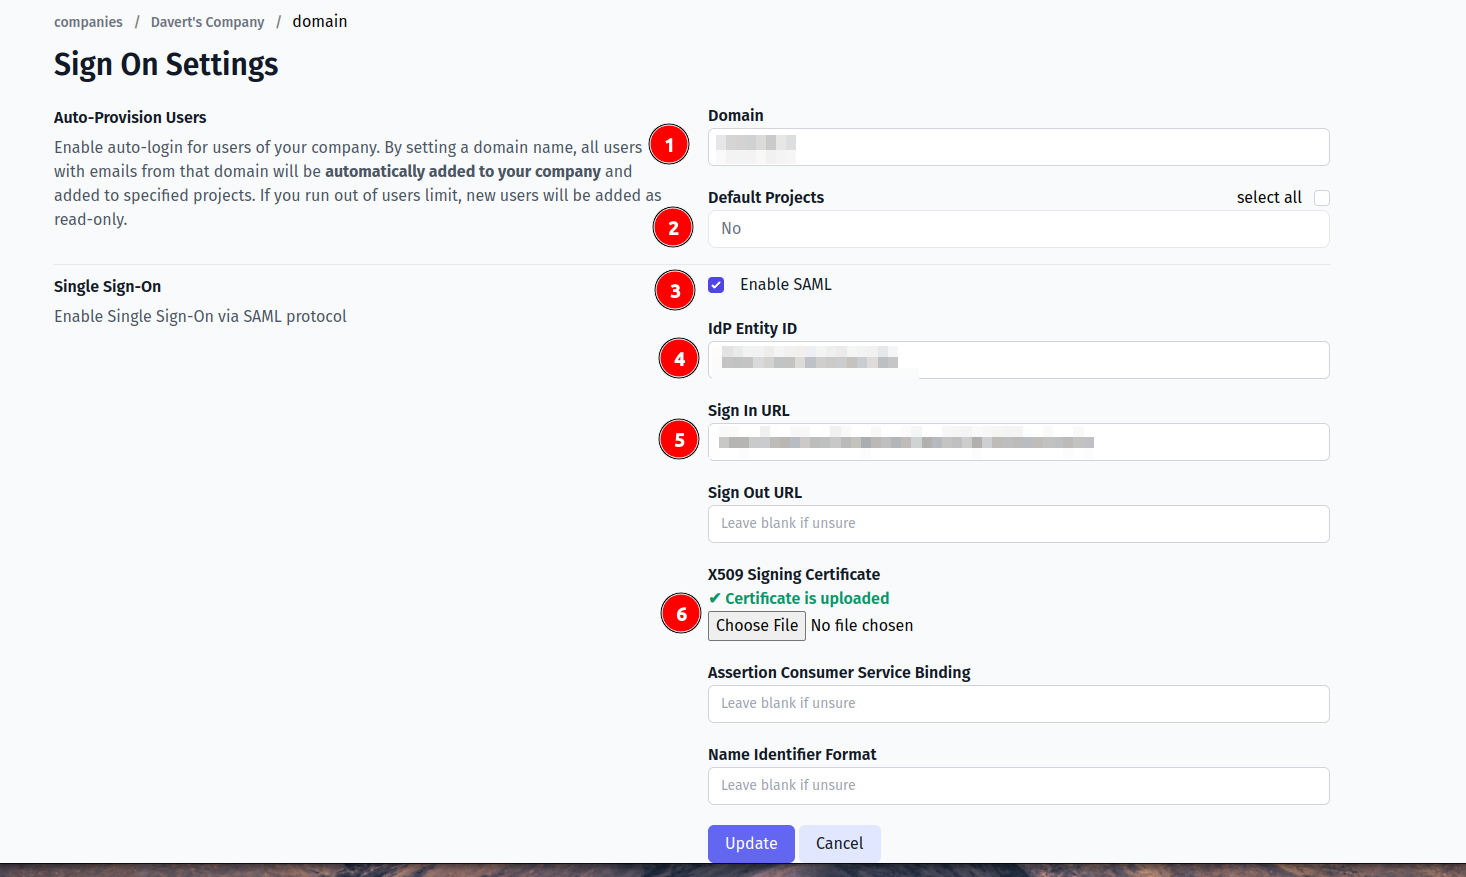
Fill in the form:
- Company domain. This is required to identify SSO connection by user’s email. Example:
mycompany.com. - Default Projects. Select projects to new users will be added to (optional).
- Enable SAML:

- Set IdP Entity ID
- Set Sign In URL
- Upload certificate file.

And save the form.
Now, use any assigned user from SAML provider to Log In into Testomat.io. Select “SSO” on the Sign In page, enter the email, and if everything is correct user will get inside Testomat.io, assigned to your company and added to default projects.
In case user sees 404 page on SAML provider, check that Single Sign-On URL was correctly set.