Users Roles & Access Overview
Managing users and permissions in Testomat.io is essential for effective team collaboration and project organization. Everything starts at the Company level — this is where you create your team space, invite users, and assign roles.
Before you begin managing users and their permissions, make sure your company is created. If you haven’t created a company yet, follow this guide to get started: How to Create a Company
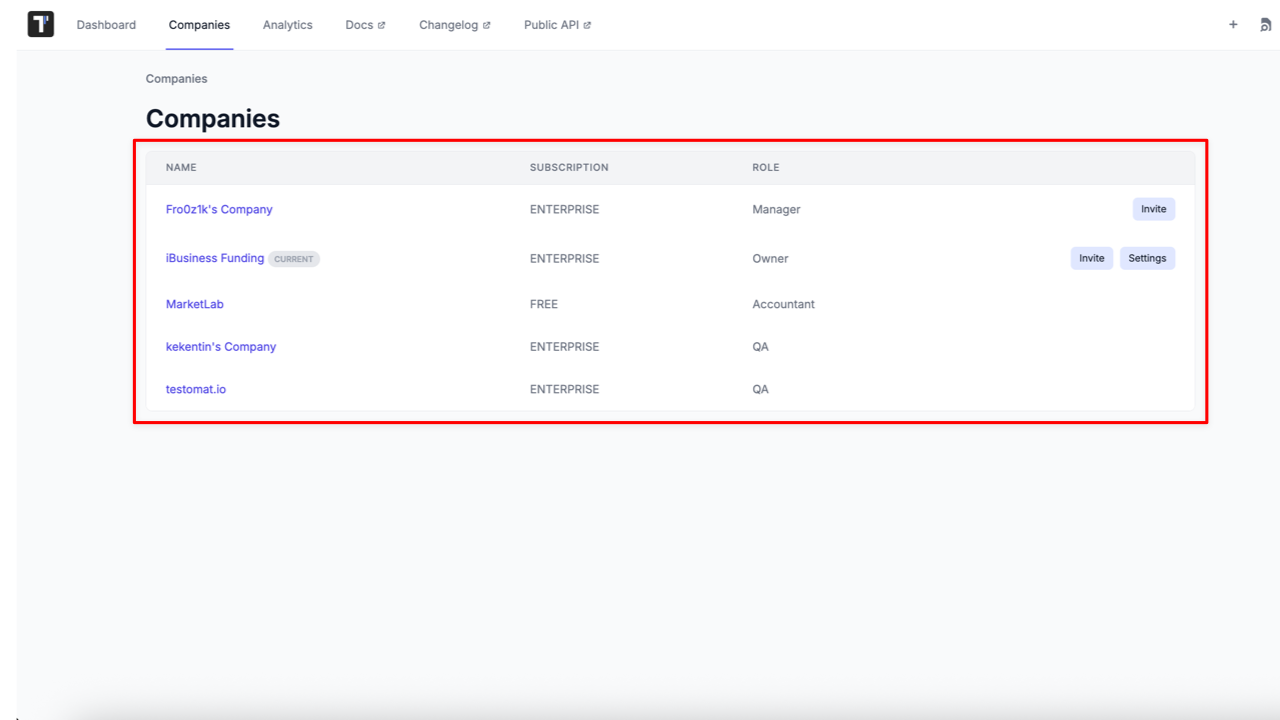
On the Companies page, you have a list of companies you participate in with mentioning your role in them.
Once your company is ready, you can:
- Invite users and assign roles (Owner, Manager, QA, Accountant, or Read-Only)
- Add users to specific projects within the company
- Manage user permissions and roles at the company and project levels
- Organize users into teams for easier access control
- Use bulk management options for large teams
Use this section to learn how to effectively manage your users and ensure your team has the right access to get the job done.
Users Roles Overview
Section titled “Users Roles Overview”Testomat.io provides different roles within projects and companies to make your testing process more convenient. Different team members have different access levels to management options.
Roles Within a Company
Section titled “Roles Within a Company”- Owner is a team member who created a company, can purchase a subscription, invite/delete members to a company and a project, change other team members’ roles inside the company, create projects, and has access to all features within the project.
- Manager is a team member who can purchase a subscription, create projects, invite members to a company and a project, can change other team members’ roles inside the company, except the owner role, and has access to all features within the project.
- QA is a team member who can create projects and has access to all features within the project.
- Accountant is a team member who can only update subscriptions and it is free of charge.
- Read-only is a team member who has permissions for viewing or reading information, but can’t make any changes. It is free of charge and available in Professional and Enterprise plans.
Roles Within a Project
Section titled “Roles Within a Project”- Owner is a team member who created a project, can invite/delete members and Support user to a project, change other team members’ roles inside the project, and has access to all features within the project.
- Manager is a team member who has almost the same rights as the project owner: can invite/delete members and Support user to a project, has access to all features within the project but can’t change other team members’ roles inside the project.
- Regular User is a team member who has access to all project features but limited access to project settings, can’t invite or delete members and Support user to a project, nor change their roles within the project.
- Read-only is a team member who has permissions for viewing or reading information, but can’t make any changes. All team members with a read-only role at the company level automatically have a read-only role at the project level, and this role can only be changed to a non-read-only role at the company level.
How to Invite a User to a Company
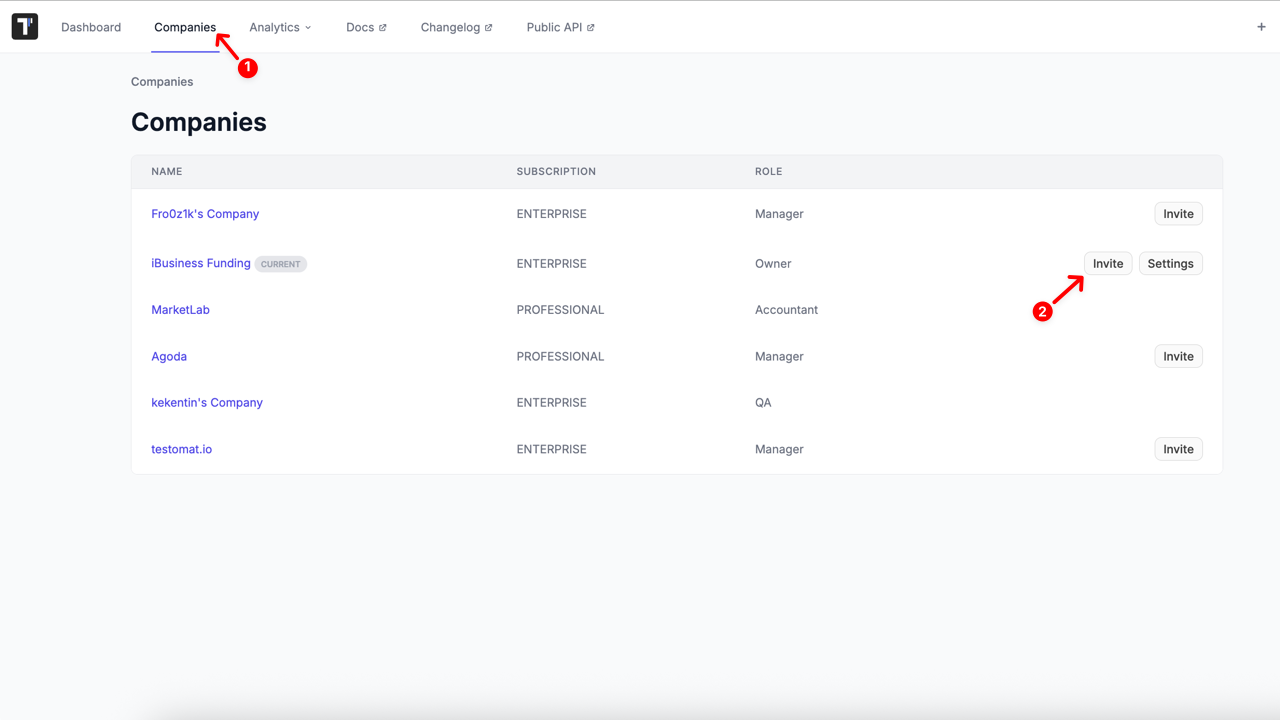
Section titled “How to Invite a User to a Company”Follow these steps to invite users to your company:
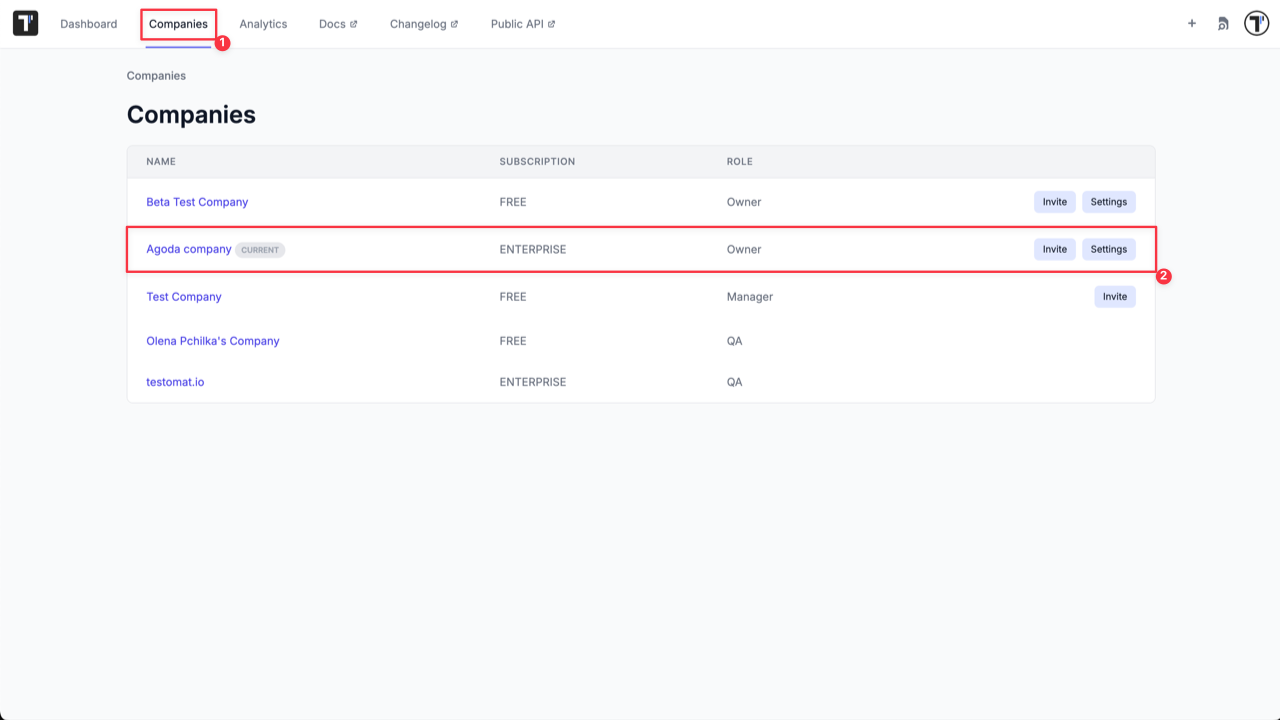
- Go to the Companies page
- Click the Invite button next to the company you want to invite users to
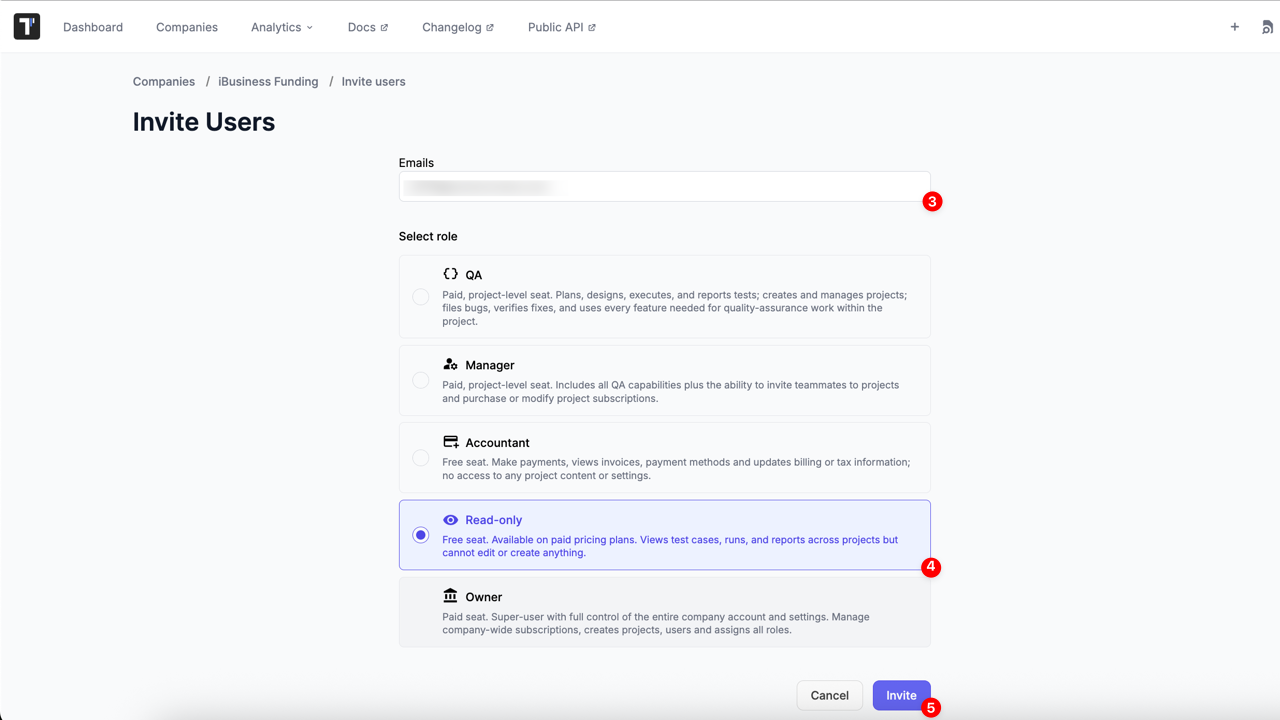
Once the Invite Users page opens
- Enter the user’s email. To invite multiple users, separate addresses with commas
- Select a specific role:
- QA (Paid, project-level seat. Plans, designs, executes, and reports tests; creates and manages projects; files bugs, verifies fixes, and uses every feature needed for quality-assurance work within the project.)
- Manager (Paid, project-level seat. Includes all QA capabilities plus the ability to invite teammates to projects and purchase or modify project subscriptions.)
- Accountant (Free seat. Make payments, views invoices, payment methods and updates billing or tax information; no access to any project content or settings.)
- Read-only (Free seat. Available on paid pricing plans. Views test cases, runs, and reports across projects but cannot edit or create anything.)
- Click Invite button
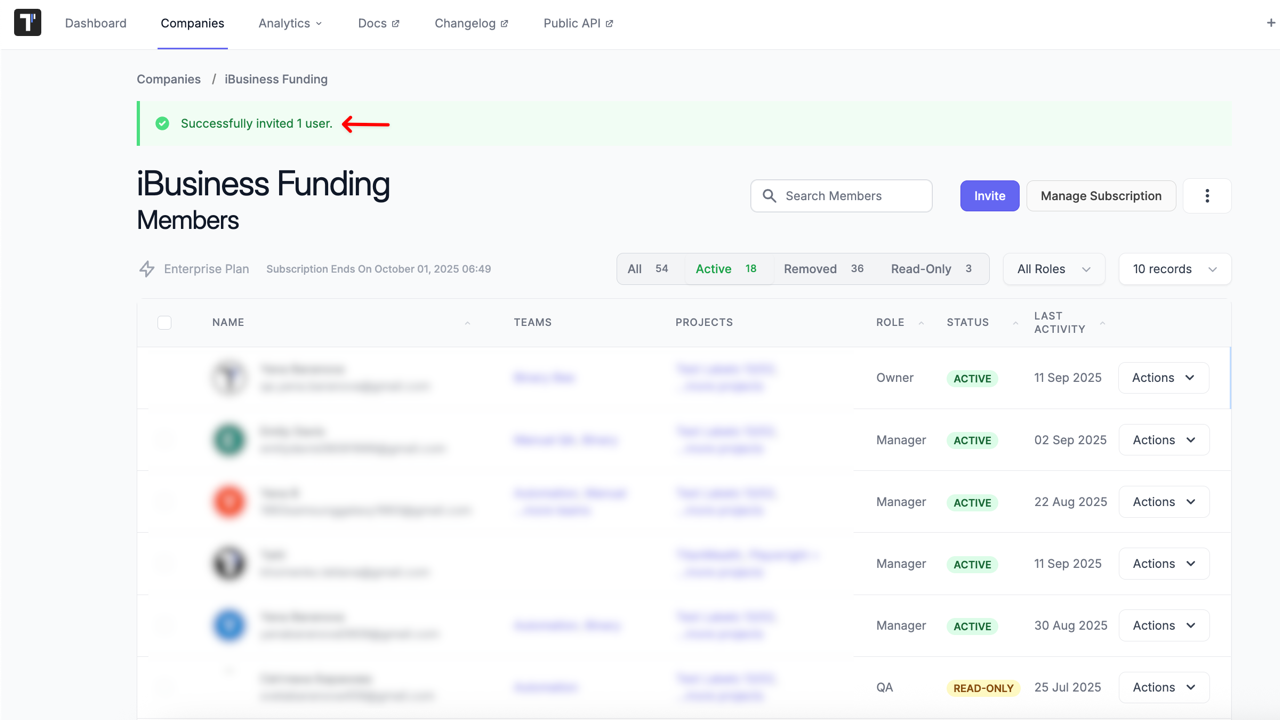
- You will be redirected to the Company page
- A confirmation message will appear to confirm that users have been successfully added
- If the paid seat limit is reached, only eligible users will be added
- If an invited email is invalid (wrong format or already exists), an orange warning message will appear
- After users are added to the Company, you can assign them to Projects
How to Add a User to a Project
Section titled “How to Add a User to a Project”There are two ways to add a user to a Project: from the Company Settings or directly from the Project Settings.
How to Add a User to a Project from the Company Settings
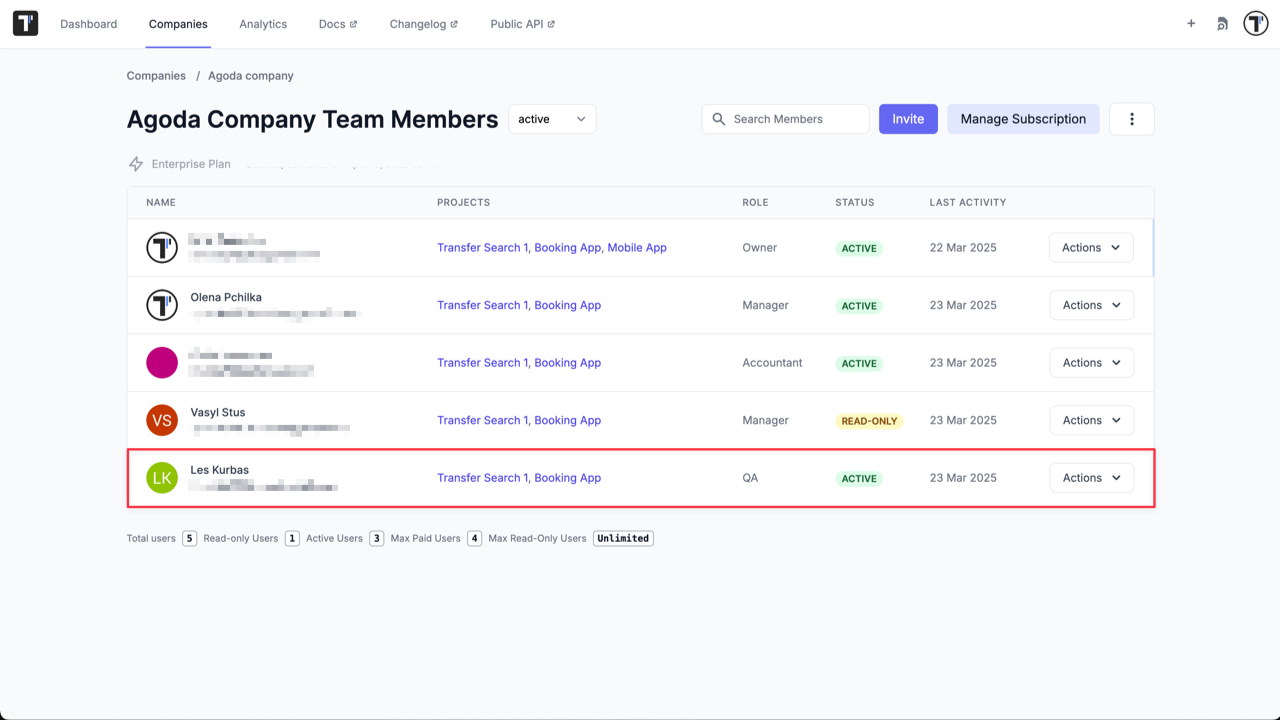
Section titled “How to Add a User to a Project from the Company Settings”- Go to the ‘Companies’ page.
- Select Company.
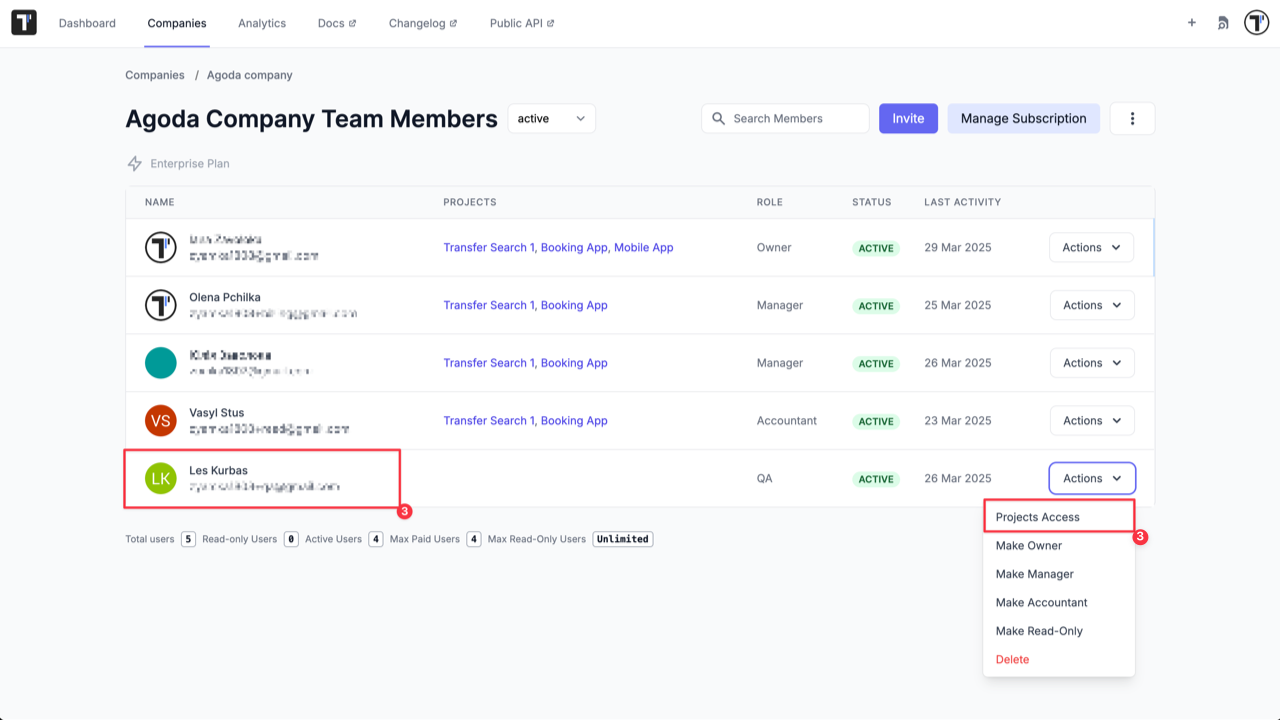
- Click on ‘Actions’ button and pick ‘Projects Access’ option or click on member’s name.
- Choose the project via ‘Add to Project’ button or add to all projects with one click via ‘Add to All Projects’ button.
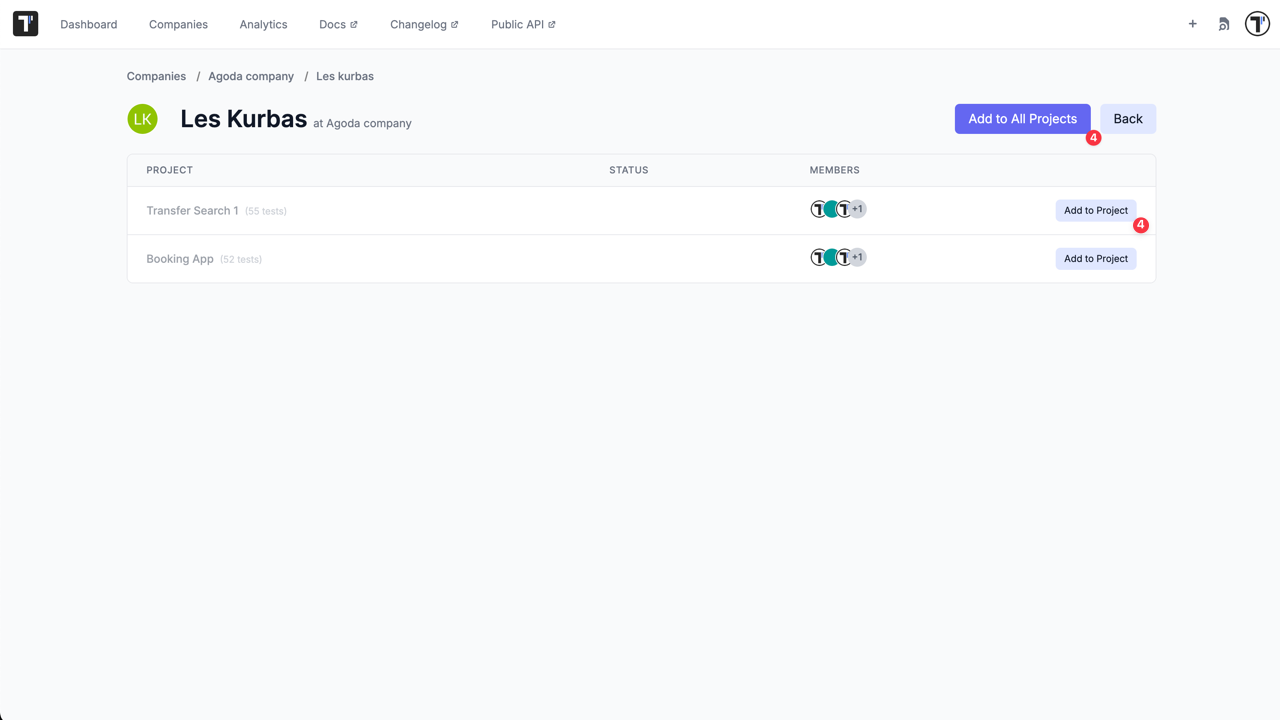
- See that a member was successfully added to projects and click ‘Back’ button.
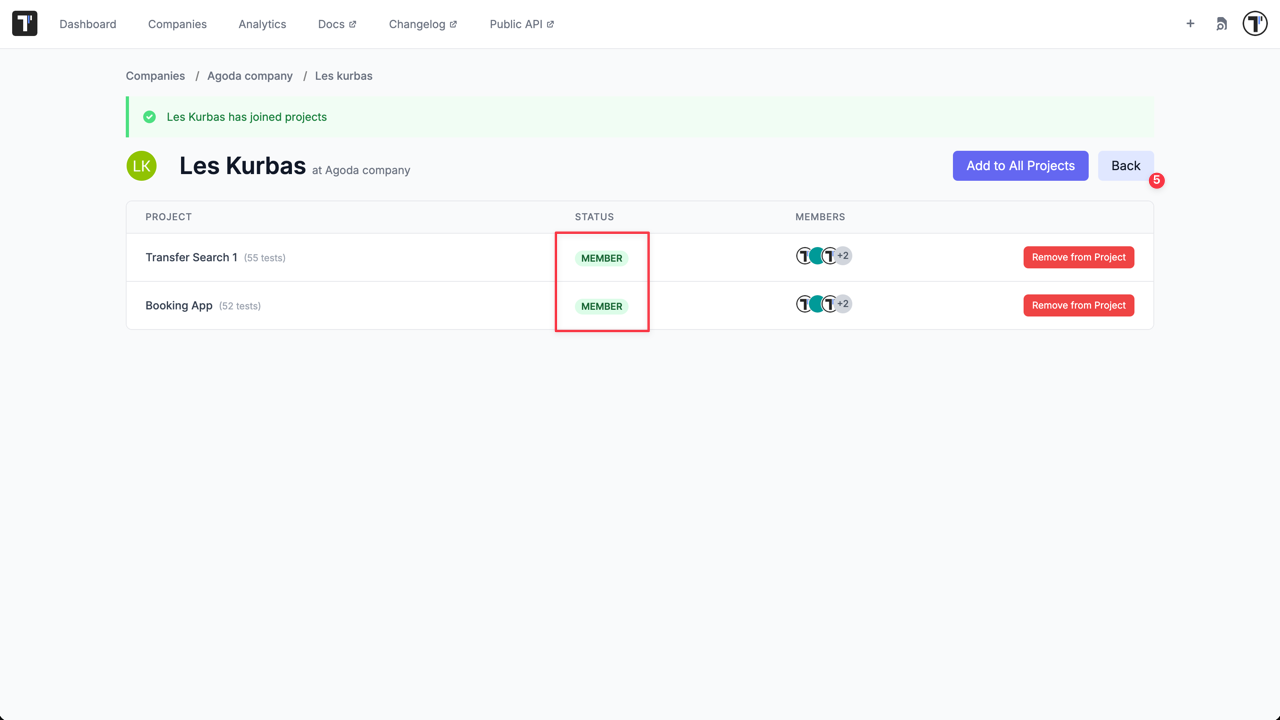
- See that projects appeared in added member’s line.
How to Add a User to a Project from the Project Settings
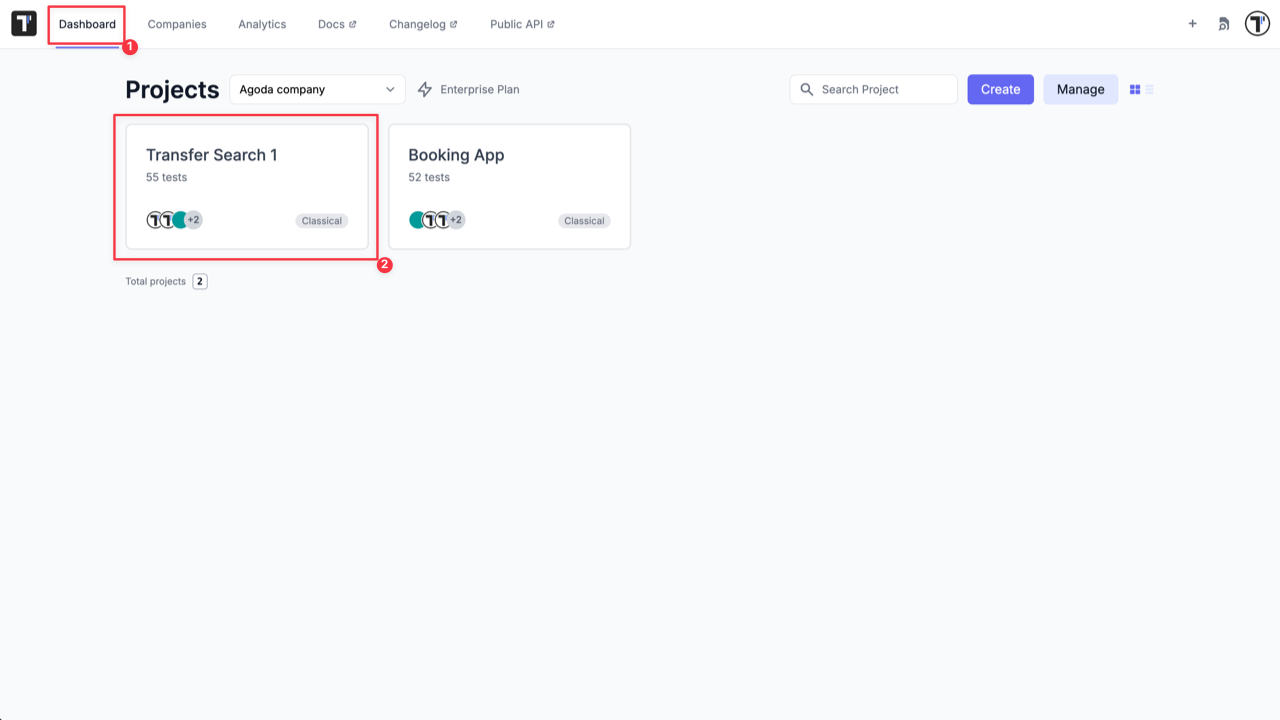
Section titled “How to Add a User to a Project from the Project Settings”- Go to the ‘Dashboard’ page.
- Select Company and Project.
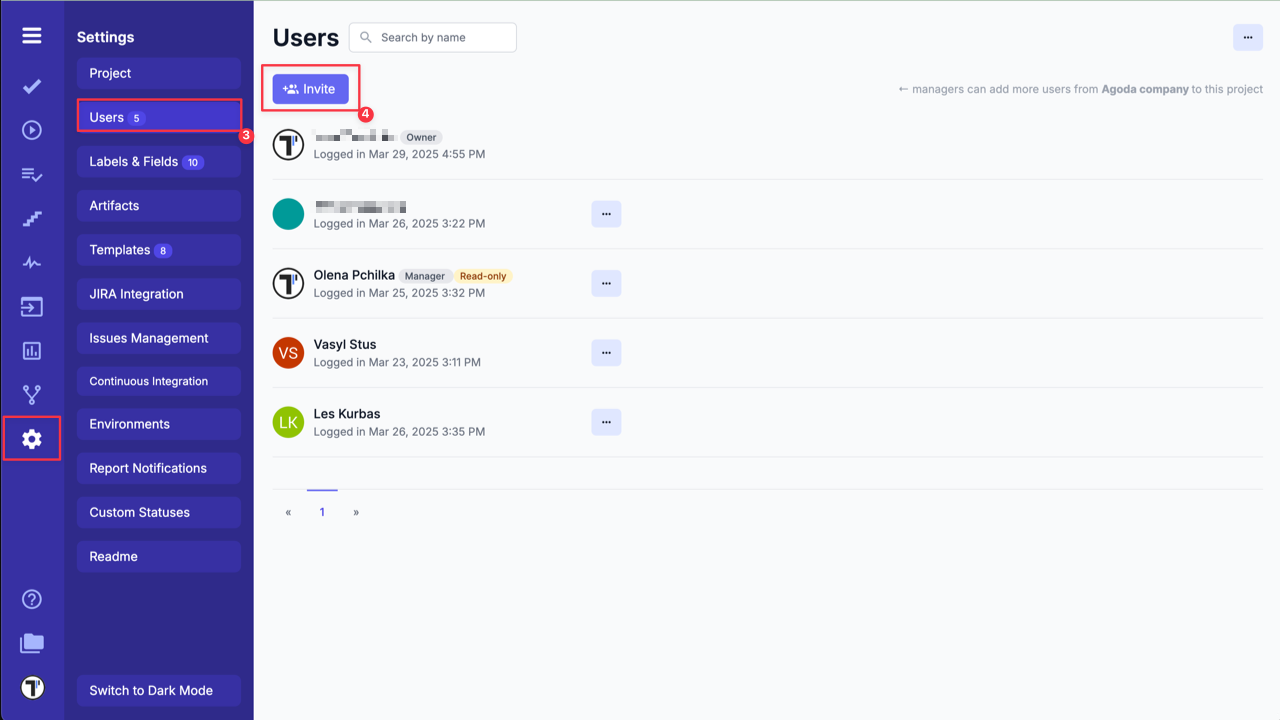
- Go to Settings-> Users.
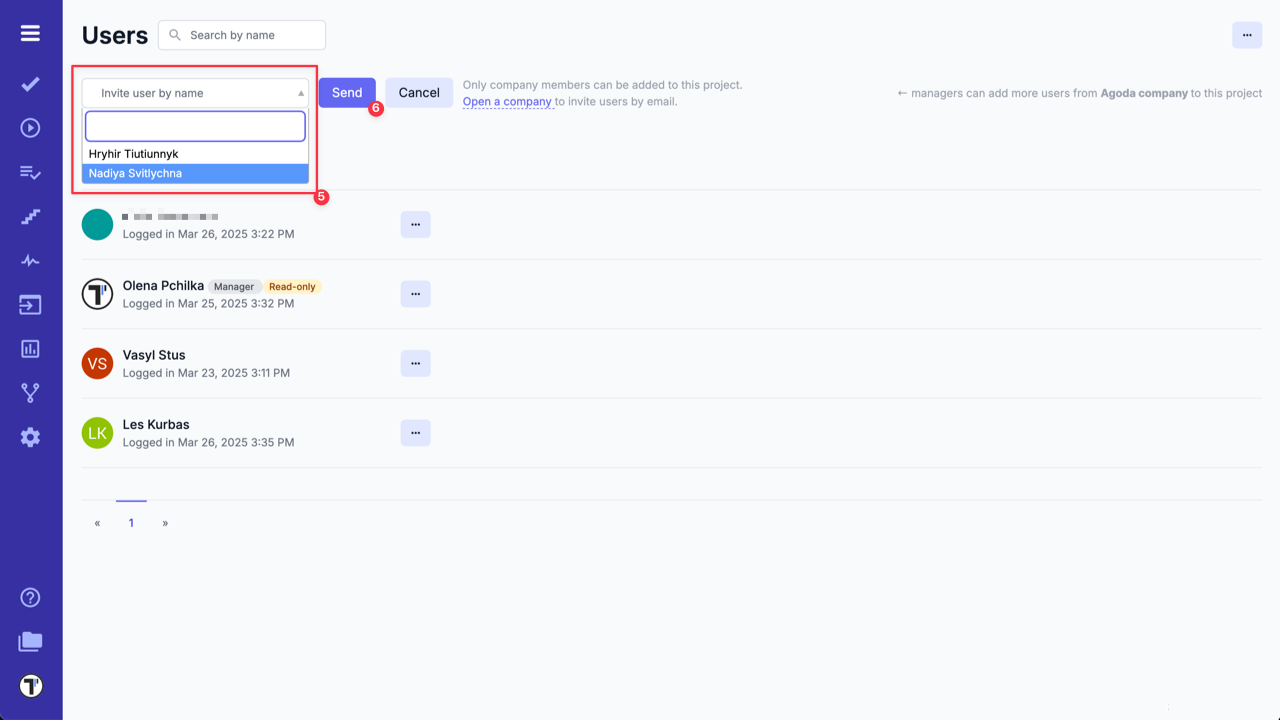
- Click ‘Invite’ button.
- Choose a User from the dropdown list.
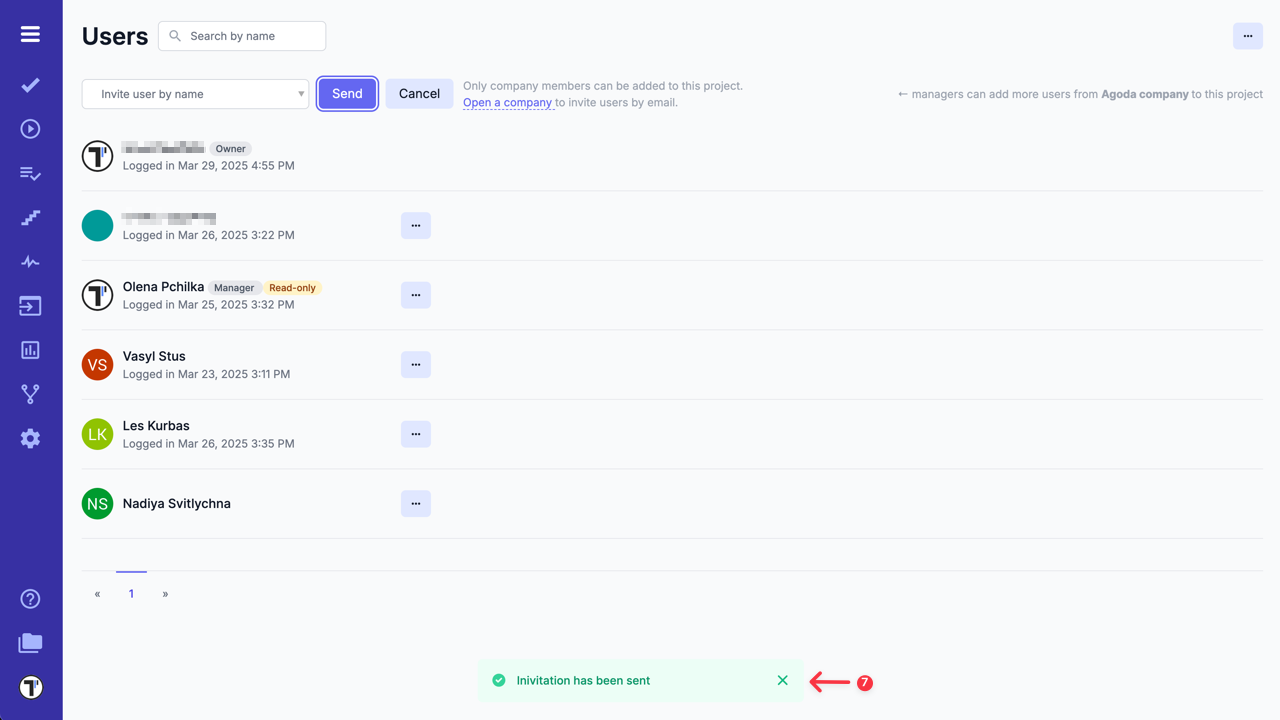
- Click ‘Send’ button.
- Invitation has been sent.
How to Manage Team Members on Company Level
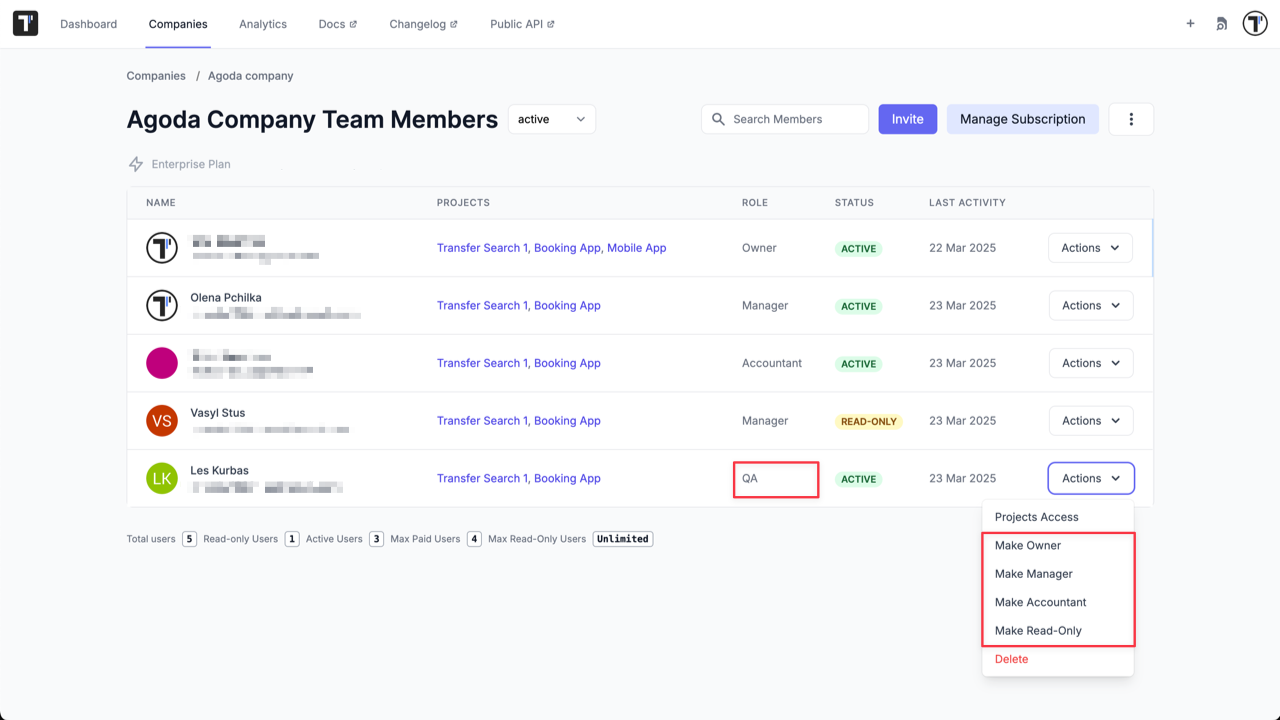
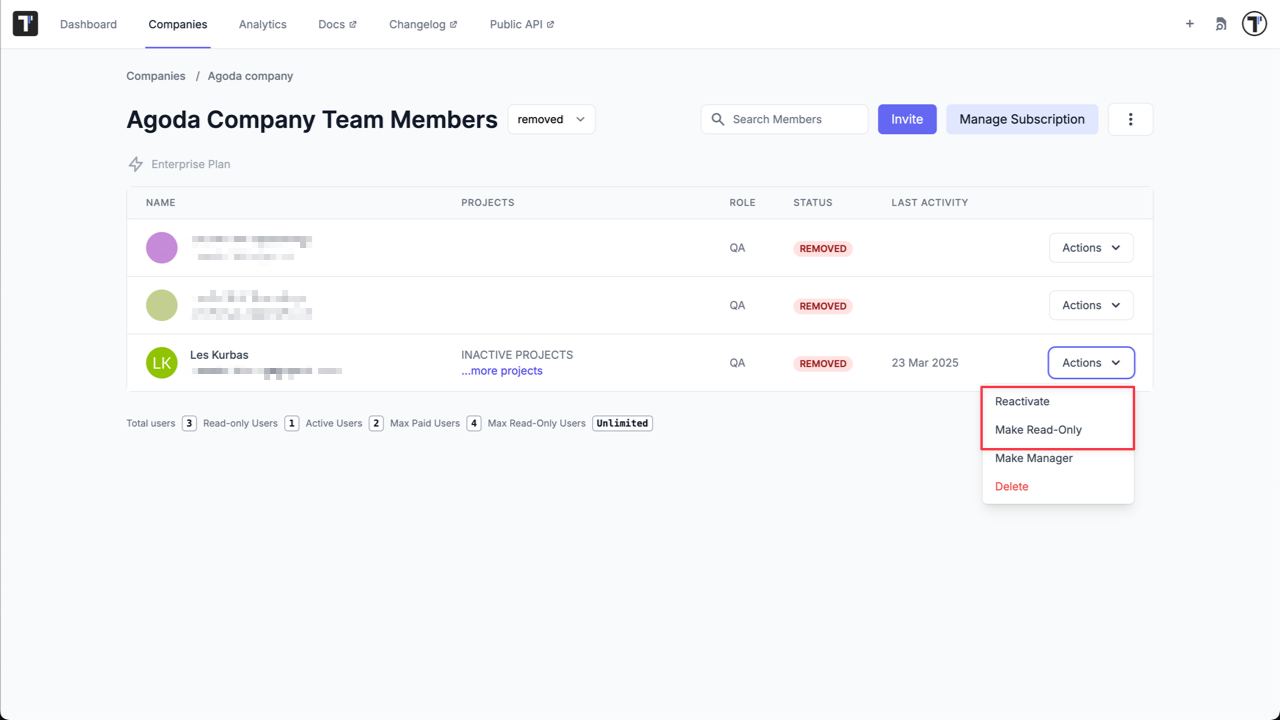
Section titled “How to Manage Team Members on Company Level”All invited members have a QA role by default. You can change the member’s role on the Company Team Members page (‘Companies’ page -> Select Company -> ‘Actions’ button).
You can delete a team member by clicking on the ‘Delete’ button.
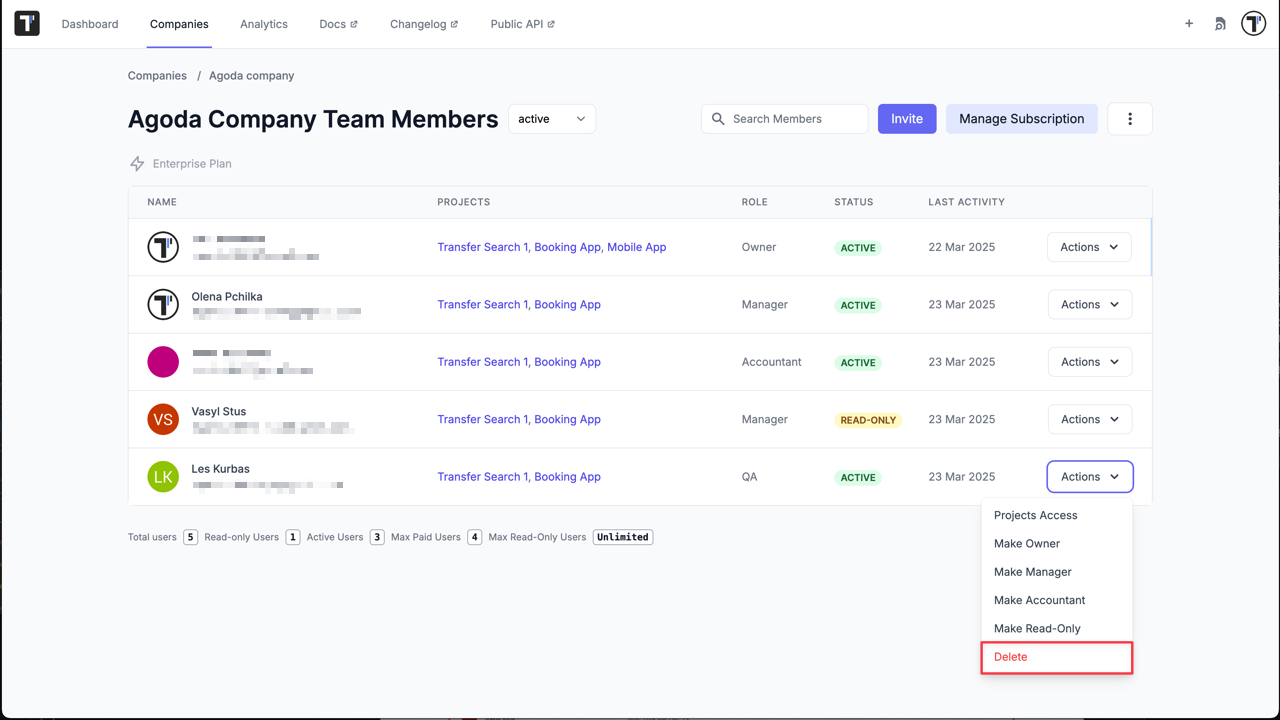
With this action deleted team members will be moved to the Removed section.
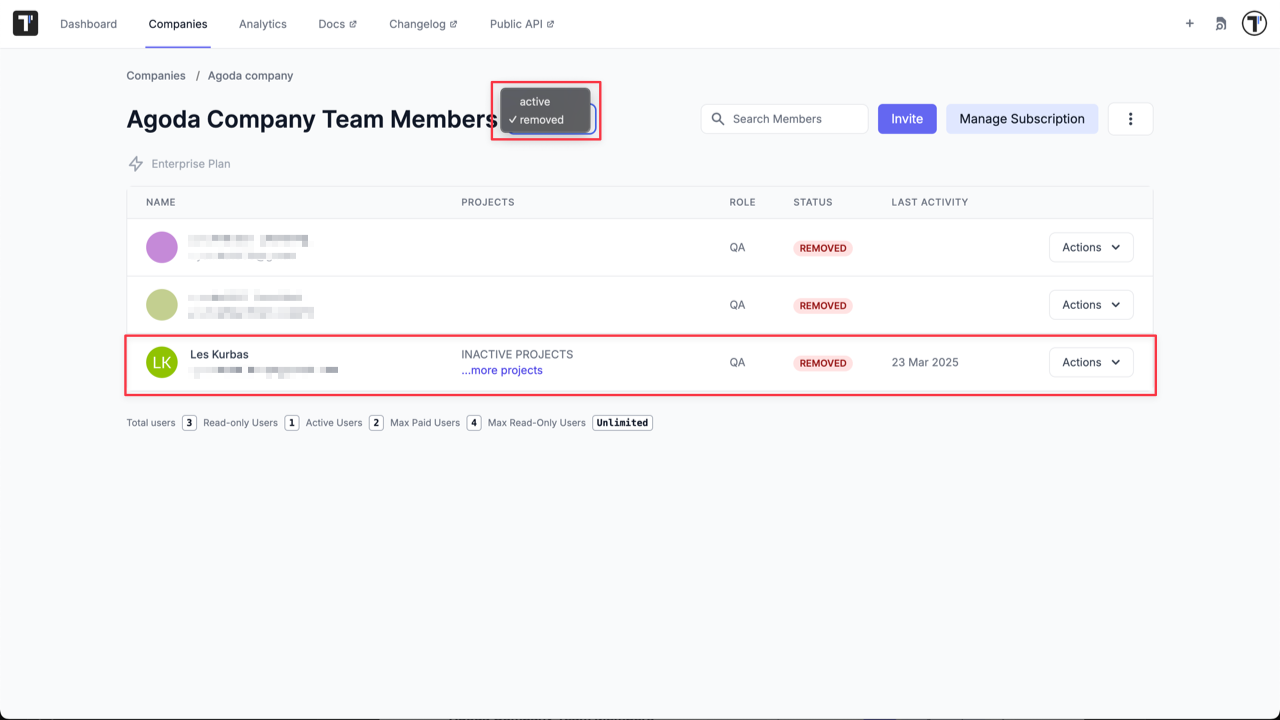
So you can reactivate them at any time with previous role by clicking on the ‘Reactivate’ button or with Read-Only permissions by clicking on the ‘Make Read-Only’ button
How to Change Company Owner
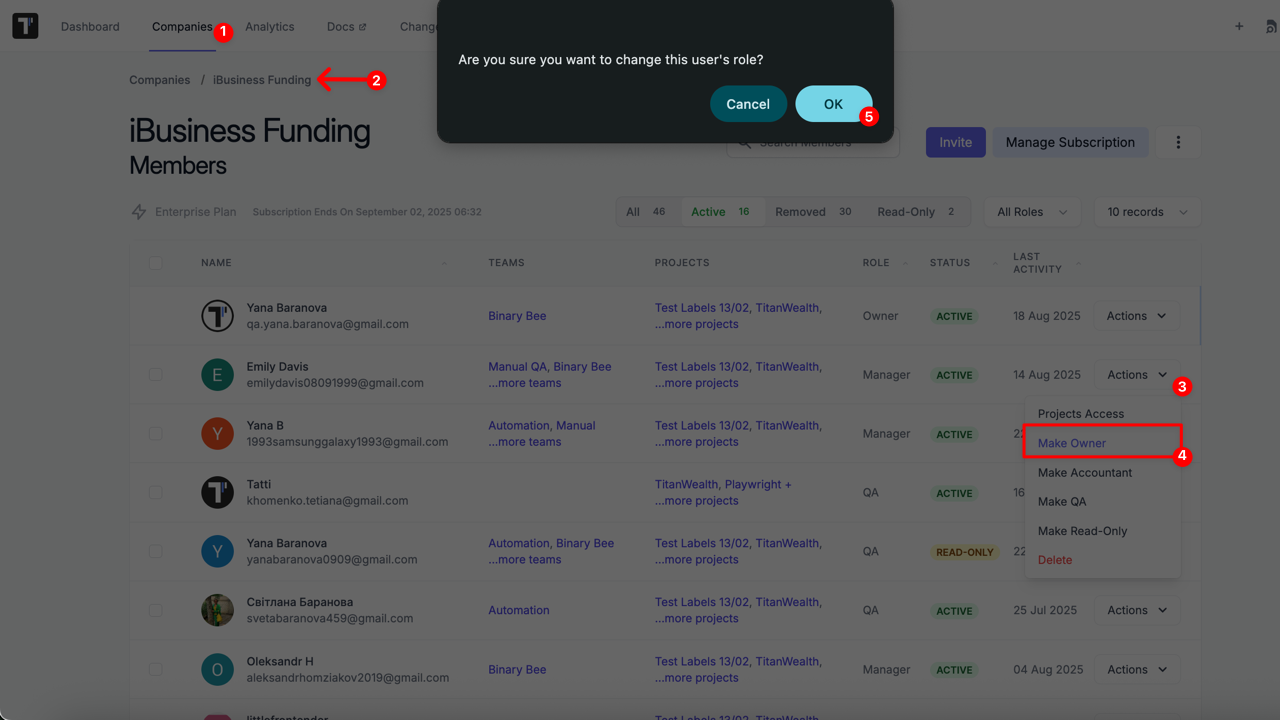
Section titled “How to Change Company Owner”In Testomat.io, a company can only have one Owner. There are two ways to transfer ownership:
- Transfer by the Current Owner (recommended)
Only the current Owner can assign ownership to another user:
- Go to Companies page
- Select the company
- Open the Actions dropdown
- Select Make Owner option
- Confirm the action
- Transfer via Support (if the Owner is unavailable)
If the current Owner cannot access the account (e.g. has left the company, email disabled, etc.):
- A user with the Manager role must send a request to support@testomat.io
- The request must be sent from the email address the Manager uses to log into Testomat
- The email should include:
- the current Owner’s email
- the new Owner’s email
How to Manage Team Members on Project Level
Section titled “How to Manage Team Members on Project Level”You can manage team members not only at Company Level but as well at Project Level.
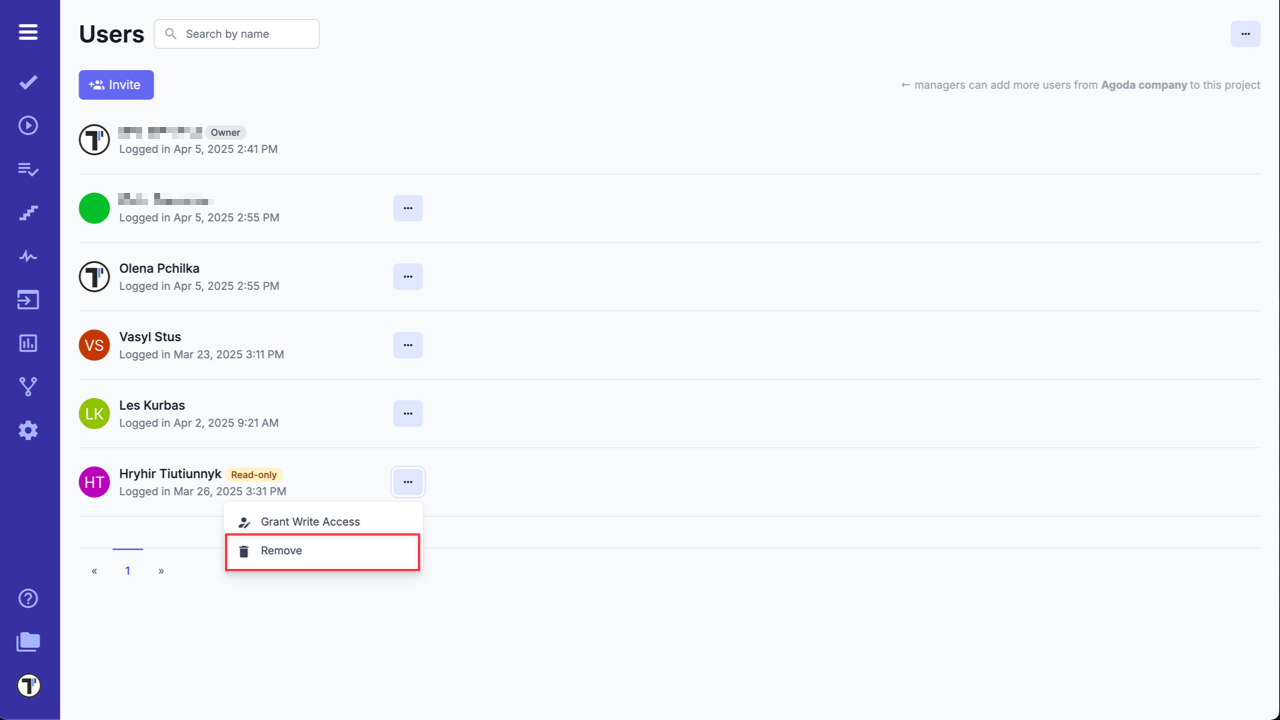
All members invited to the project have a Regular User role by default. You can change the member’s role within the project on the Users page (Select Project -> Settings -> Users -> click on ‘Extra menu’ button).
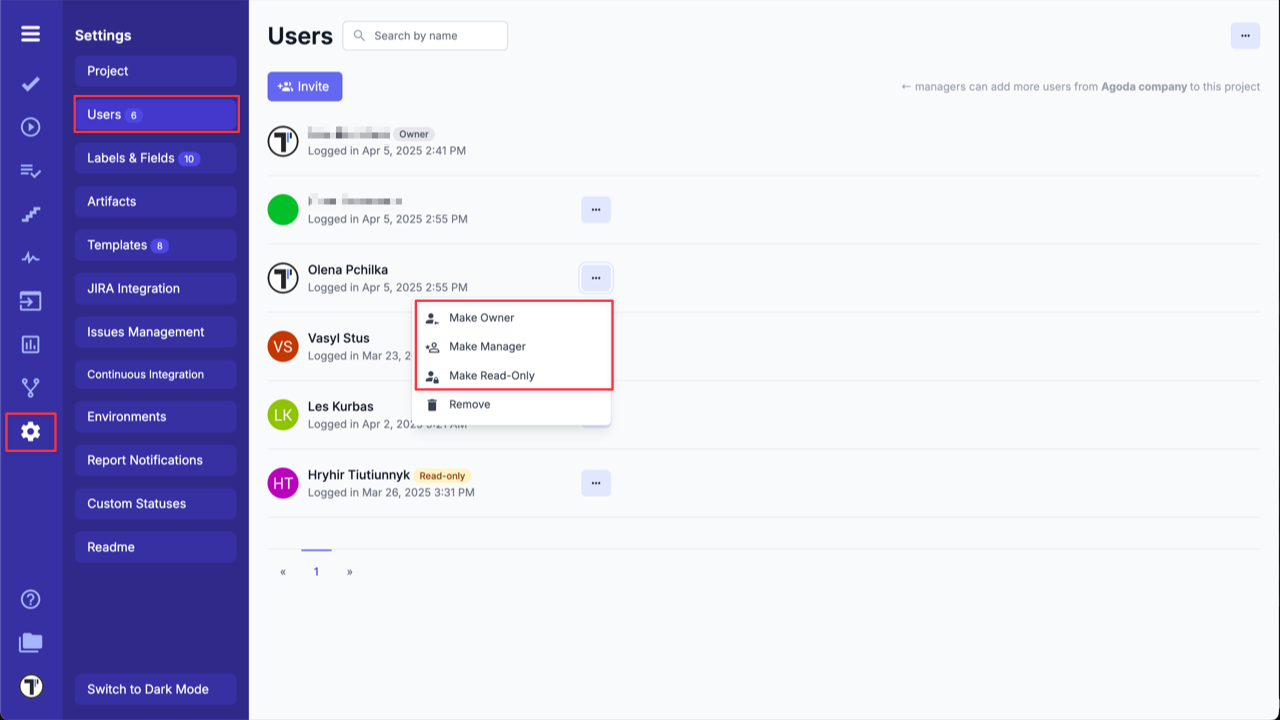
You can delete a team member from the project by clicking on the ‘Remove’ button.
Bulk User Management
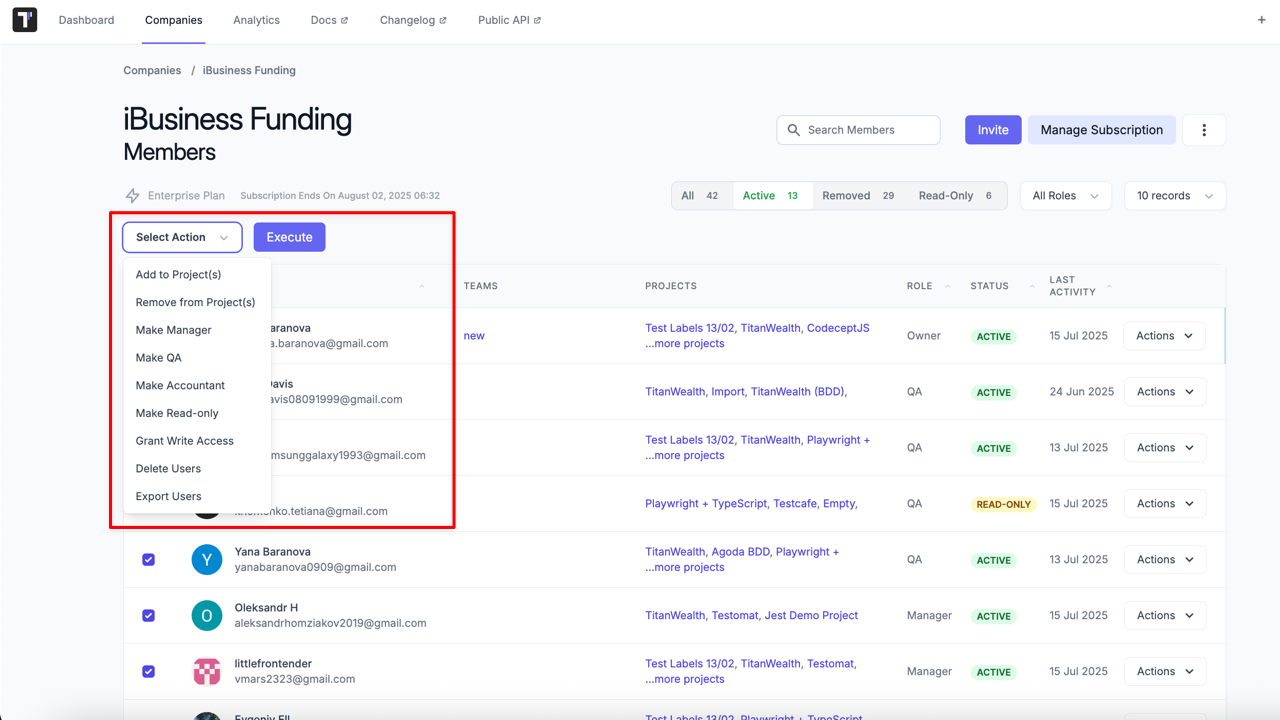
Section titled “Bulk User Management”For faster and more convenient user management, Testomat.io provides a Bulk Actions menu. This menu appears when you select one or more users via checkboxes:
- Selecting the checkbox in the header row selects all users on the page
- Selecting a checkbox next to a specific user selects only that user
Once selected, a dropdown menu and Execute button will appear, allowing you to apply actions to one or multiple users at once.
Available Bulk Actions
Section titled “Available Bulk Actions”Here’s what you can do from the bulk actions menu:
- Add to Project(s): Add selected users to one or more projects within the company
- Remove from Project(s): Remove selected users from one or more projects
- Make Manager: Assign the ‘Manager’ role to selected users at the company level
- Make QA: Assign the ‘QA’ role to selected users at the company level
- Make Accountant: Assign the ‘Accountant’ role at the company level
- Make Read-only: Change user access to read-only mode
- Grant Write Access: Upgrade from read-only to a regular role (QA or Manager depending on previous role)
- Delete Users: Remove selected users from the company (they will be moved to the Removed section)
- Export Users: Download selected users’ data into .csv and .xlsx files (includes Name, Email, Role, Status, etc.)
Using bulk actions is especially helpful for managing teams at scale — saving time and reducing manual effort when updating permissions or organizing access across multiple projects.
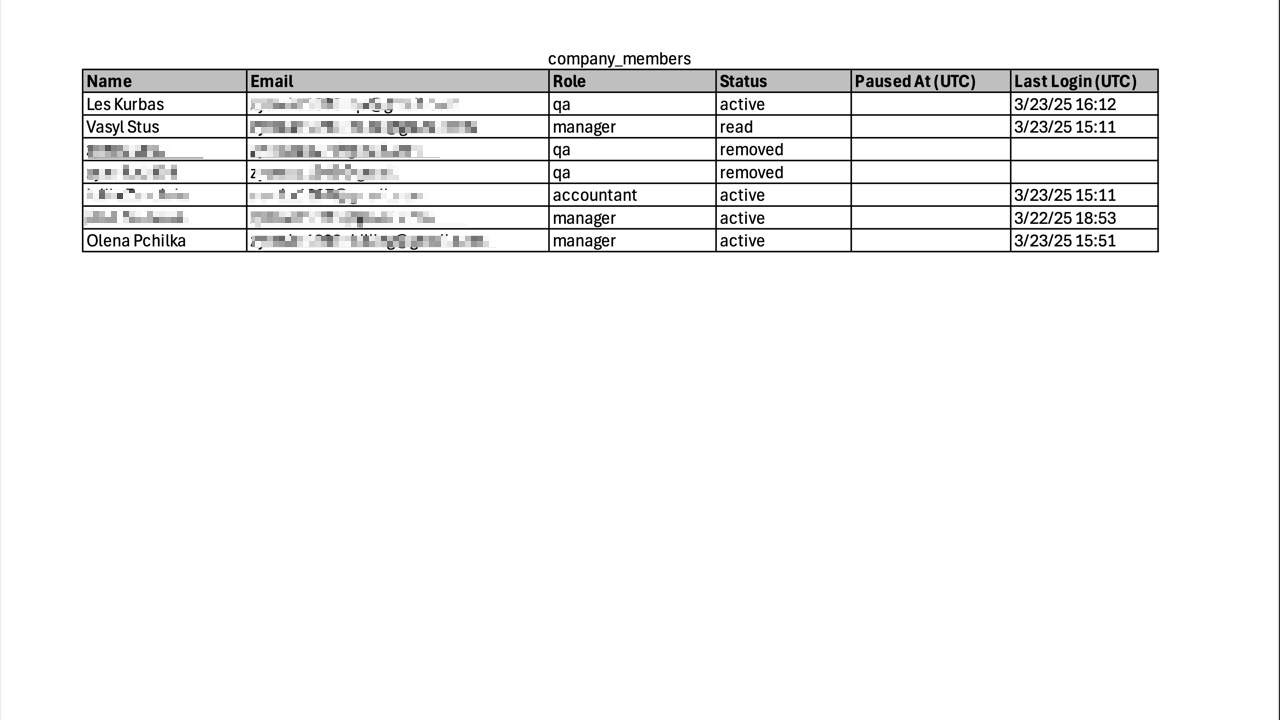
Export Users List
Section titled “Export Users List”You may need to get data about users who are members of your company. Fortunately, Testomat.io makes it easy and convenient:
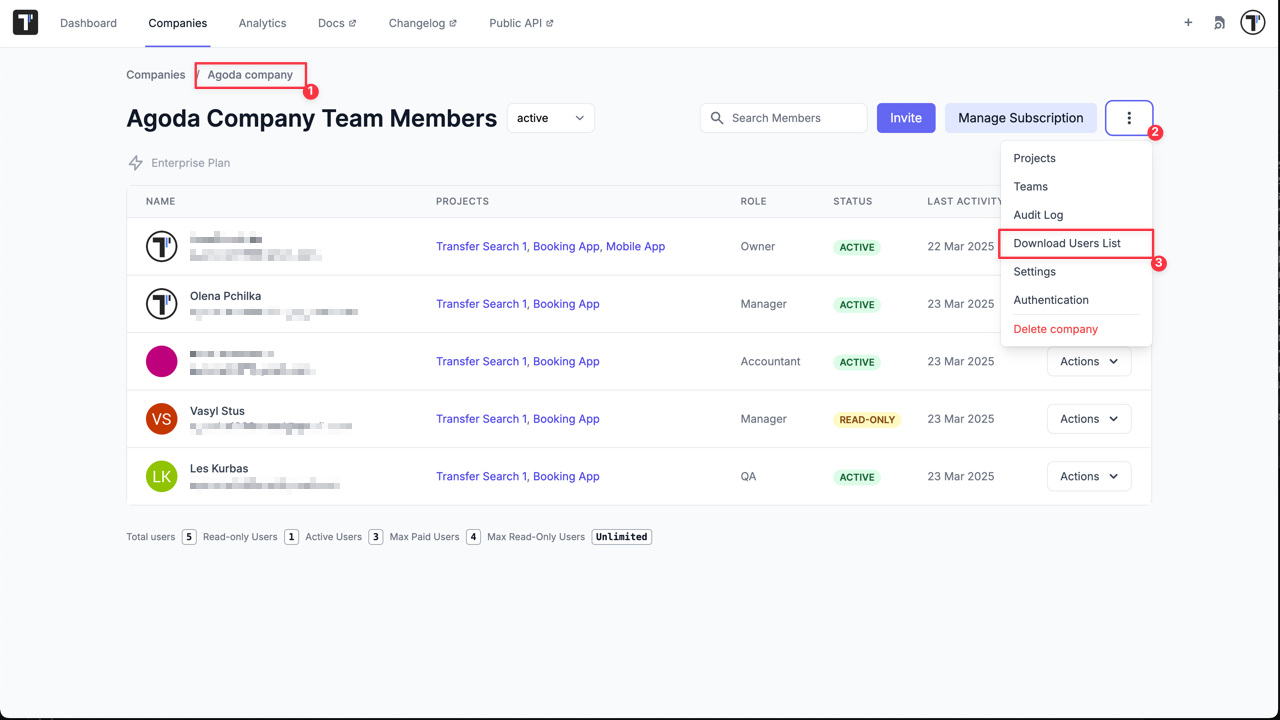
The exported .csv file contains the following information about the company’s users:
- Name.
- Email.
- Role.
- Status.
- Paused At (UTC).
- Last Login (UTC).