BitBucket Pipelines
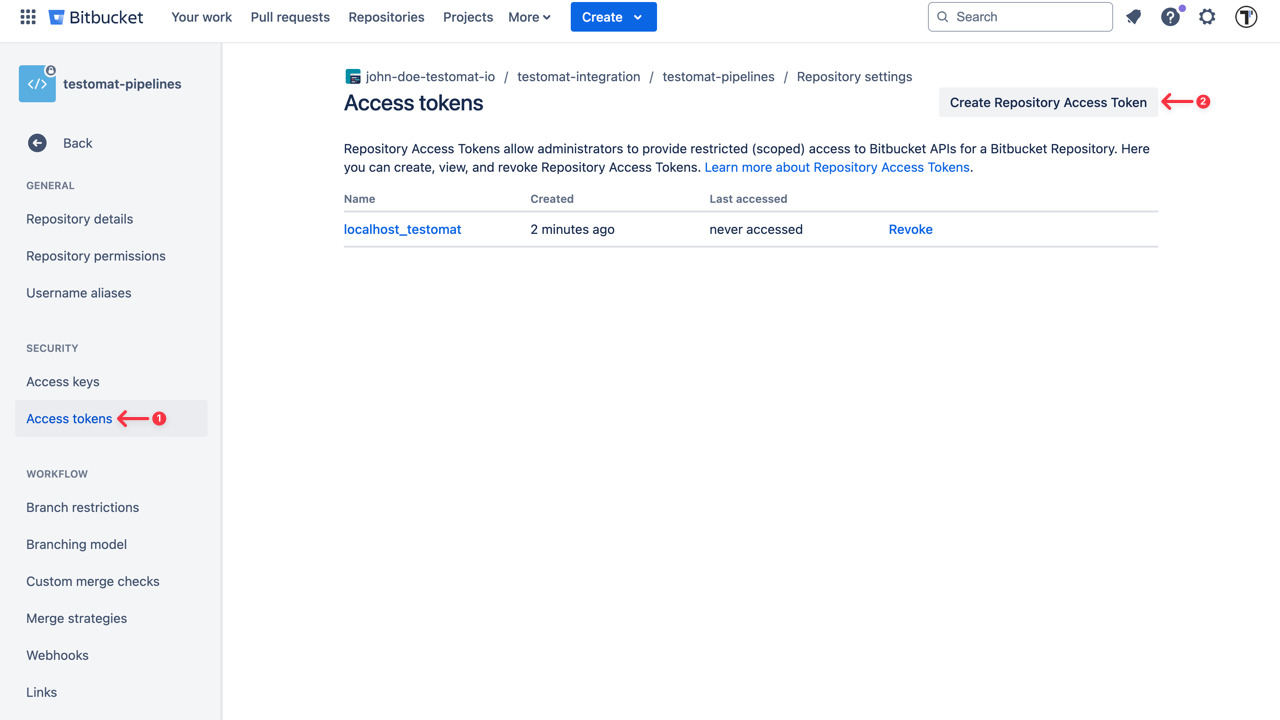
To connect BitBucket to Testomat.io you will need a API Token created in your BitBucket account. API token can be added on ‘Repository settings’ page of the current user - create an access token for repository.
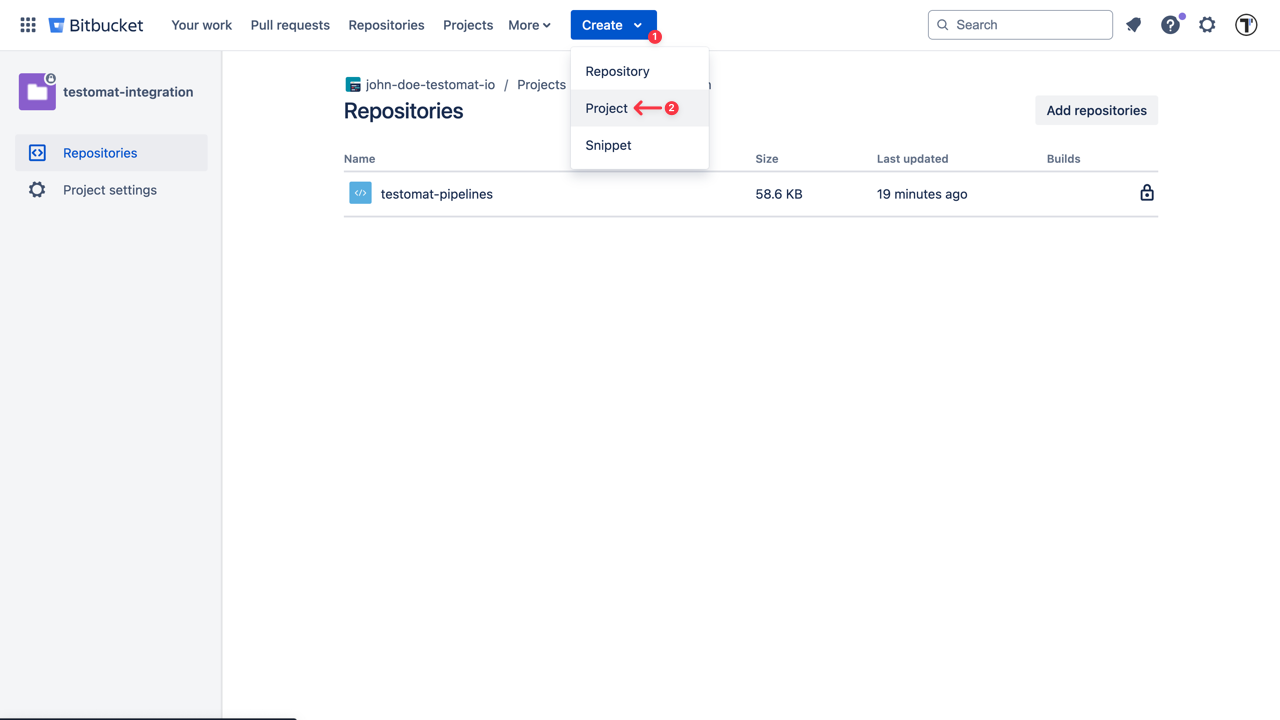
Then create a new BitBucket project. Click on ‘Create’ button at the header menu and select ‘Project’ option from the displayed dropdown list.
Make this build parametrized. Go to ‘Settings’ -> ‘Workspace settings’ -> ‘Workspace variables’
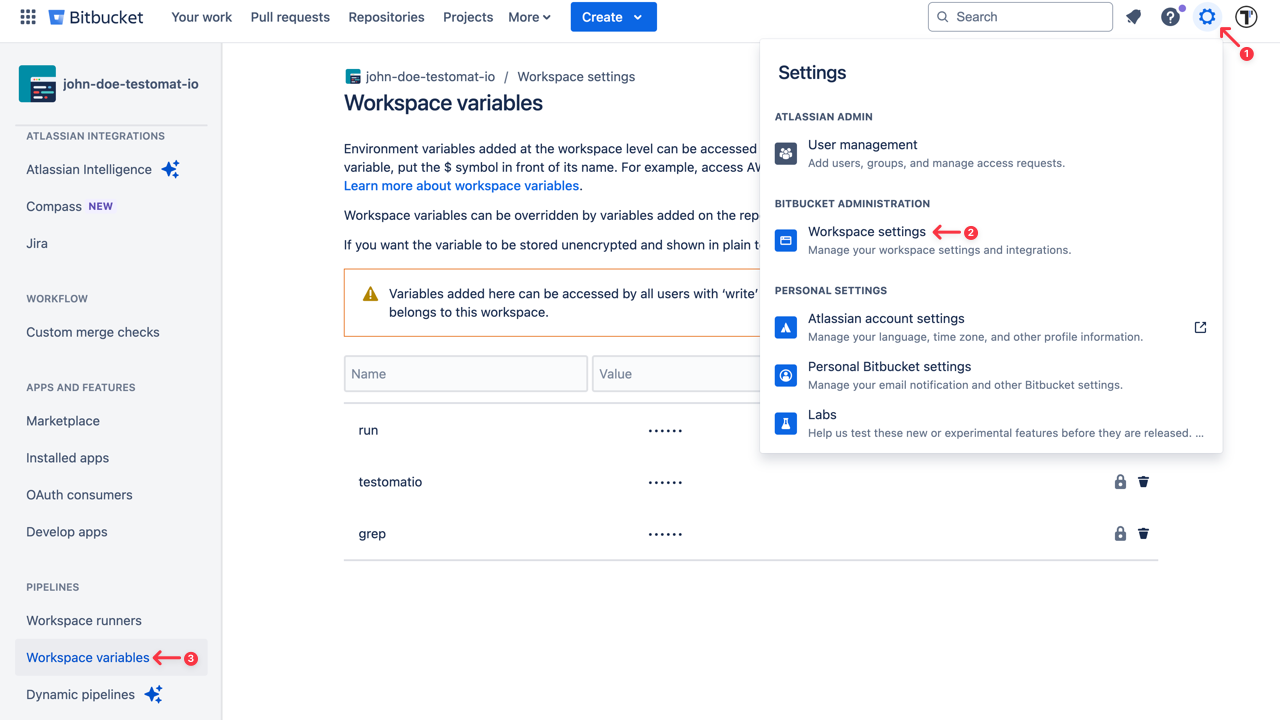
Add the following parameters as a string with empty default values:
runtestomatiogrep
The Job should include a step where the test runner is executed with —grep option and TESTOMATIO environment variables passed in.
For instance: - npx codeceptjs run-workers 2 --grep "${grep}"

Save the build and switch to Testomat.io. To integrate BitBucket with your Testomat.io project follow the steps described below:
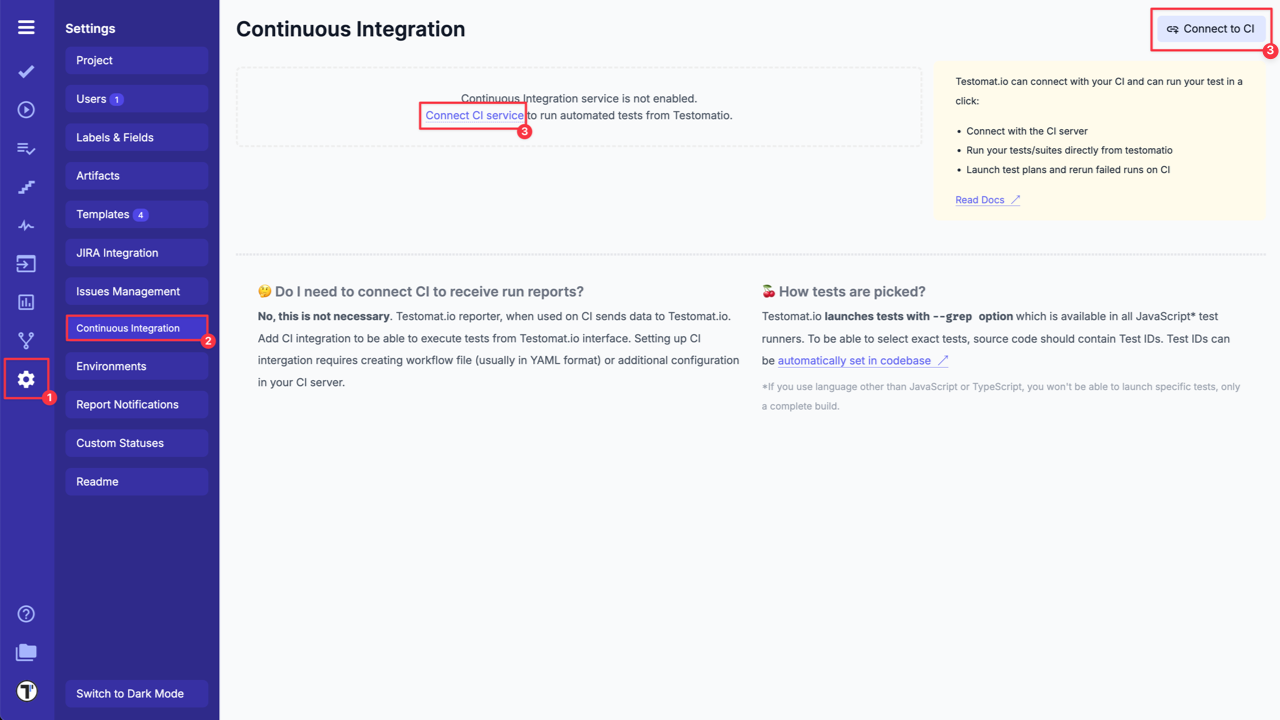
- Go to ‘Settings’.
- Select ‘Continuous Integration’.
- Click ‘Connect to CI’.
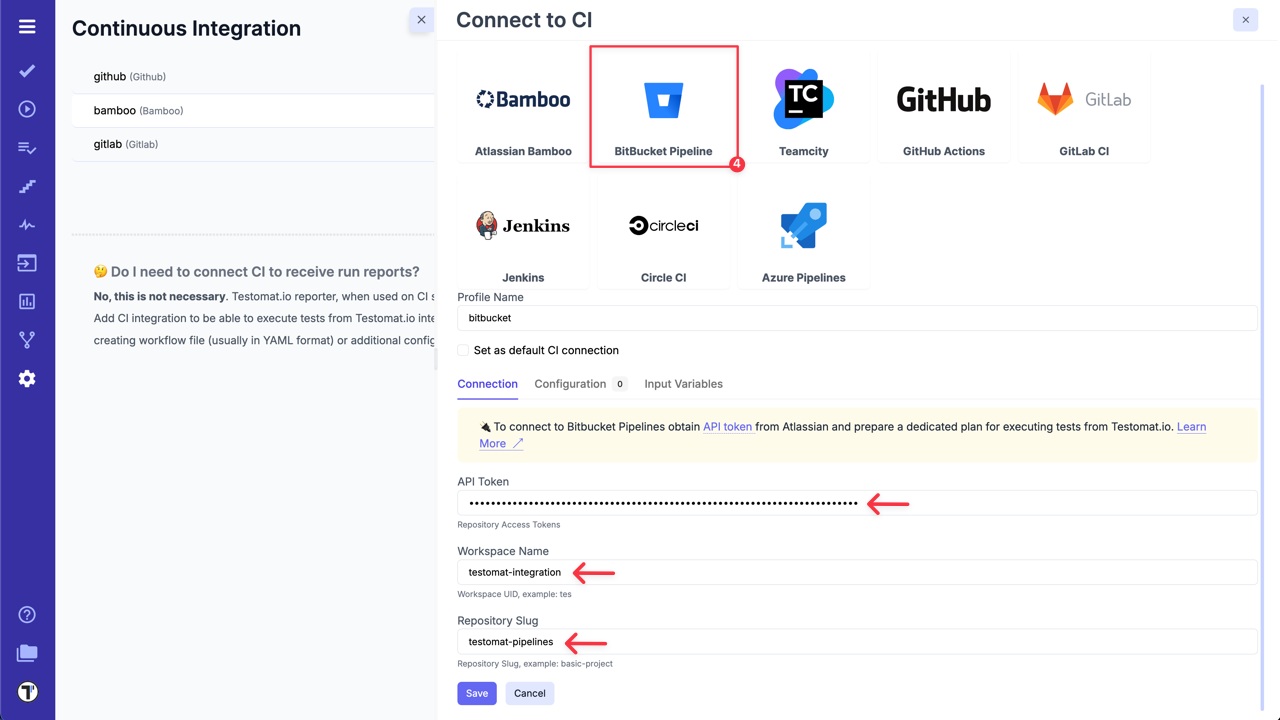
- Select ‘BitBucket Pipeline’ and enter following details on the ‘Connection’ tab:
API token- access token, created in BitBucket during Step 1.Workspace Name- Workspace UID.Repository Slug- a URL-friendly version of a repository name, automatically generated by BitBucket for use in the URL.
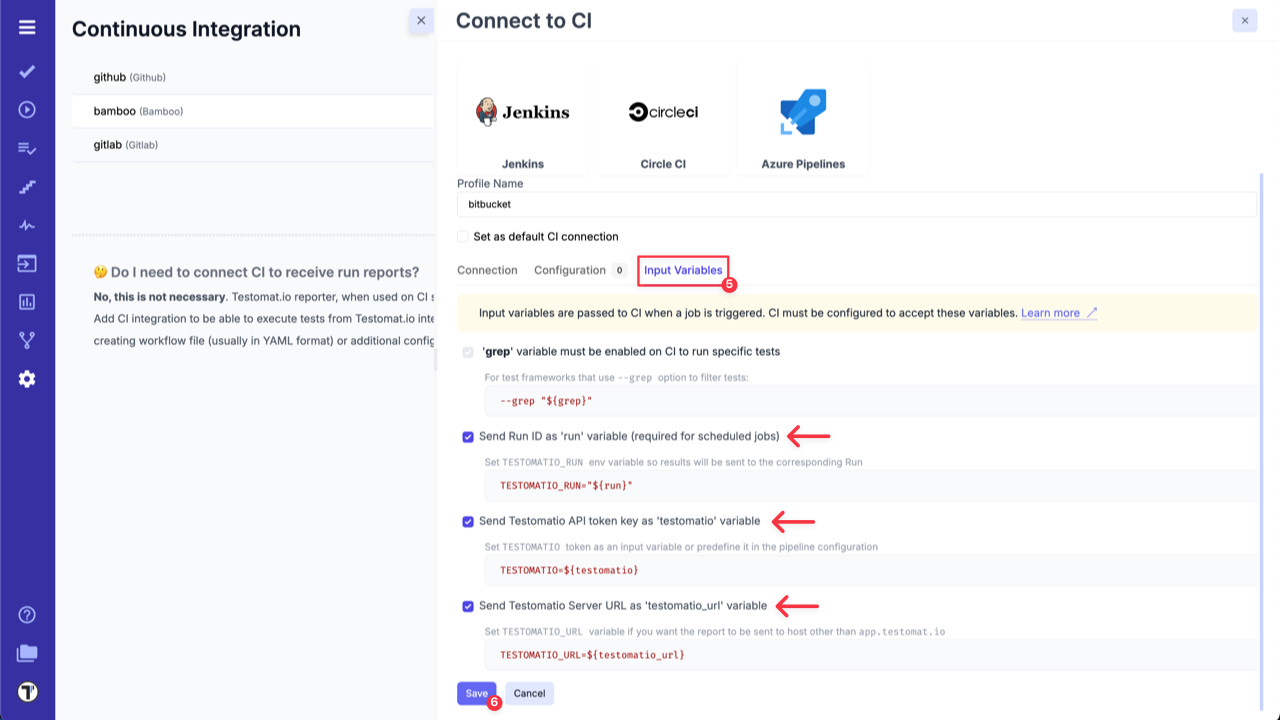
- Switch to ‘Input Variables’ tab and select checkboxes:
- Send Run ID as
runinput (required for scheduled jobs). - Send Testomat.io API key as
testomatioinput. - Send Testomat.io Server URL as
testomatio_urlinput (if you use on-premise setup).
- Click on ‘Save’ button to save the connection.
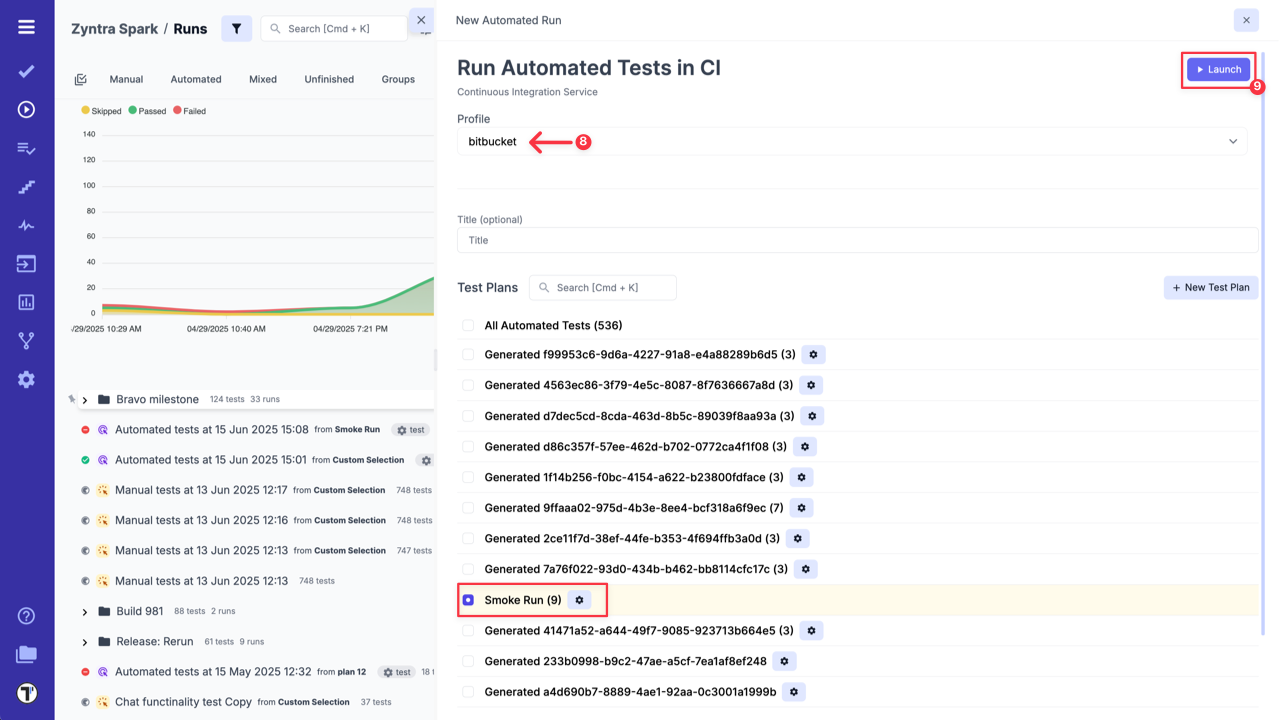
7a. When the connection is saved, open ‘Runs’ page and select Run Automated Tests in CI option in extra menu.
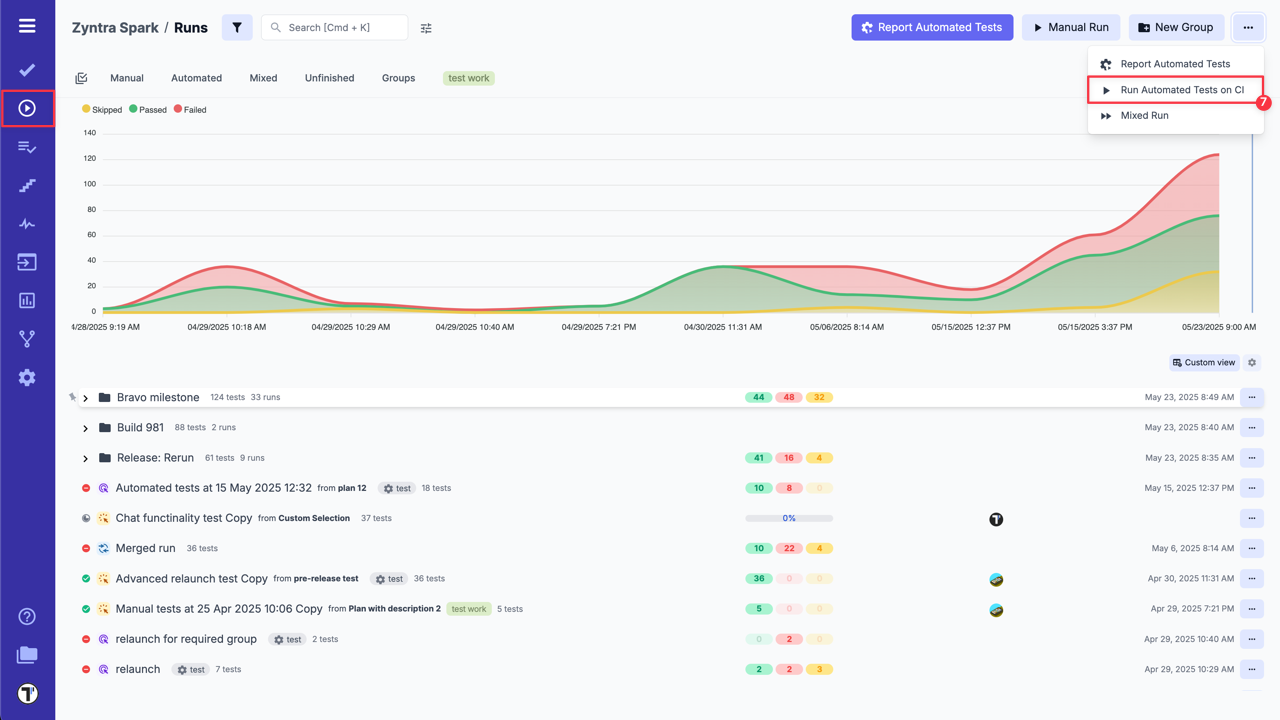
8a. Select ‘BitBucket’ profile in a list, select a target ref or any other variables, if any were configured. Optionally, select a Test Plan or create a new one.
9a. Click on ‘Launch’ button and wait for the results.
OR
7b. On ‘Tests’ page select any automated suite or test case -> click ‘Extra menu’ button -> select ‘Run Tests’ option -> open ‘Run in CI’ tab.
8b. Select ‘BitBucket’ profile in a list, as well, select a target ref or any other variables, if any were configured.
9b. Click on ‘Launch’ button and wait for the results.
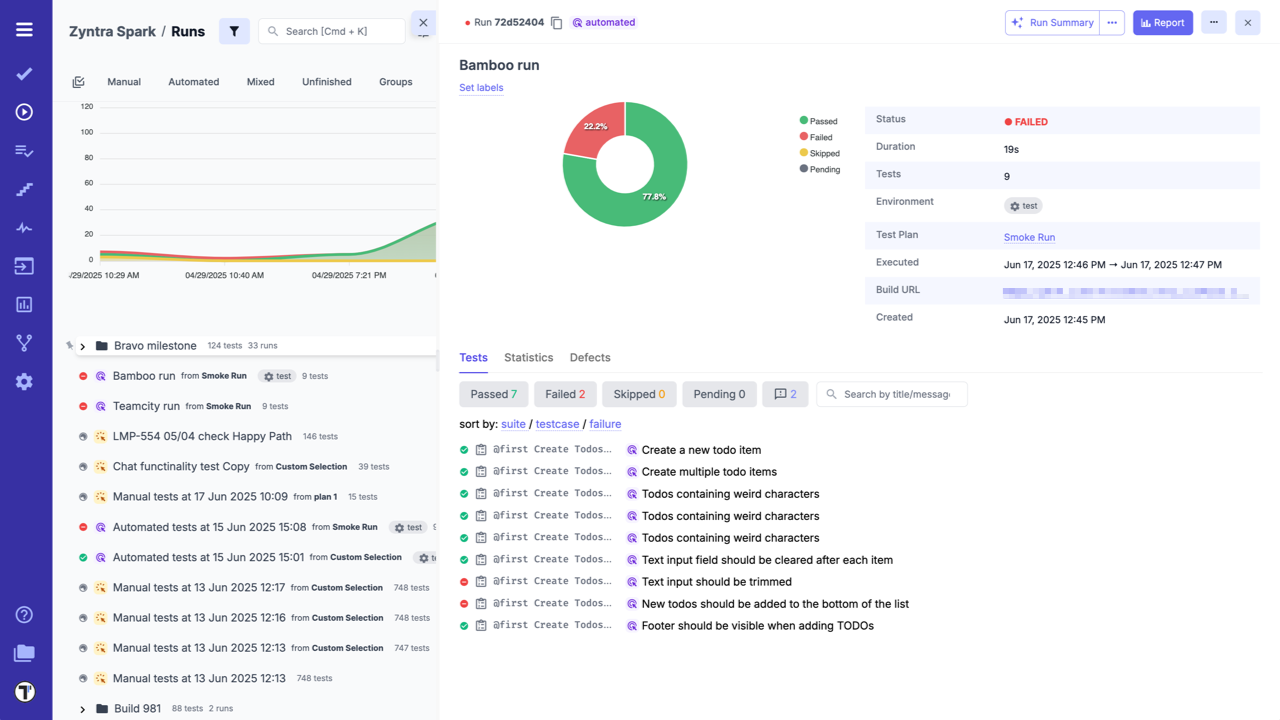
This will start a new job in BitBucket, please check that the job was successfully triggered and completed. After the job has finished, a run report will be available on Runs page of Testomat.io.