Administration
How to Create a Company
Section titled “How to Create a Company”In Testomat.io, a Company is required to manage projects and enable subscriptions.
To create a Company in Testomat.io, follow these steps:
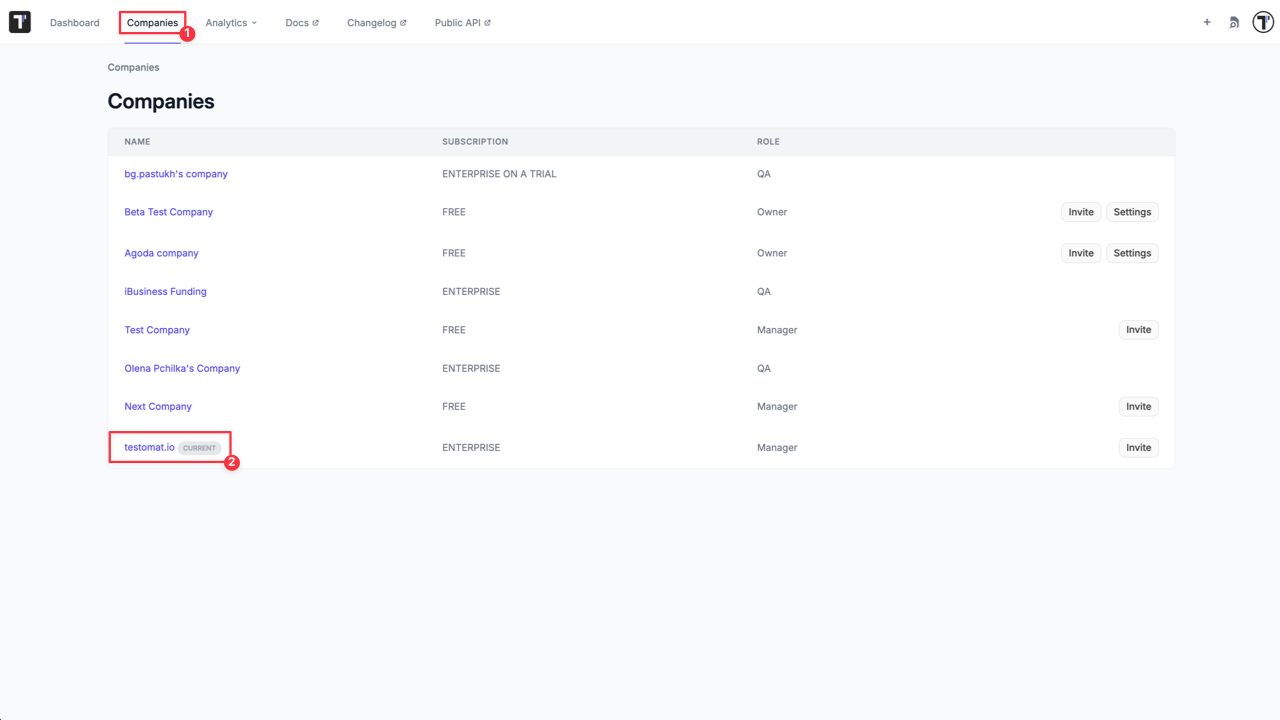
- Open the ’Companies’ tab
- Click the ’Create’ button
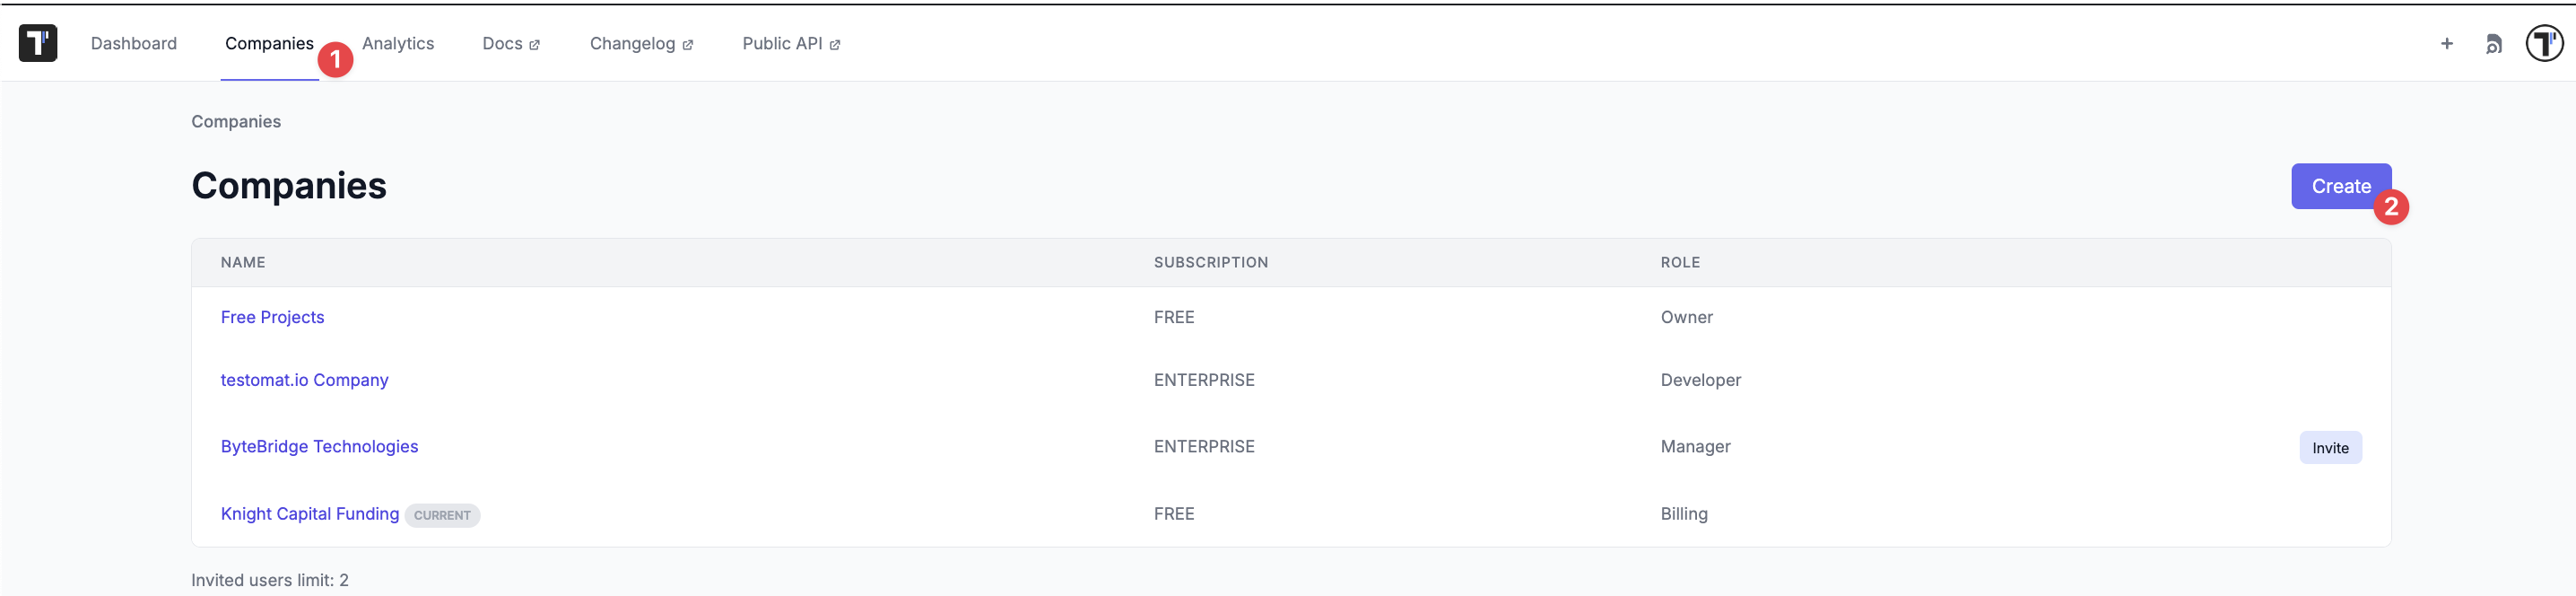
- Enter the Company Name in the ’Title’ field
- Click the ’Create’ button to finalize the process

Once your Company is created, you can proceed with Enabling a Subscription.
Company Settings
Section titled “Company Settings”The ‘Company Settings’ section allows owners to manage company-specific configurations, including updating the company name, adjusting sharing options, and utilize AI features. These settings ensure the proper access control and facilitate the sharing of specific data within the company. Below is an overview of the main functionalities:
Update Company Name
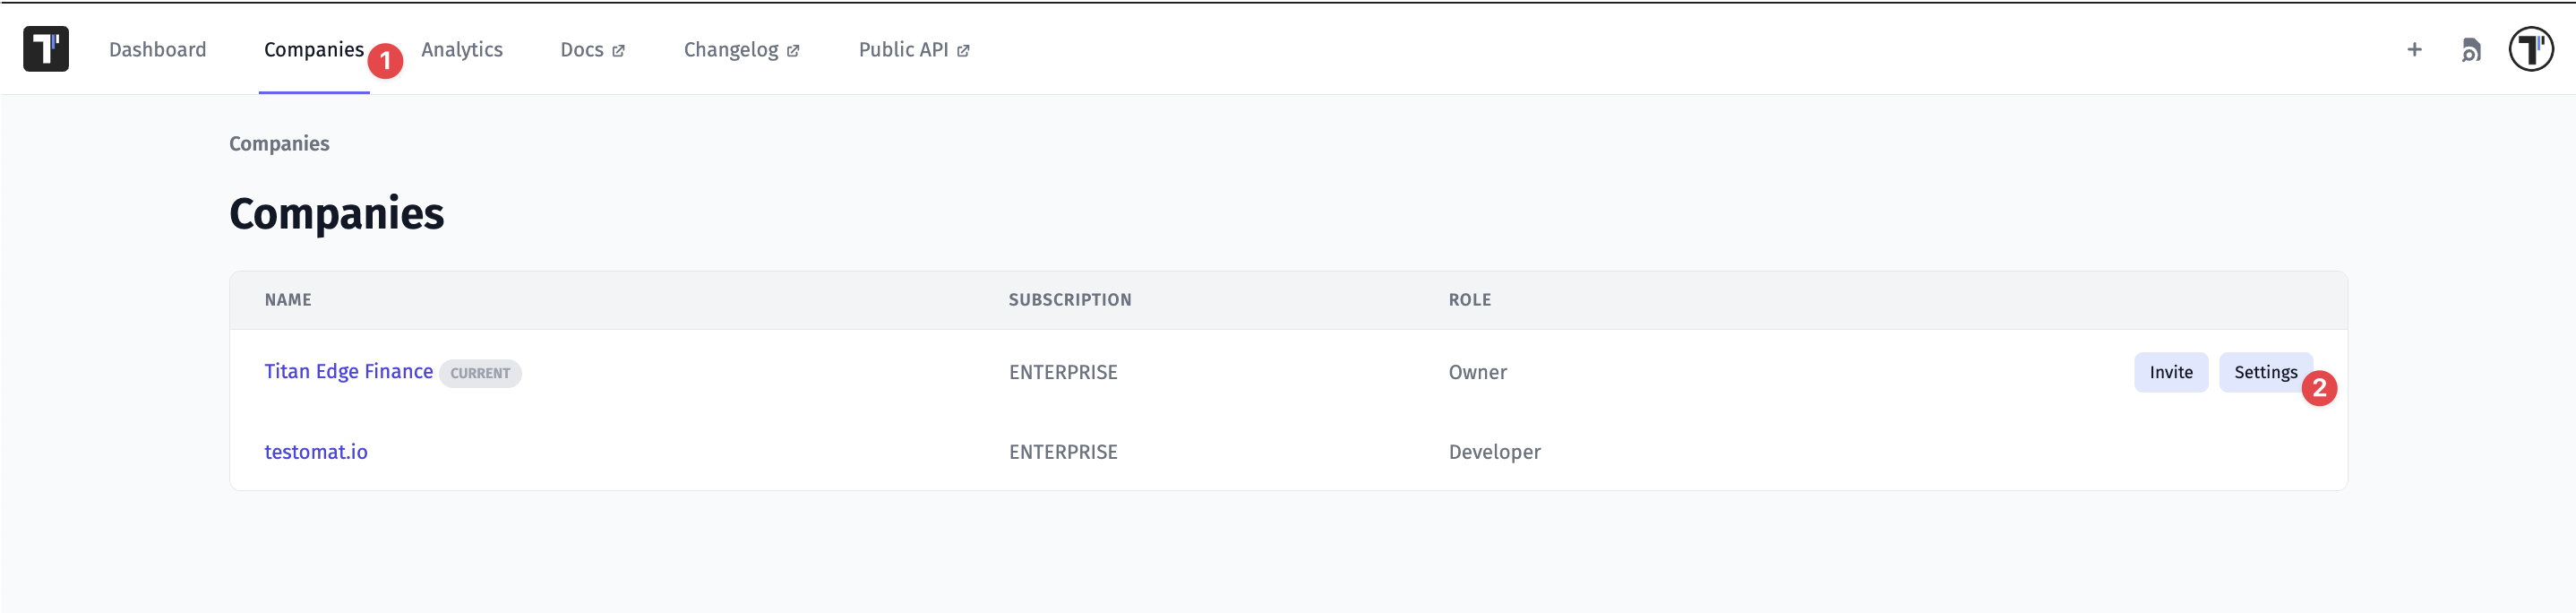
Section titled “Update Company Name”- Click ‘Companies’ in the header
- Click the ‘Settings’ button
- Update a company name in the ‘Company Name’ text field
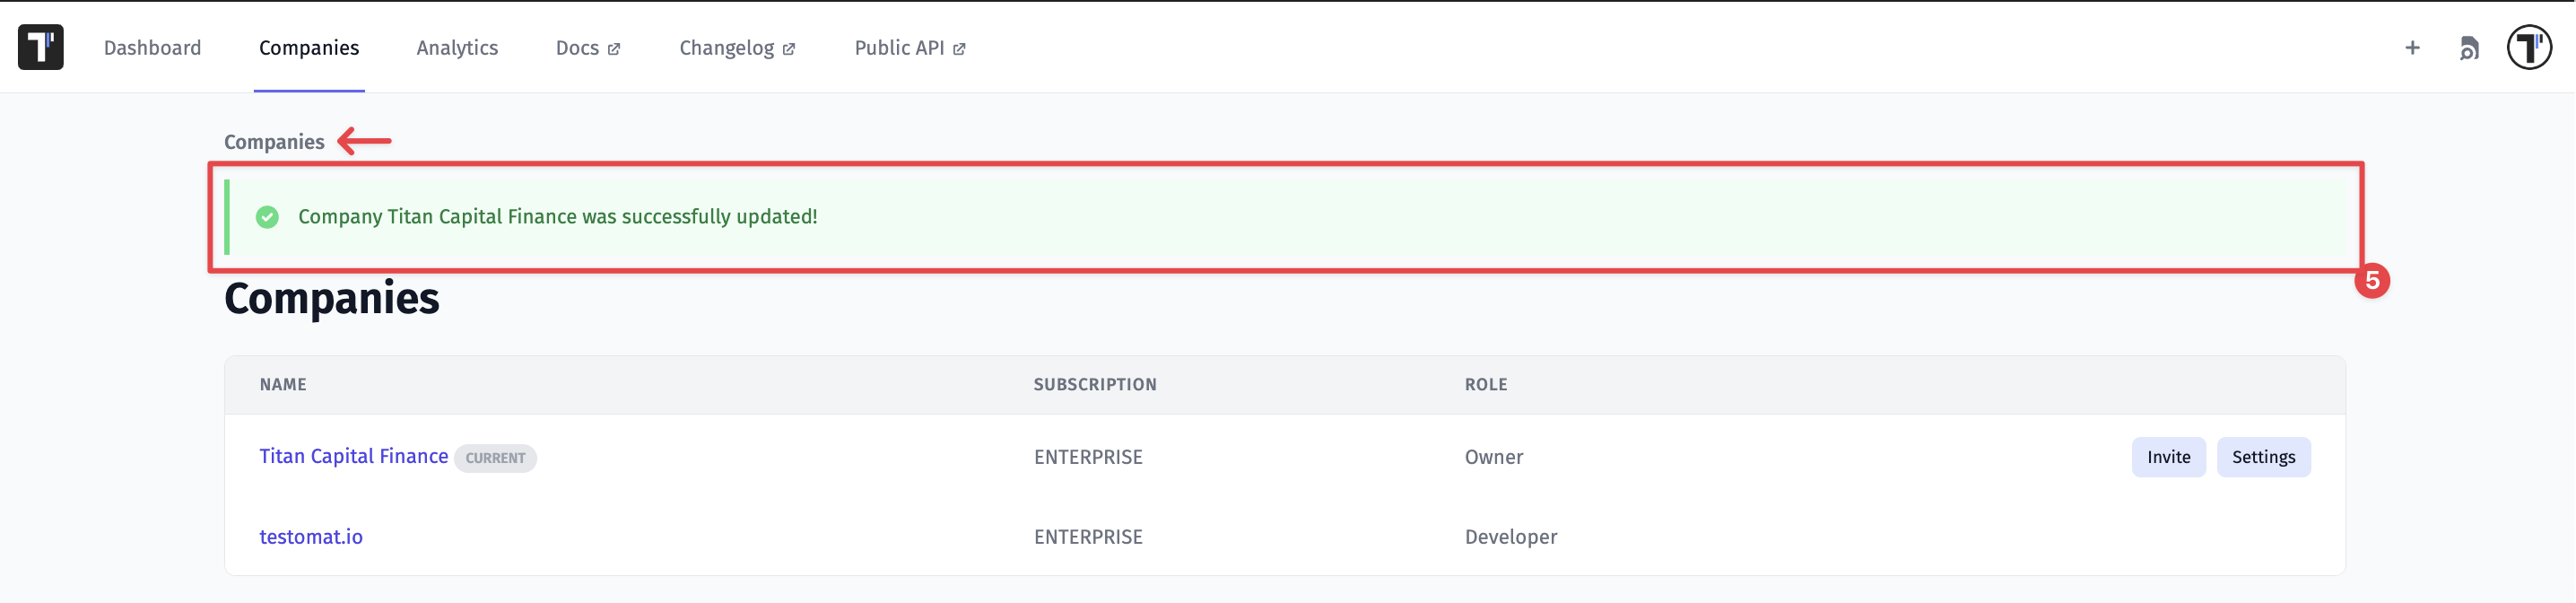
- Click the ‘Save’ button to apply updates
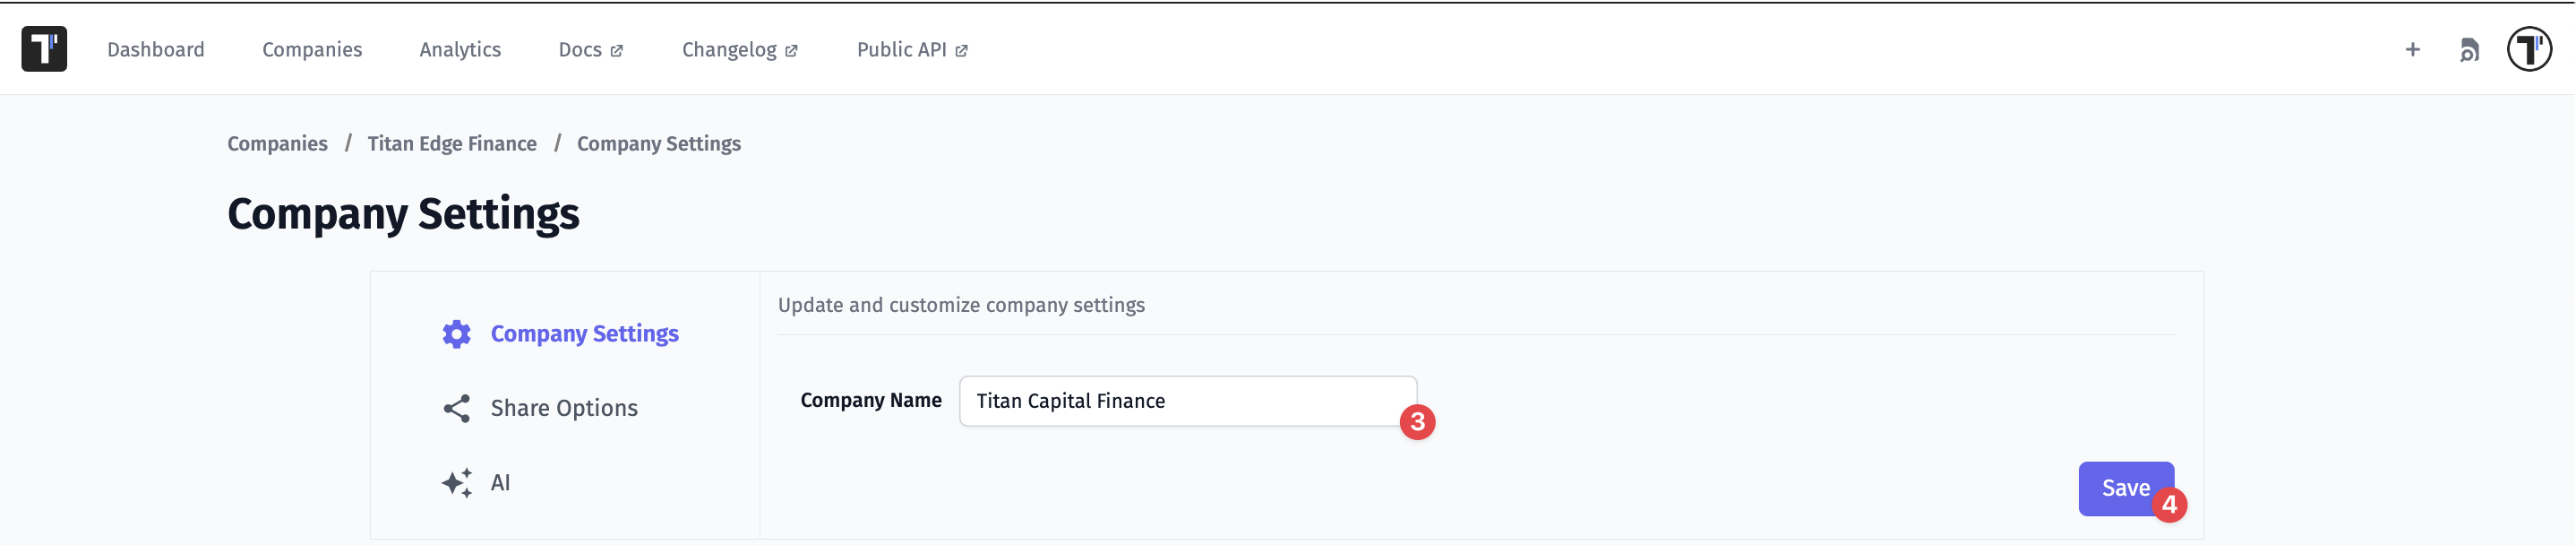
- A confirmation message ‘Company [Company Name] was successfully updated!’ is shown. The user is redirected back to the ‘Companies’ page
Share Options
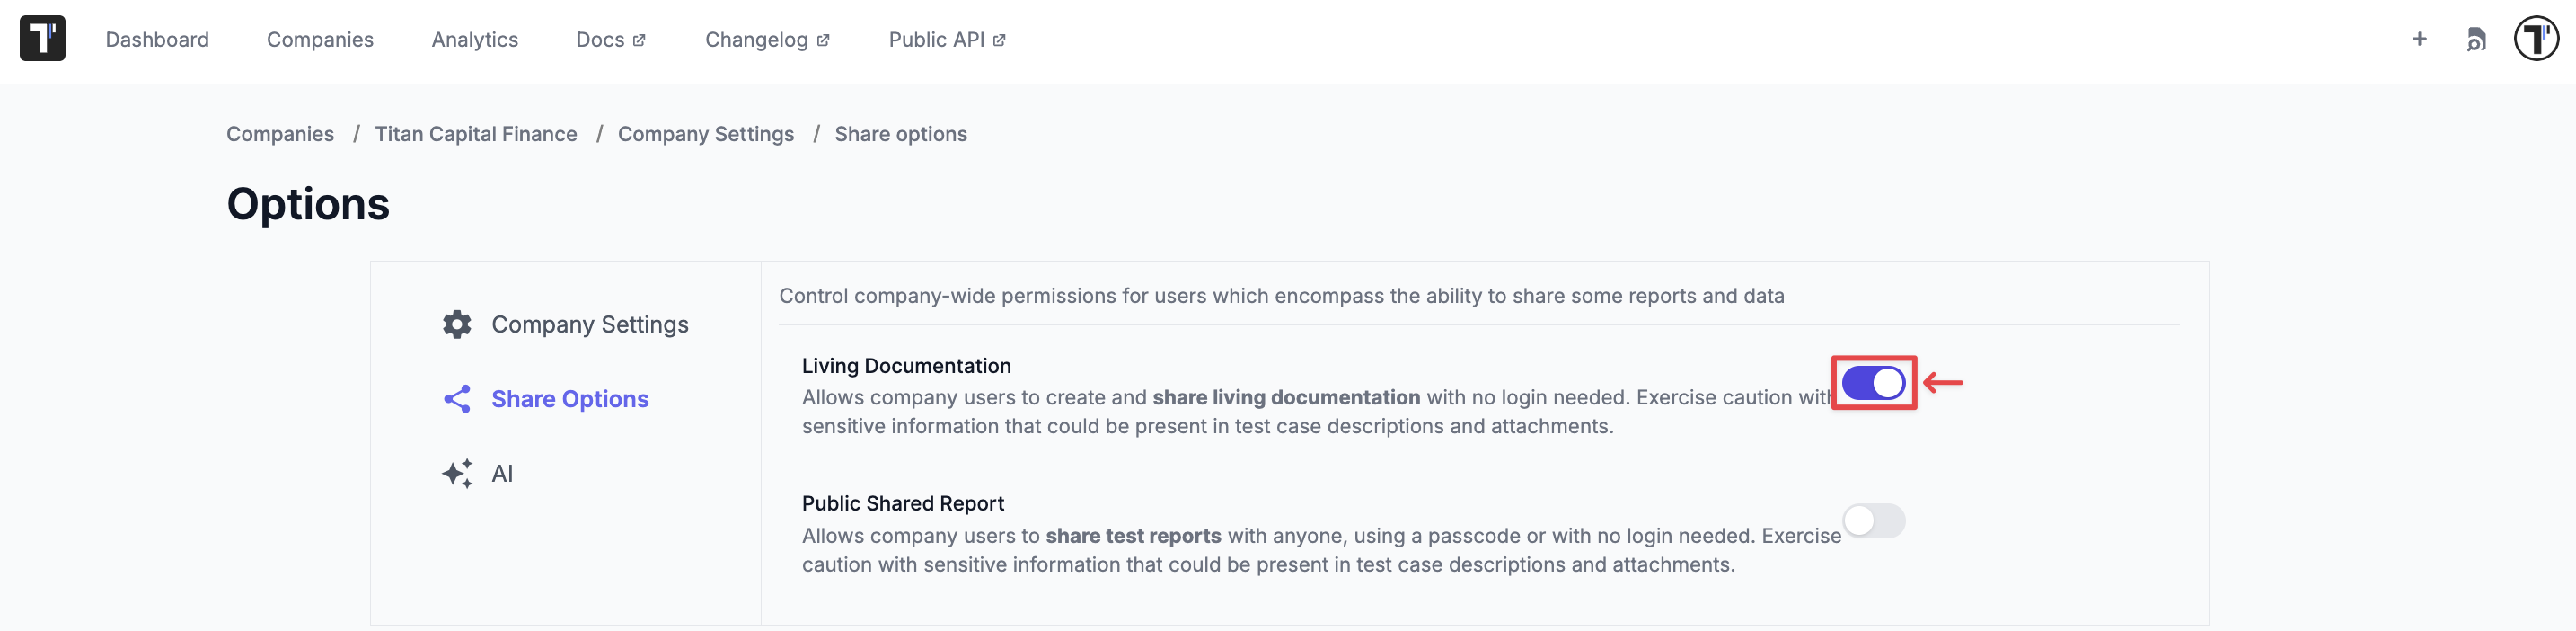
Section titled “Share Options”Allows control over company-wide permissions, enabling users to share specific reports and data.
- Living Documentation
Enables company users to create and share living documentation without requiring a login.
- Enable this feature at the company level
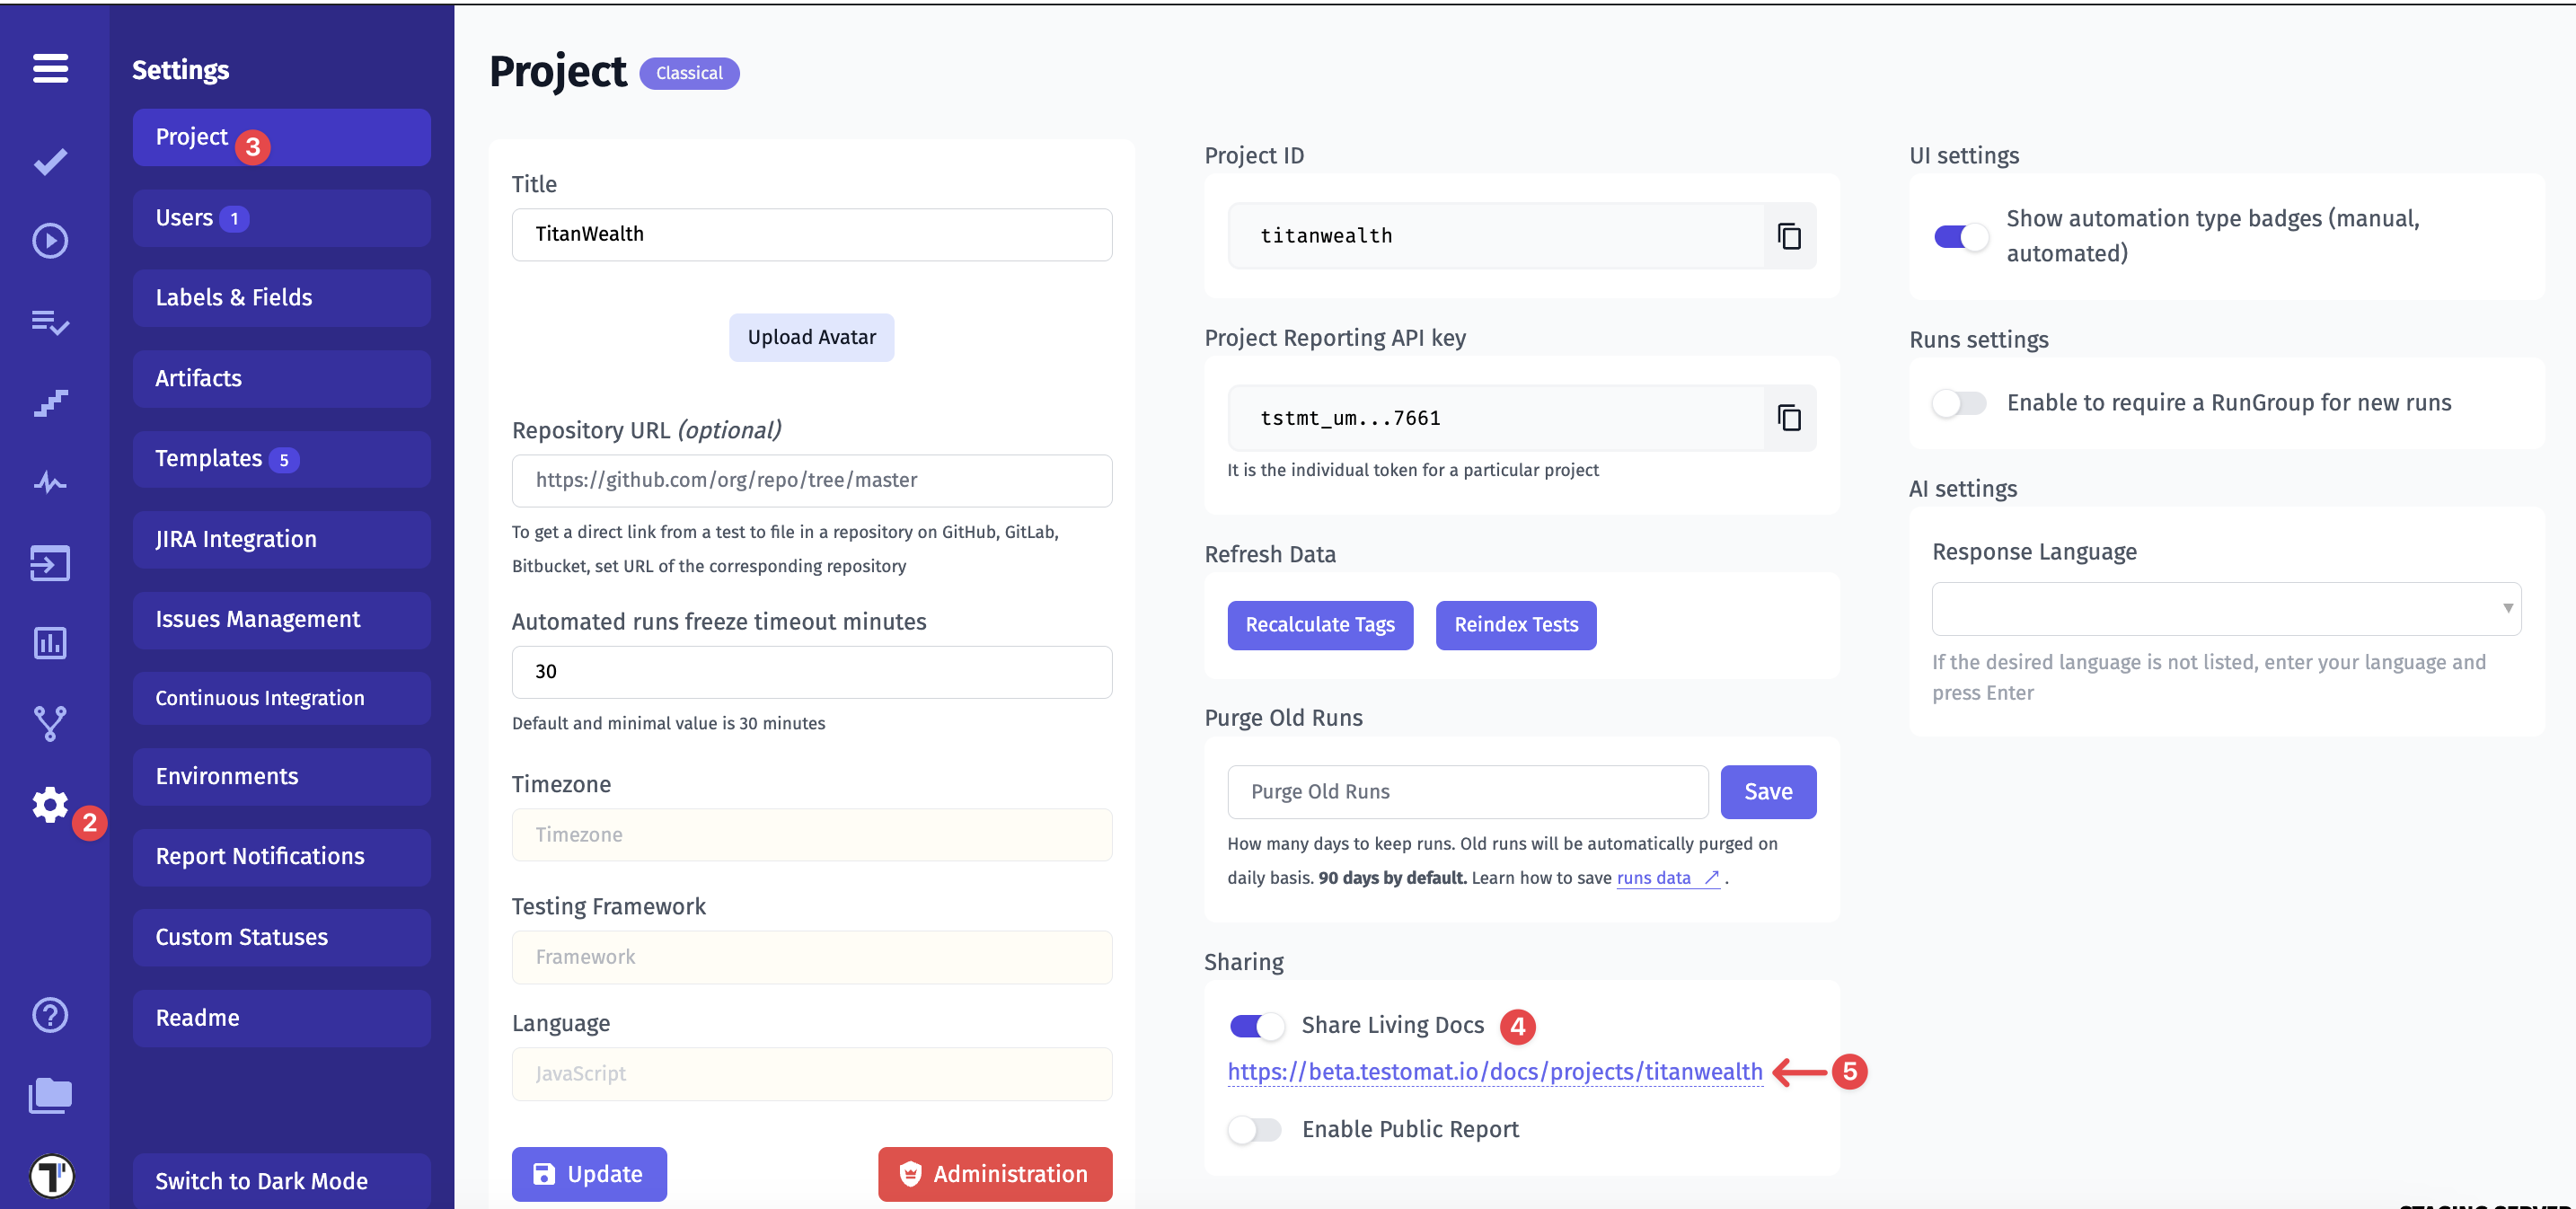
- Navigate to the general ‘Settings’ tab in the sidebar
- Click the ‘Project’ tab
- Enable ‘Share Living Docs’ in the ‘Sharing’ section
- The link appears under the ‘Share Living Docs’ button
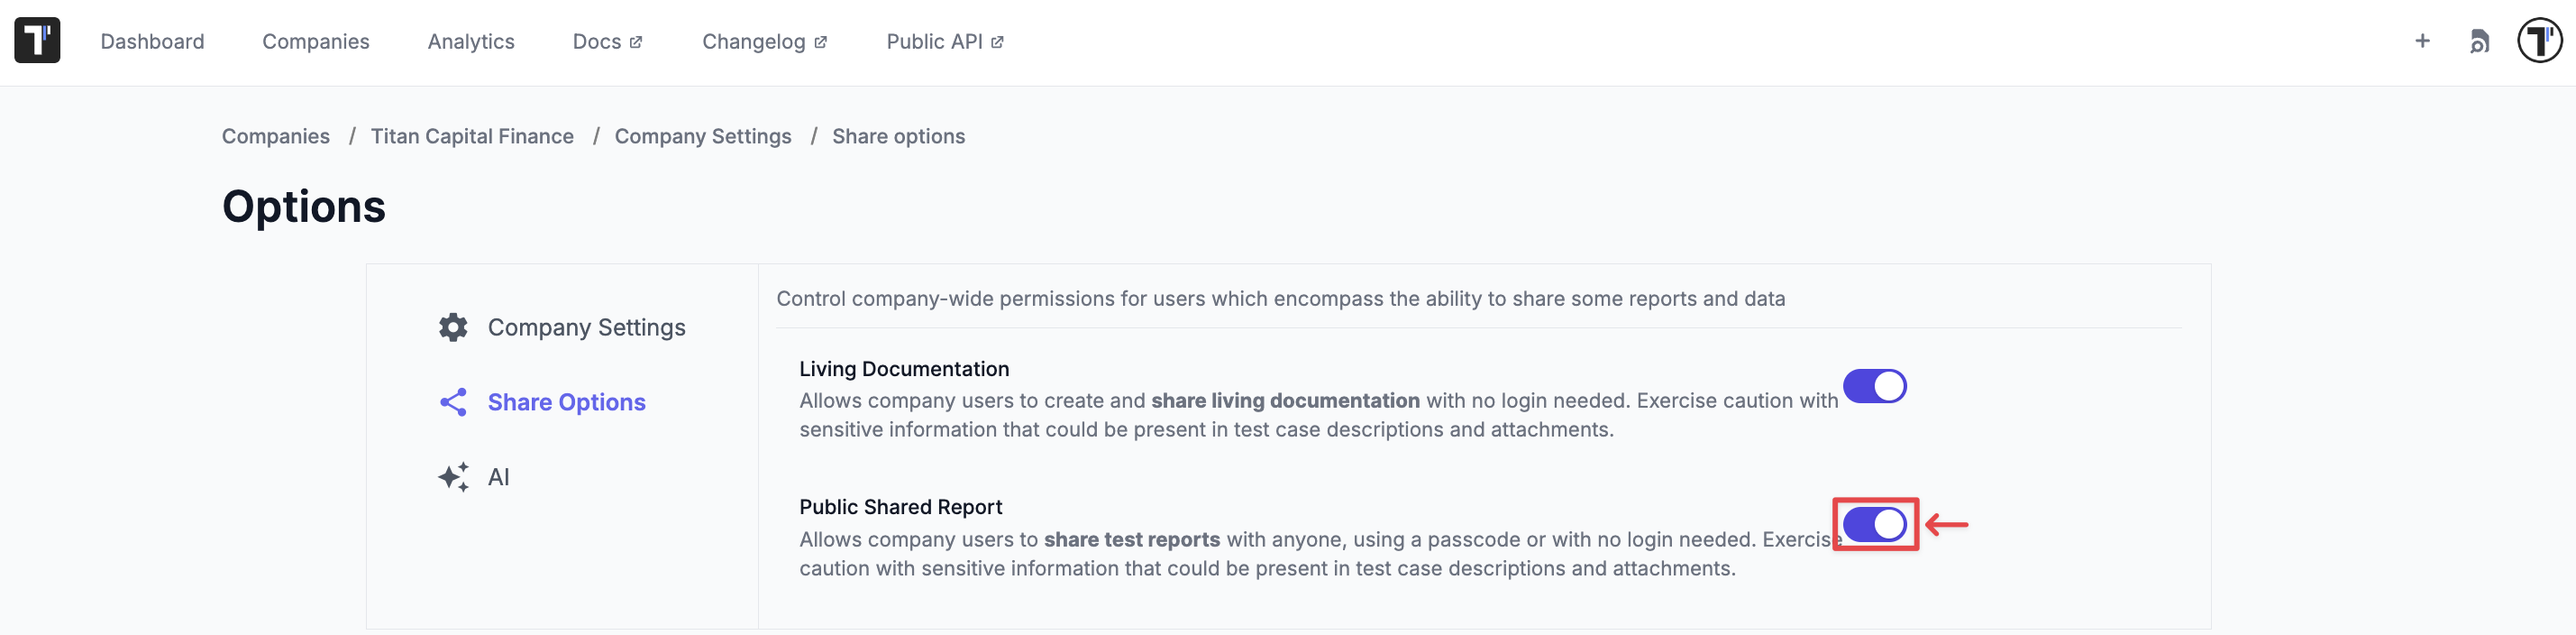
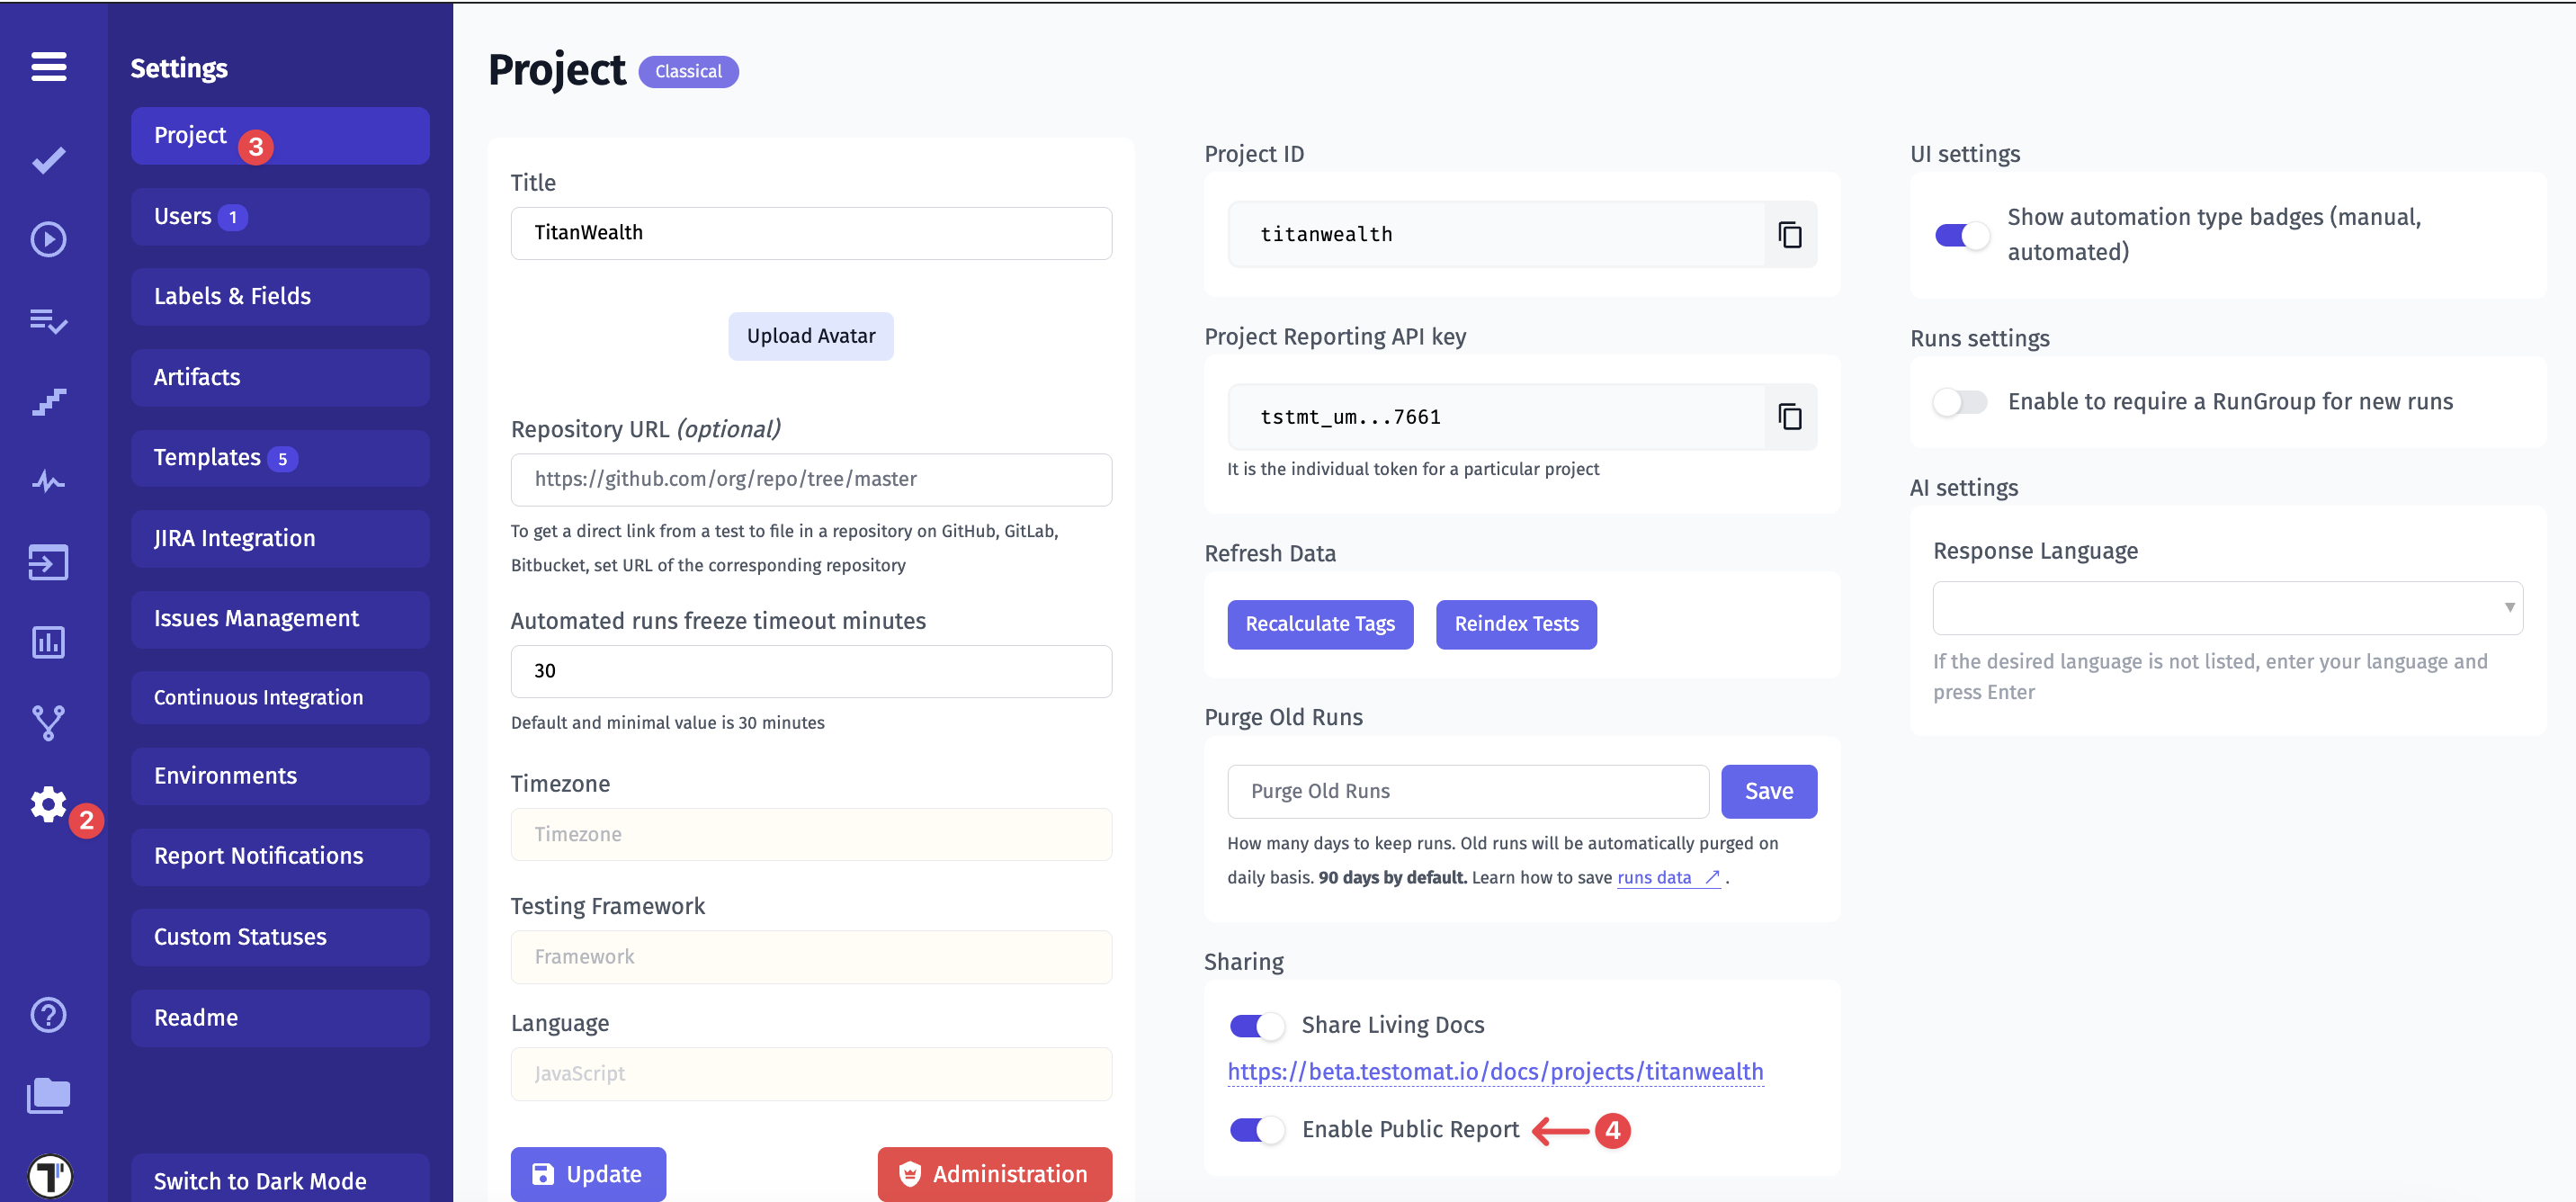
- Public Shared Report
Allows company users to share test reports with anyone, either using a passcode or without requiring a login.
- Enable this feature at the Company level
- Navigate to the General ‘Settings’ tab in the sidebar
- Click the ‘Project’ tab
- ‘Enable Public Report’ in the ‘Sharing’ section
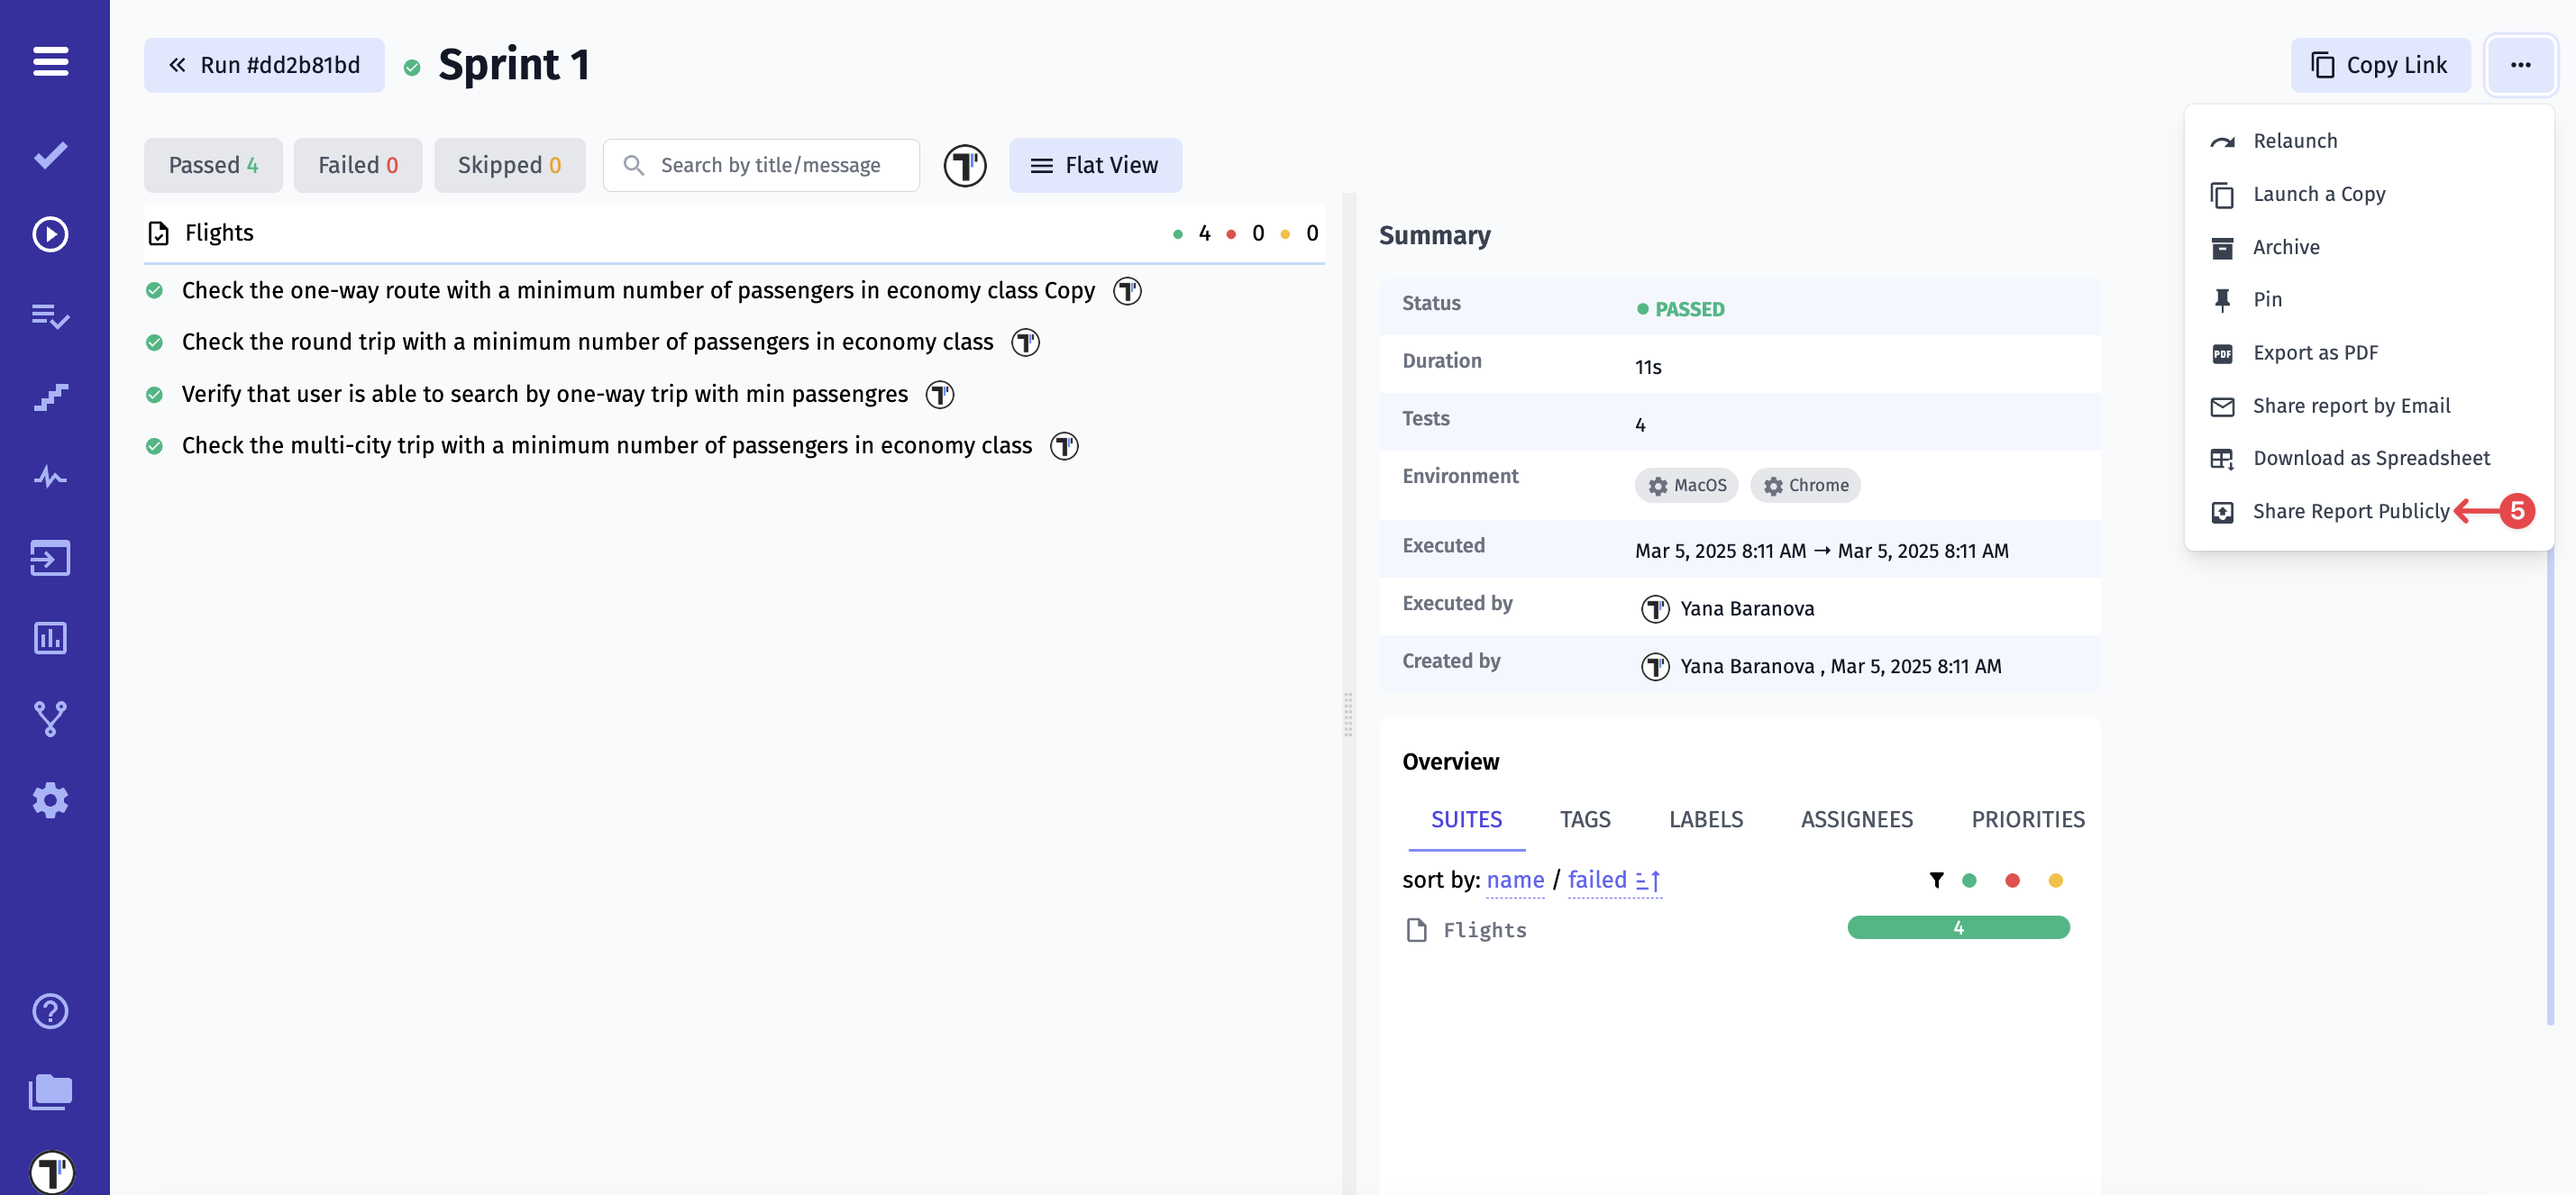
After activation, the ‘Share Report Publicly’ option becomes available in the Test Run Report
- Click the ‘Share Report Publicly’ button
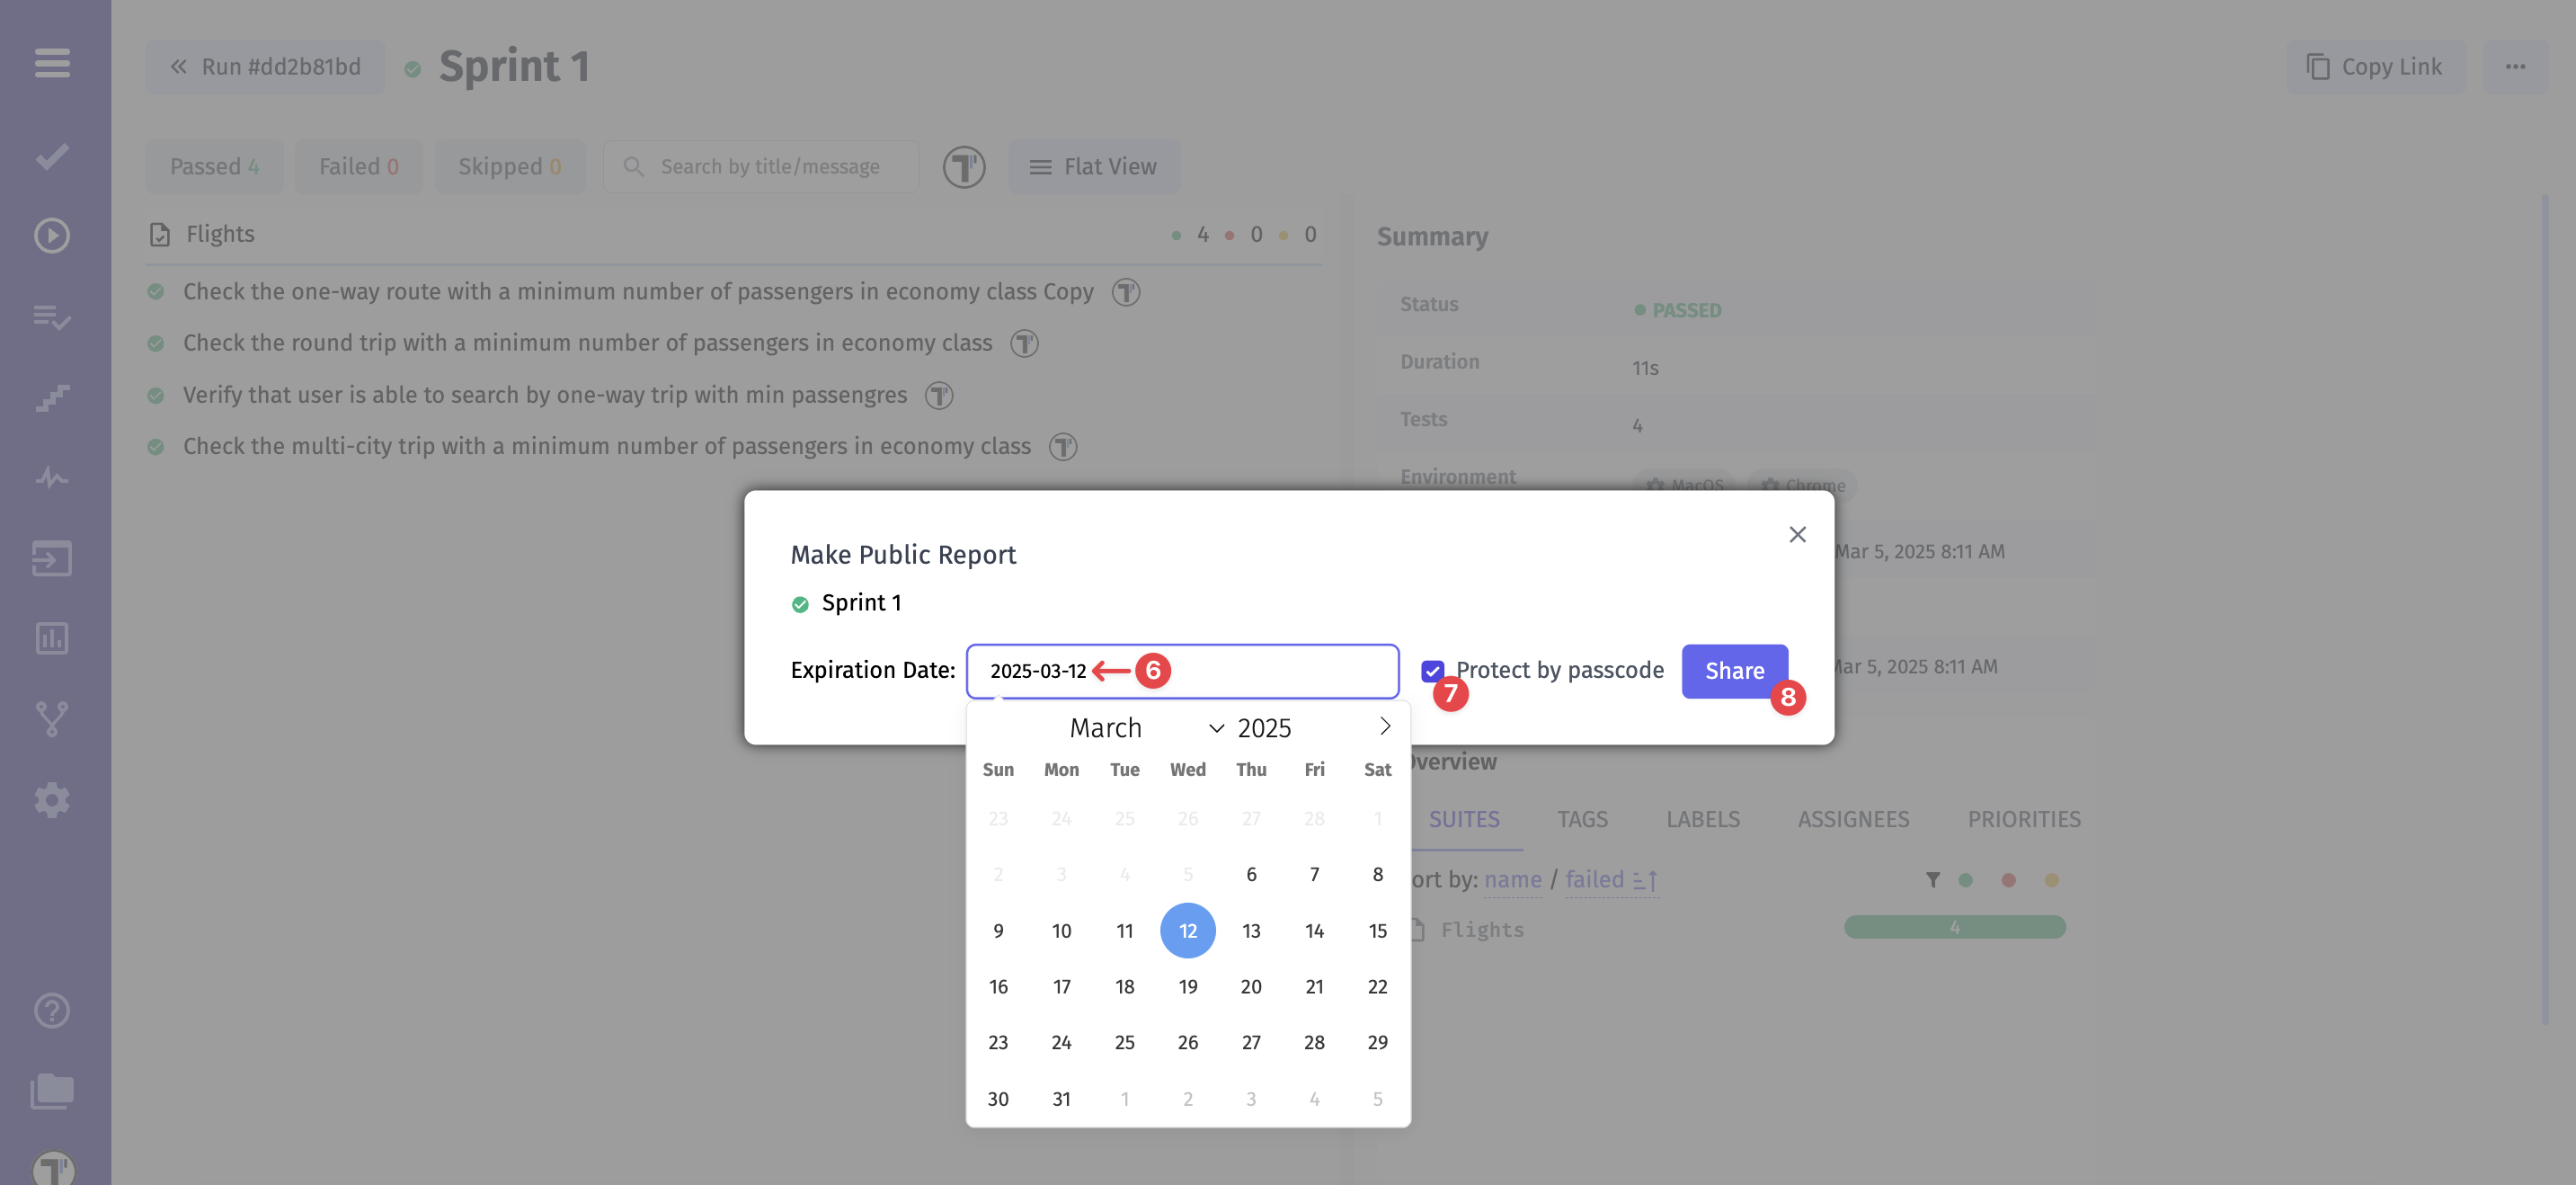
- Select the ‘Expiration Date’ from the date picker
- Check the ‘Protect by passcode’ checkbox, if you would like to increase protection
- Click the ‘Share’ button
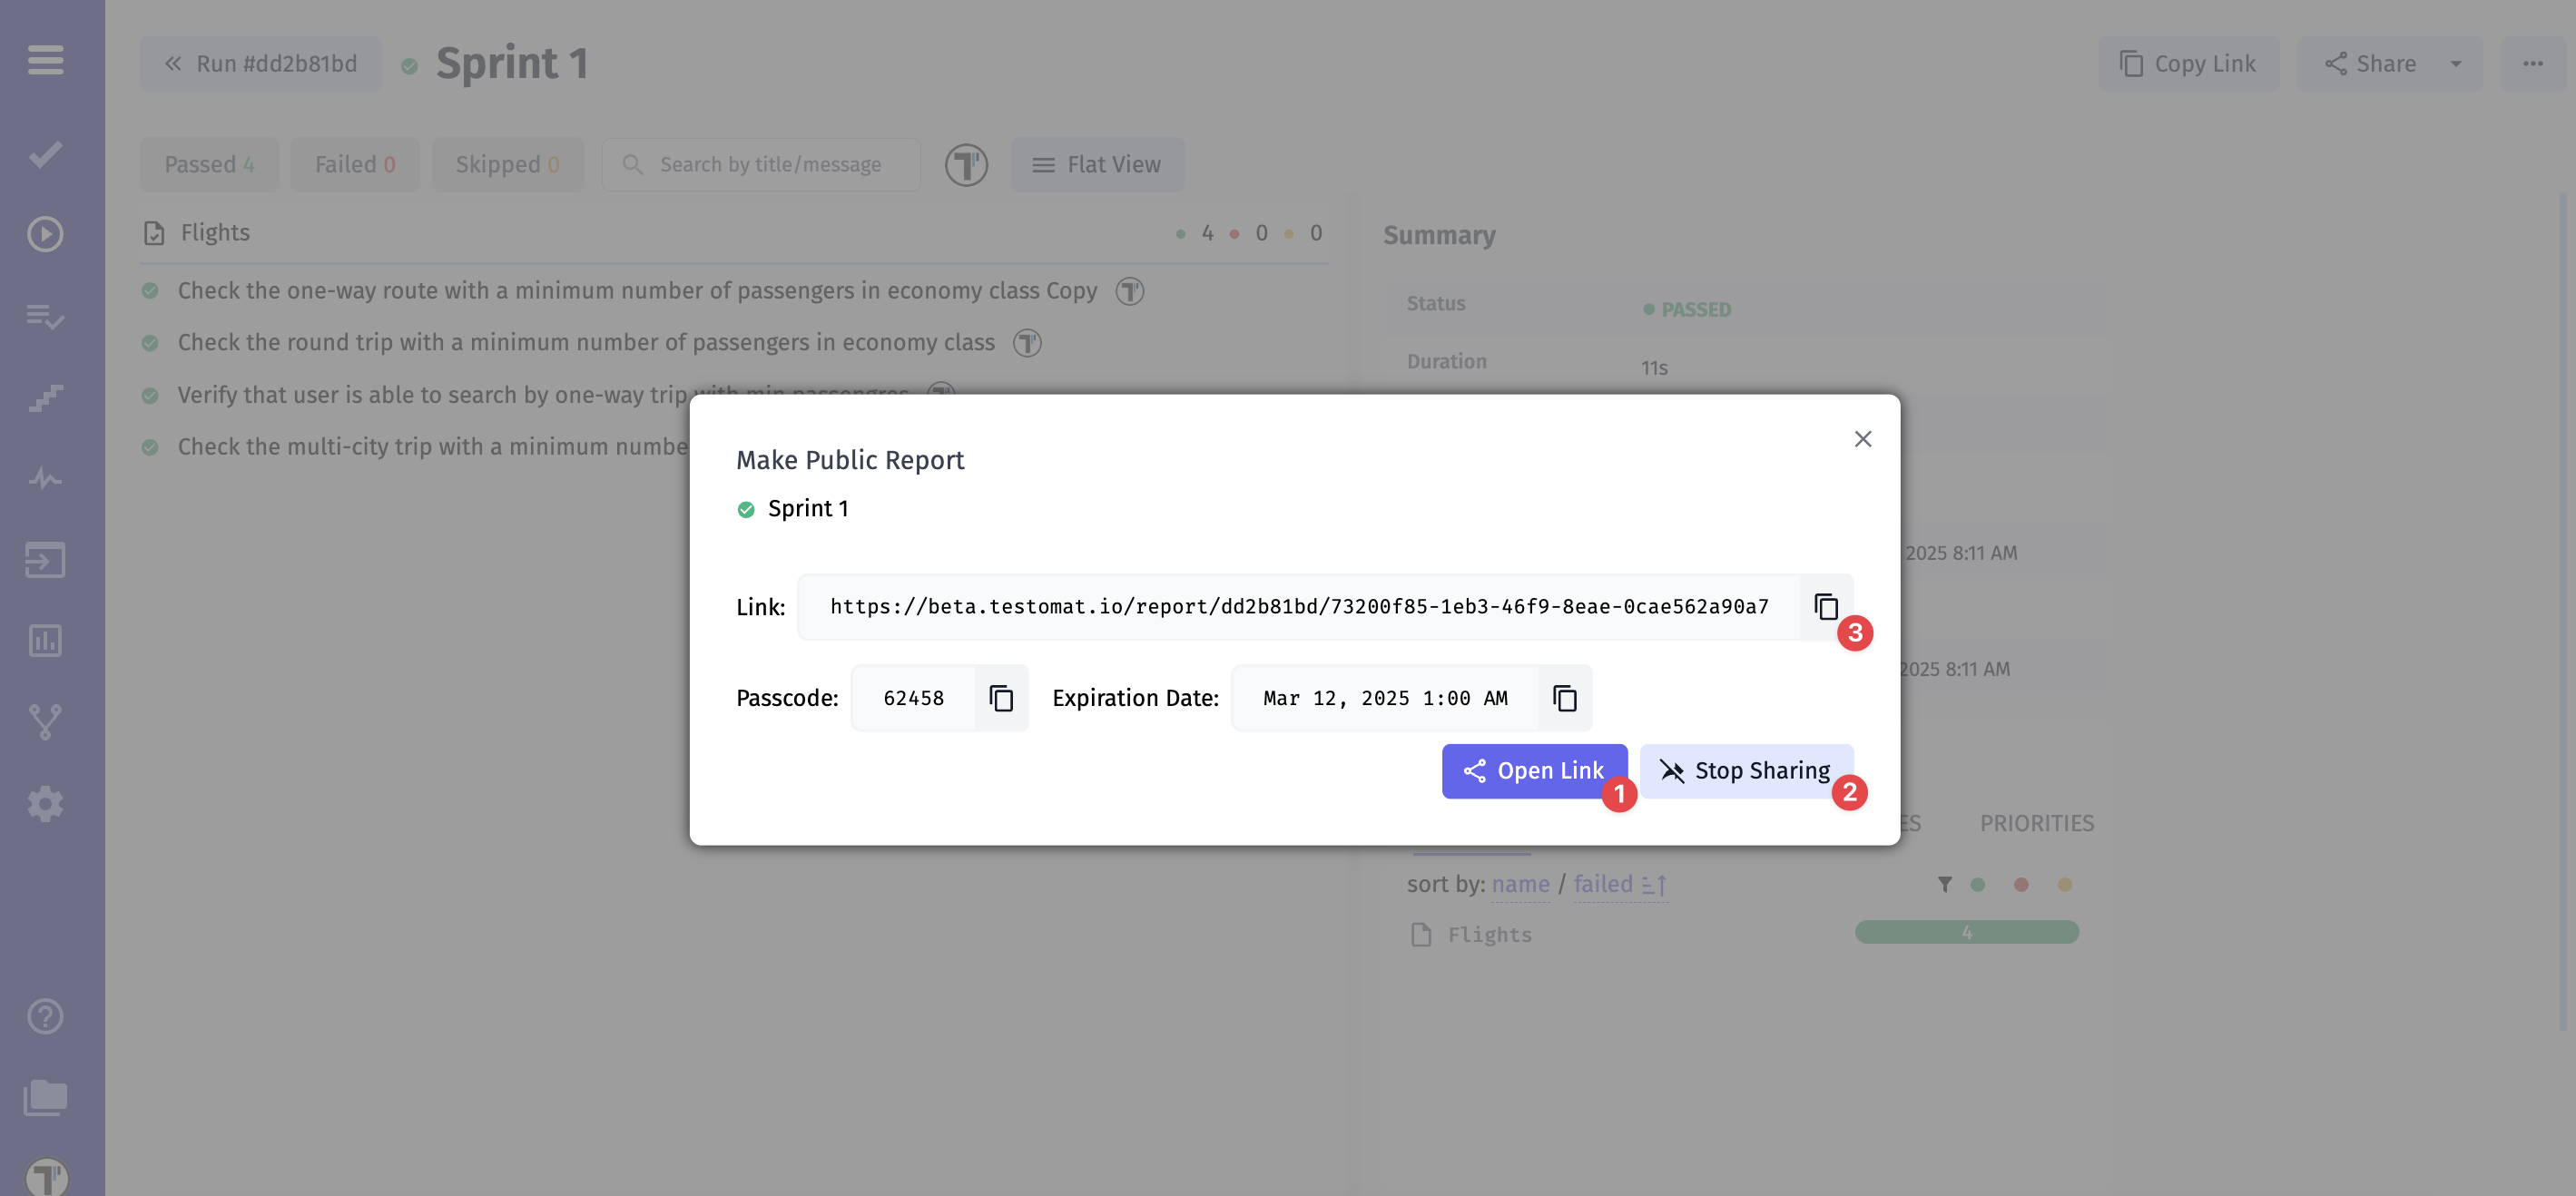
The report is now being shared. You have several options,
- ‘Open Link’ in a separated tab
- ‘Stop Sharing’ report
- Or copy data manually, such as ‘Link’, or ‘Passcode’, or ‘Expiration Date’
The AI Features section allows company members to utilize AI-powered capabilities for enhanced test management and data analysis. With AI enabled, teams can automate routine tasks, gain deeper insights, and improve overall efficiency.
Testomat.io offers two AI configuration options:
Built-in AI Provider
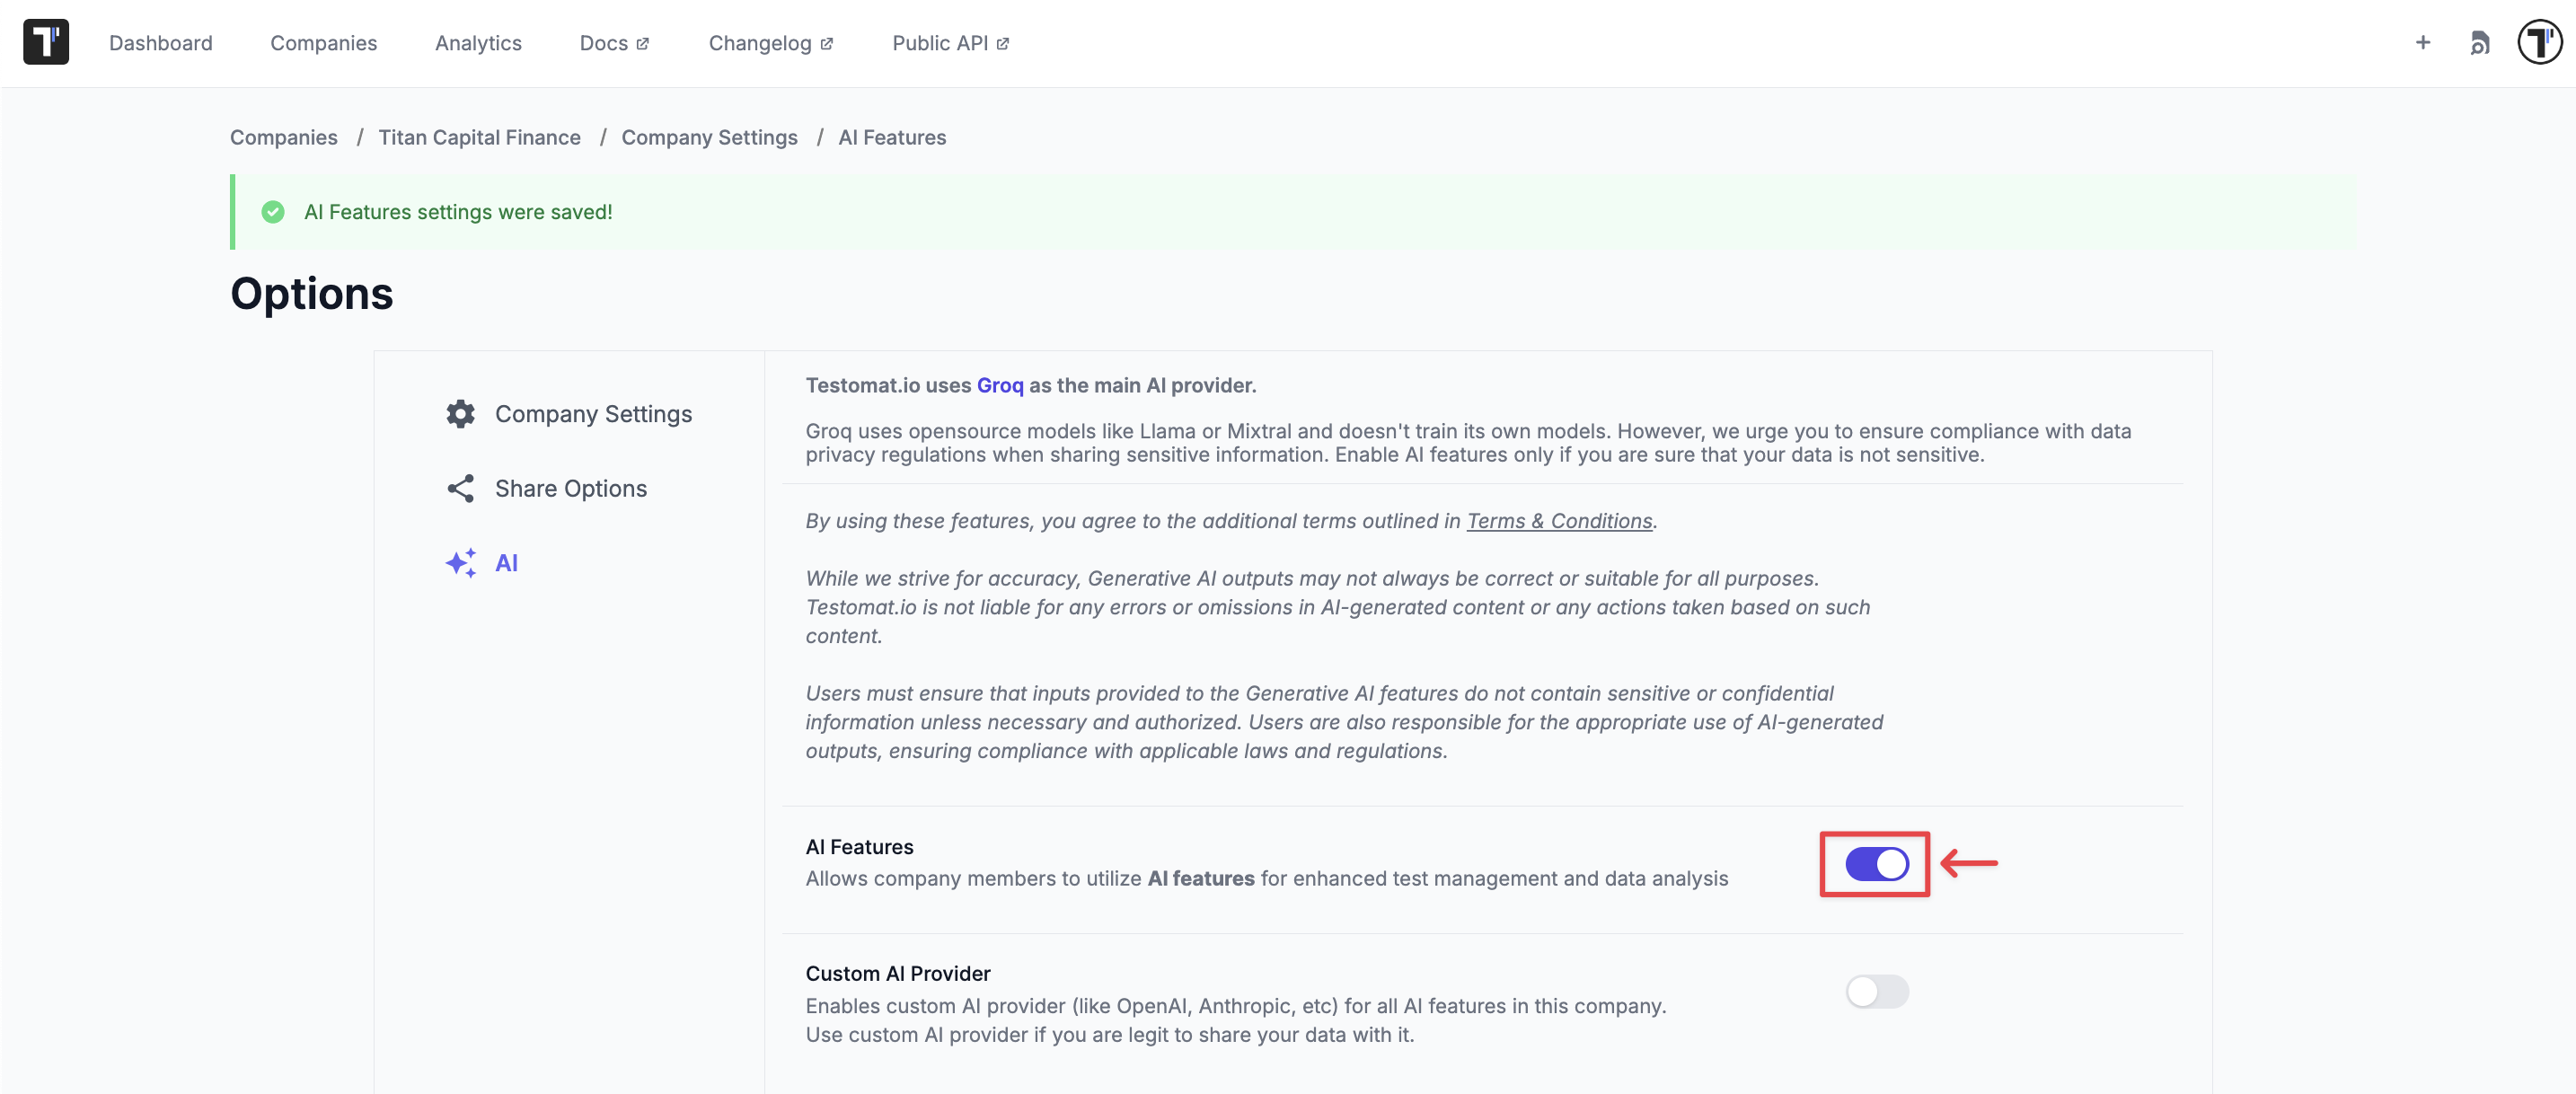
Section titled “Built-in AI Provider”Testomat.io uses Groq as the main AI provider. Groq uses only open-source models like Llama or Mixtral. Your data is not used for AI model training. However, enable AI features only if you are sure that your data is not sensitive.
How to enable built-in AI?
- Create a Company (see how to do this here)
- Click ‘Companies’ in the header
- Click the ‘Settings’ button
- Click the ‘AI’ option
- Enable the ‘AI Features’ option
Custom AI Provider
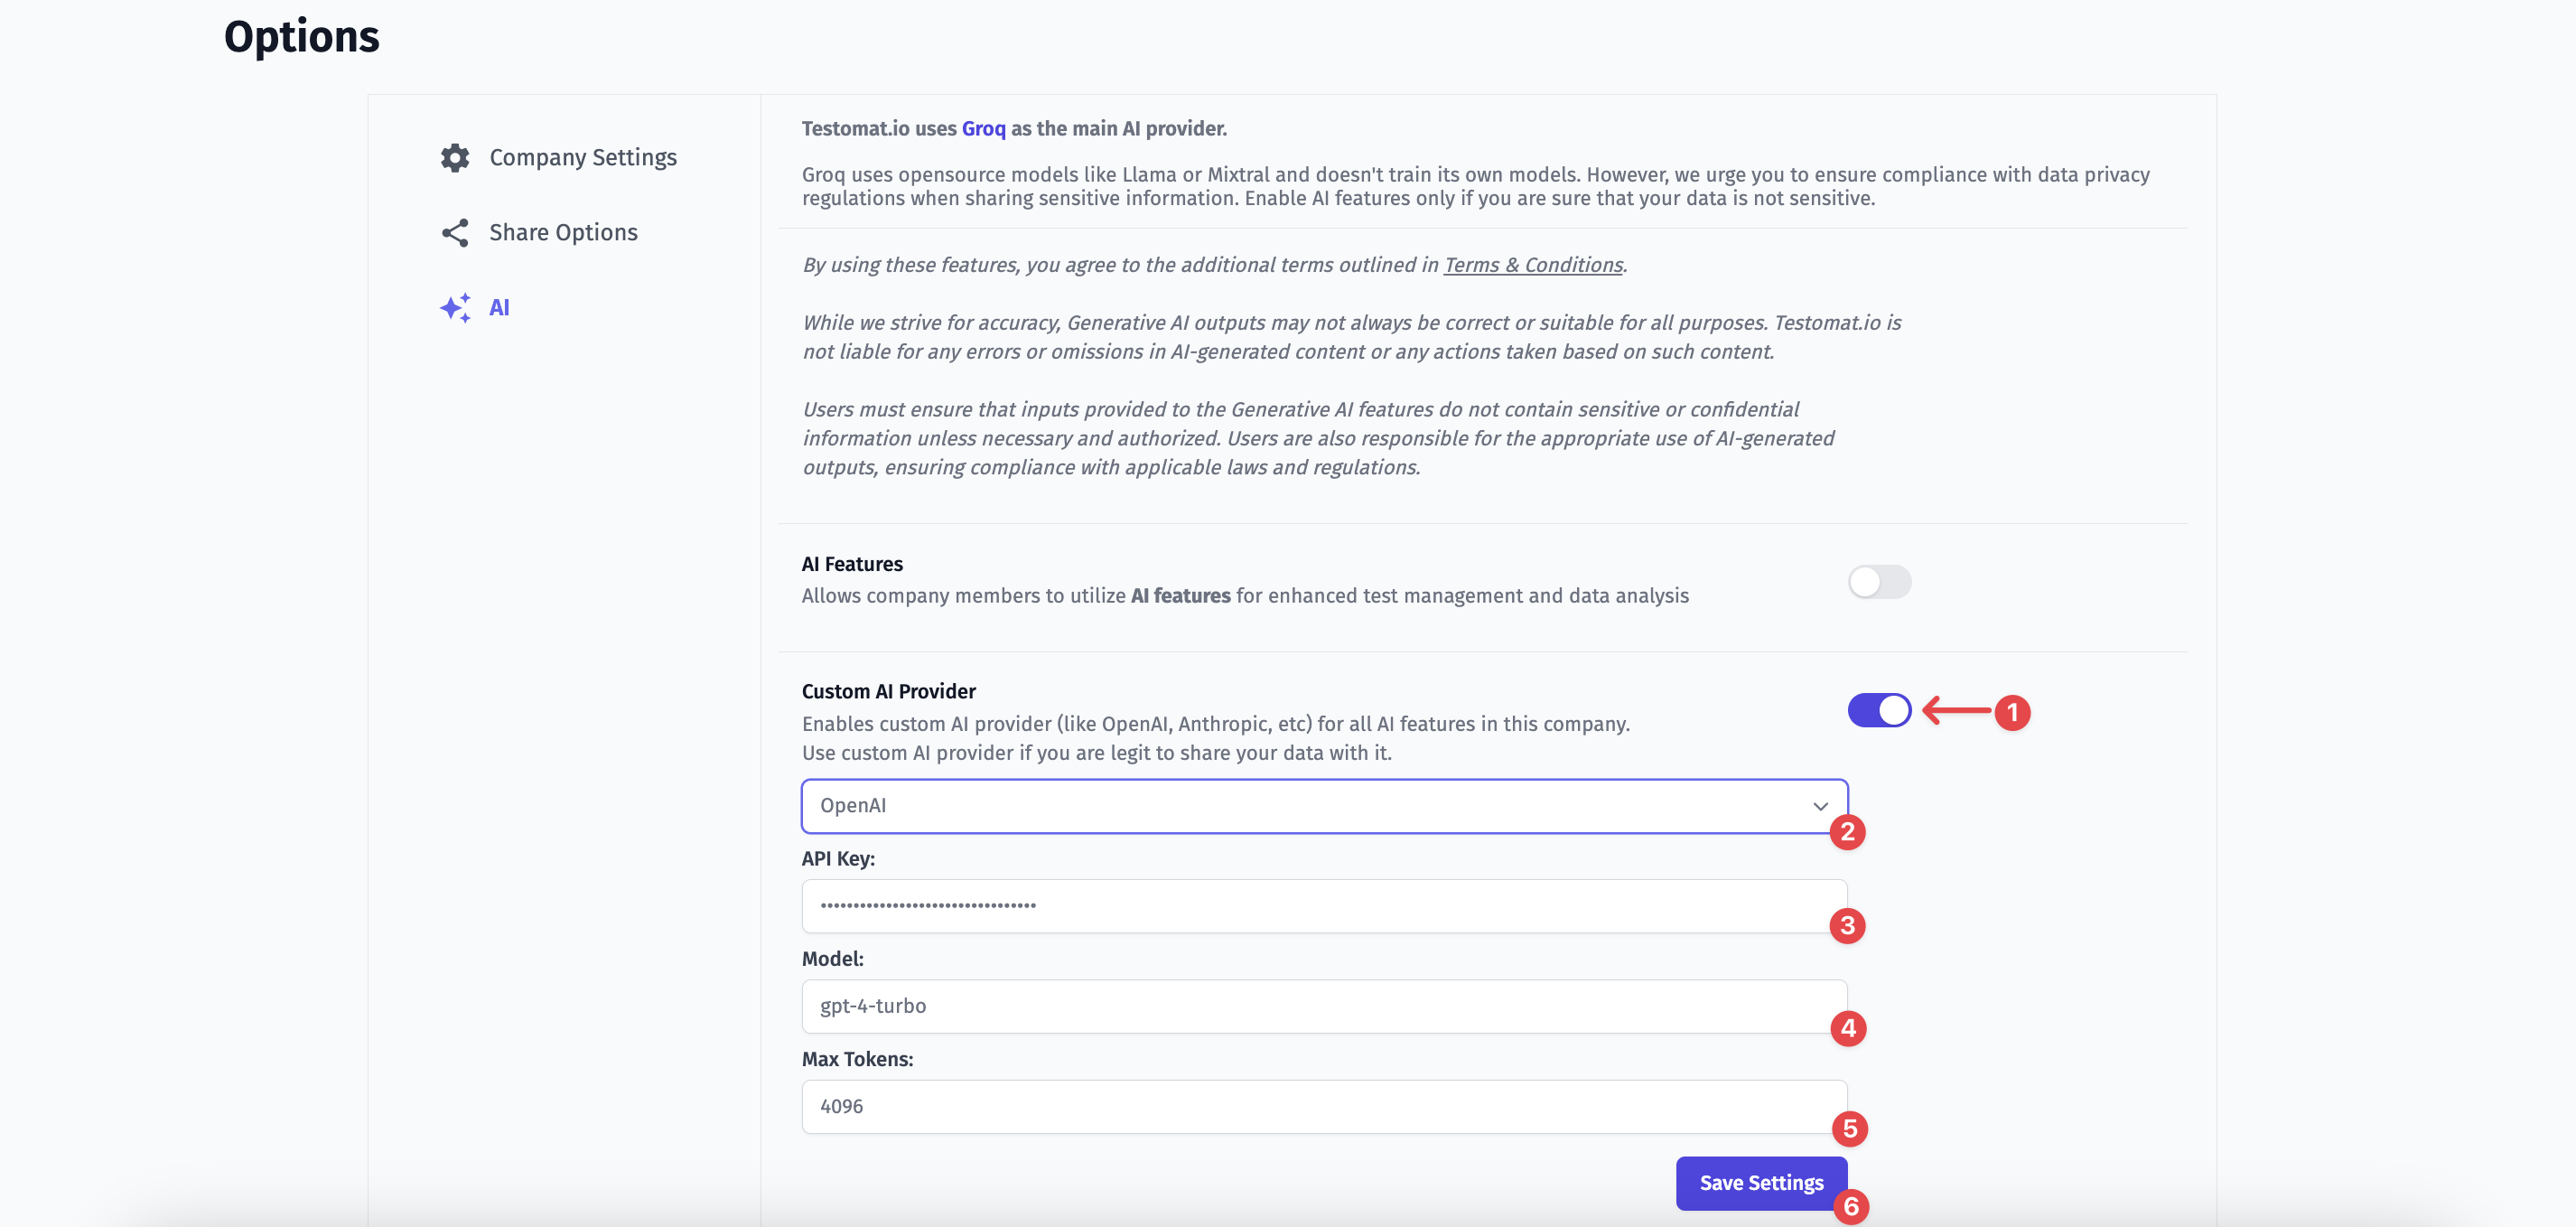
Section titled “Custom AI Provider”If your company prefers using an AI provider that you trust, Testomat.io allows integration with third-party AI services such as OpenAI, Anthropic, and others. This option ensures flexibility, allowing you to choose an AI provider that aligns with your security and compliance requirements.
How to enable a custom AI provider?
- Enable the ‘Custom AI Provider’ option
- Select a specific provider from the dropdown
- Enter the ‘API Key’
- Enter the ‘Model’ name
- Enter ‘Max Tokens’, if required by the provider
- Click the ‘Save Settings’ button
Custom AI Provider Isolation
When customers connect their own AI provider credentials, the application uses only the customer’s configured provider and API keys for all AI operations.
Once a custom AI provider is connected:
- All AI requests are executed exclusively through the customer’s provider configuration.
- The application does not automatically or silently fall back to any default/shared provider.
- If the configured provider is unavailable or returns an error, the request fails explicitly and the user is notified.
Prompts and Chat Features
Interactive AI features such as prompts, chats, and assistant conversations use the customer’s configured provider only.
If a request cannot be completed due to provider configuration issues, authentication failures, quota limits, or provider-side errors, users receive a message instructing them to verify their provider setup. No fallback to the platform’s internal provider is performed.
Agents and Background AI Jobs
AI agents and background processing jobs also run entirely on the customer’s configured provider and API keys.
Requirements Processing and Analysis
Requirements analysis, summaries, document processing, and related AI-generated insights use the customer’s configured provider exclusively.
No data is rerouted through a shared/default AI provider when customer-managed credentials are enabled.
Note: When a Custom AI Provider is configured, zero data is sent to Groq. All prompts, chats, agents, summaries, and AI processing run exclusively through the customer’s configured provider, with no fallback to Testomat.io default providers.
AI Fallback Provider
Section titled “AI Fallback Provider”Automatically retry failed AI requests through OpenRouter when the primary provider is unavailable. Enable this only if you consent to sending your data to OpenRouter.
Owner Access To Manage Team Projects
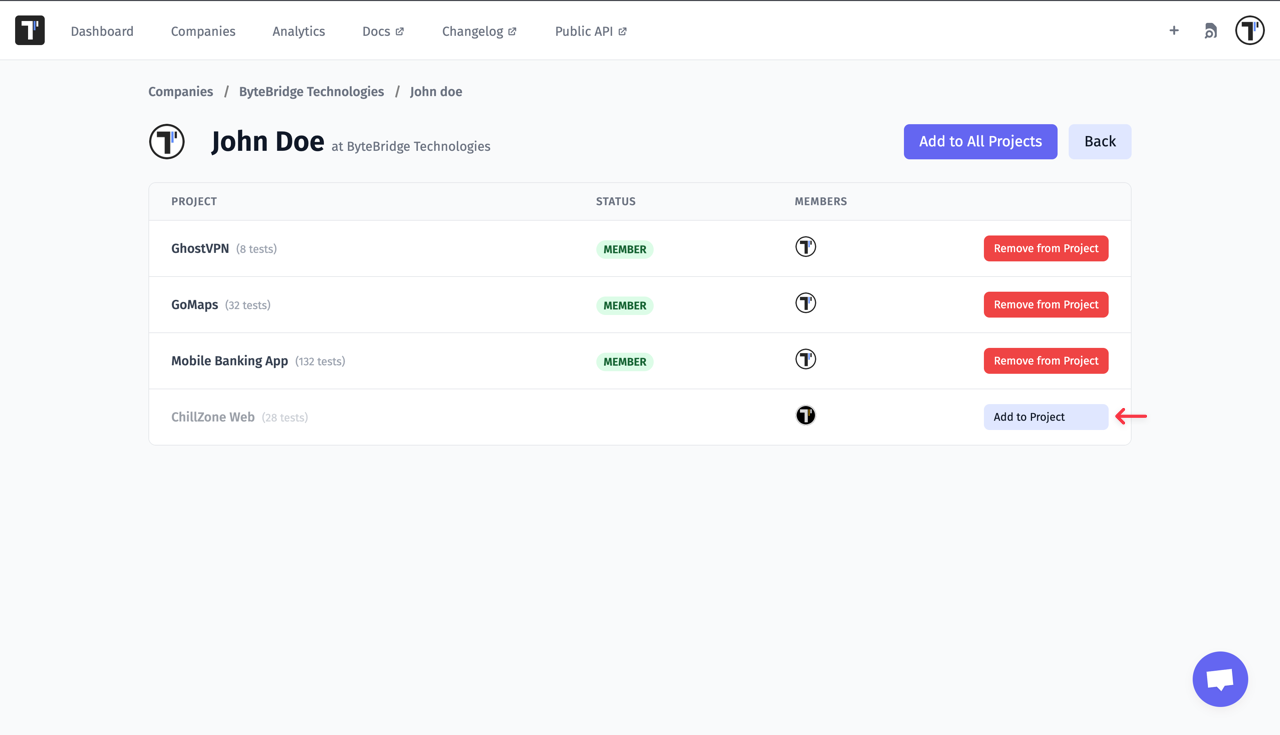
Section titled “Owner Access To Manage Team Projects”As a Company Owner, you have full oversight and control over all projects within your organization, even those that were created by other users without explicitly inviting you.
Whenever a new project is created by a team member and you are not involved, you will see a message on the Dashboard. This ensures that you stay informed and have the option to join and manage any new projects as needed.
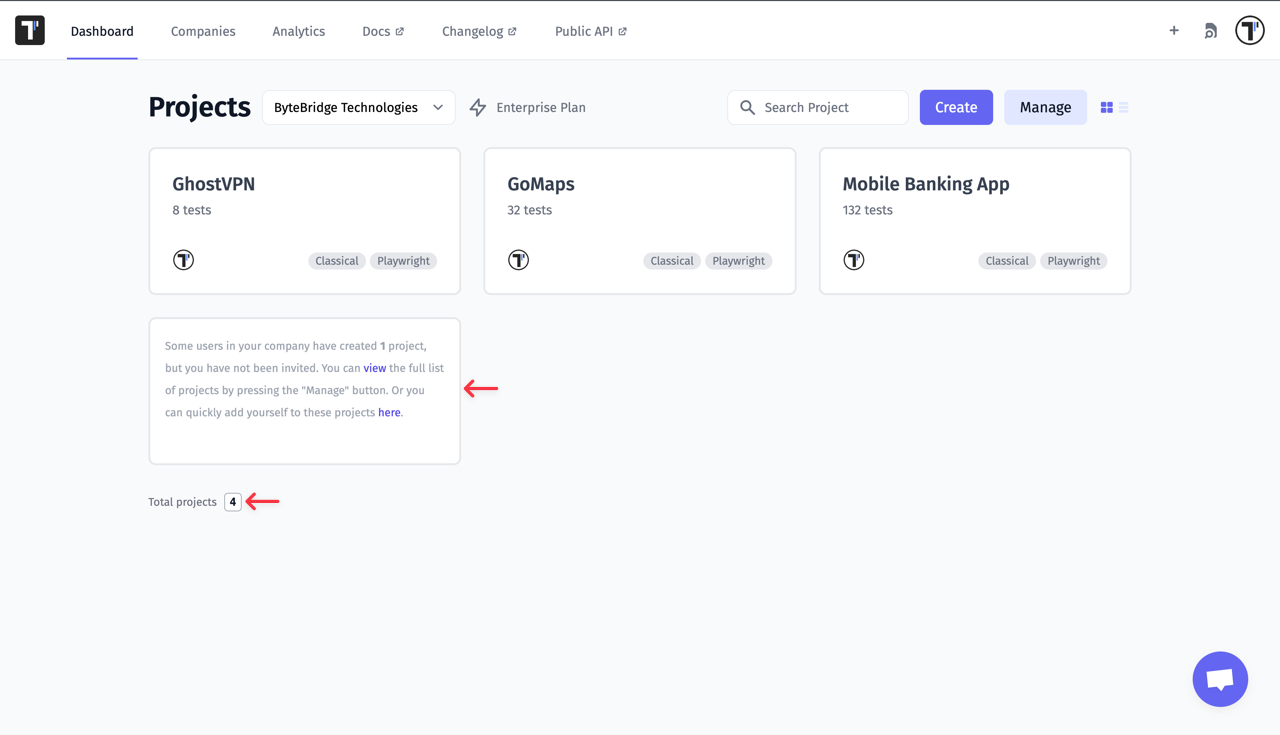
You have access to view a comprehensive list of all projects created by users within your company. To see the list of projects, click the view link in the message.
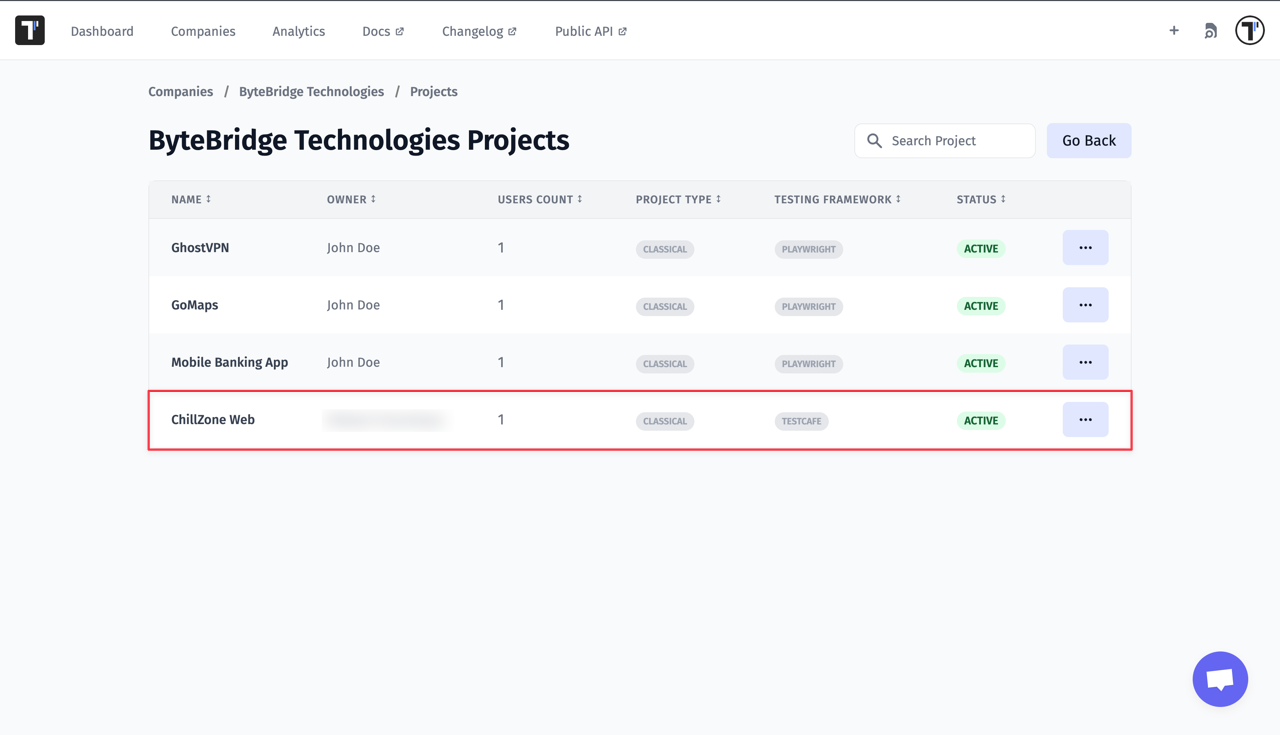
Lastly, you have the ability to manually add yourself to projects. To do it, click the here link in the message. Then find the project where you are absent and click the Add to Project button.
Auto-Provision for Company Users
Section titled “Auto-Provision for Company Users”In Testomat.io, owners of a company under the Enterprise plan have access to the auto-provisioning feature, which allows them to set up auto-login for company users. This means users with your company domain will be automatically added to the projects of your choosing — either one or all of them.
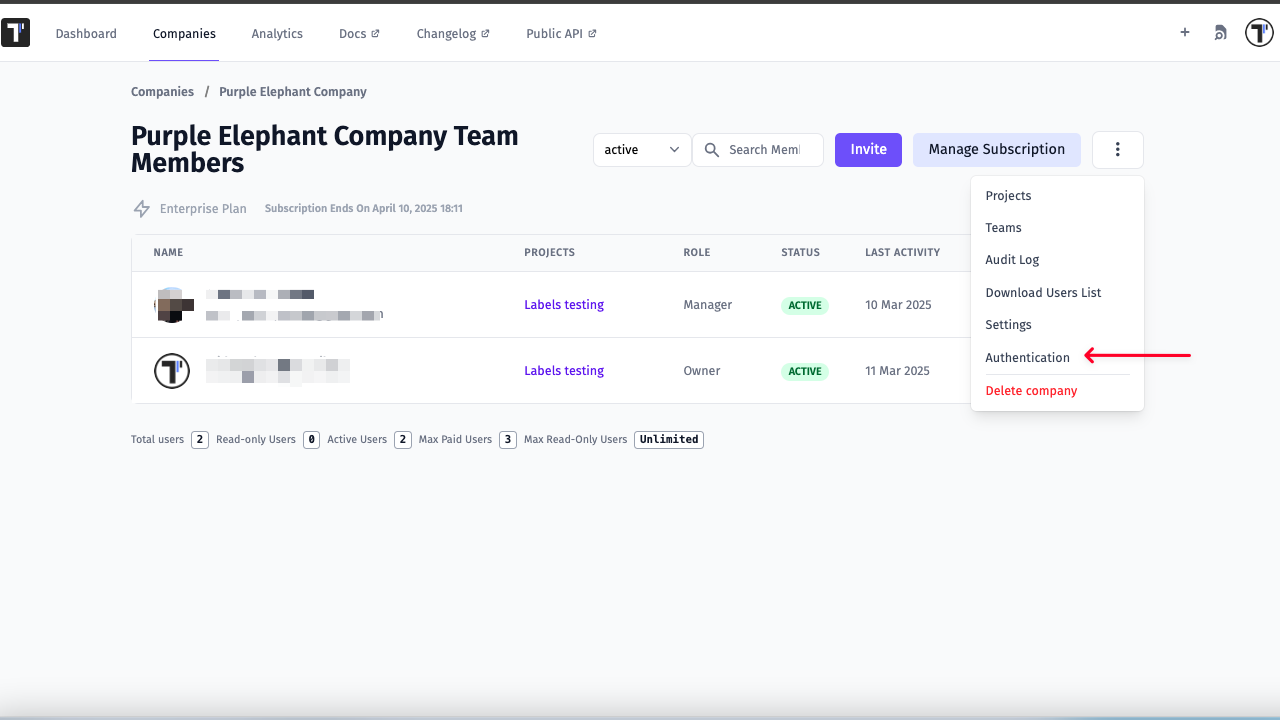
How to Access and Set Up Auto-Provision
Section titled “How to Access and Set Up Auto-Provision”- Log in as the company owner.
- Go to the Companies tab.
- Select your company.
- Click the drop-down menu (three dots next to the “Manage Subscription” button).
- Select Authentication.
- You will be navigated to the Sign-On Settings page, where you can set up auto-provisioning.
On the Sign On Settings page, you can enter a domain in the corresponding field and then either select a specific project from the dropdown menu or choose all projects by checking the “Select All” checkbox. This will automatically add all users with the specified domain to your company and the selected projects.
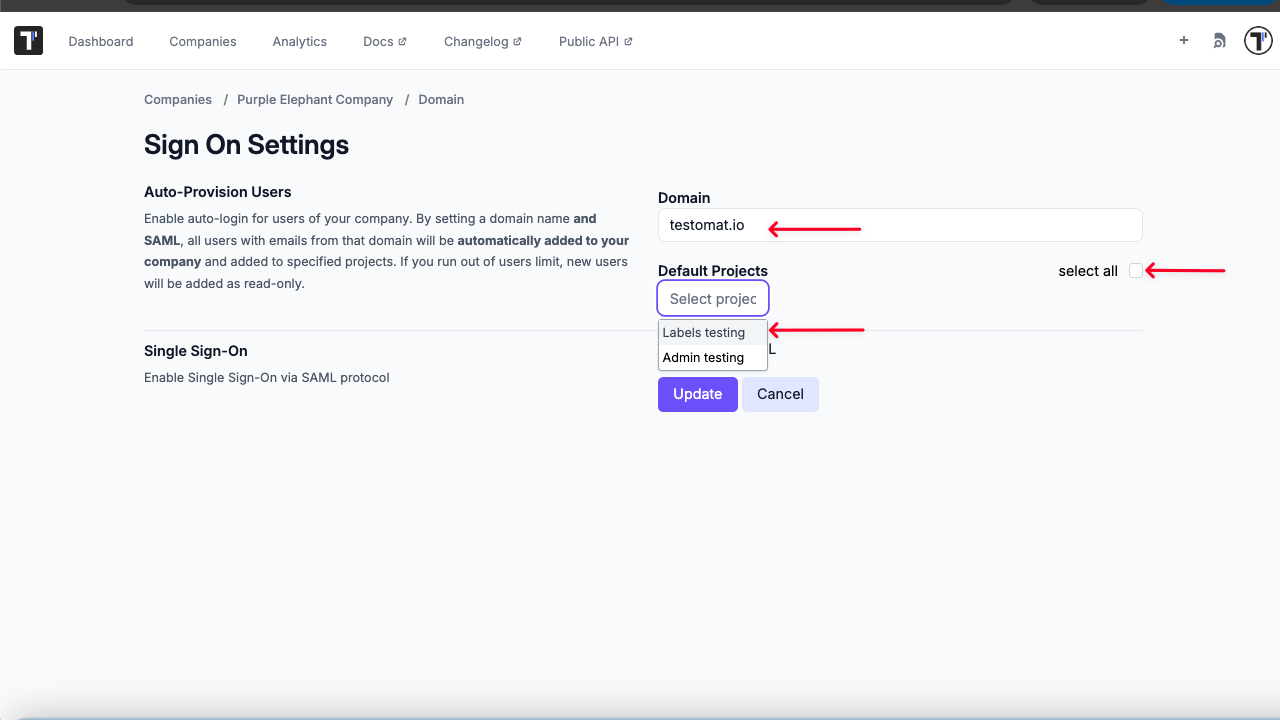
For more detailed instructions on how to set up auto-provisioning, check the official documentation:
Single Sign-On in Testomat.io
Company Statistics Widgets
Section titled “Company Statistics Widgets”Company Statistics is a feature that provides an overview of activity across all projects, offering visibility into data changes, user behavior, and AI utilization within your organization.
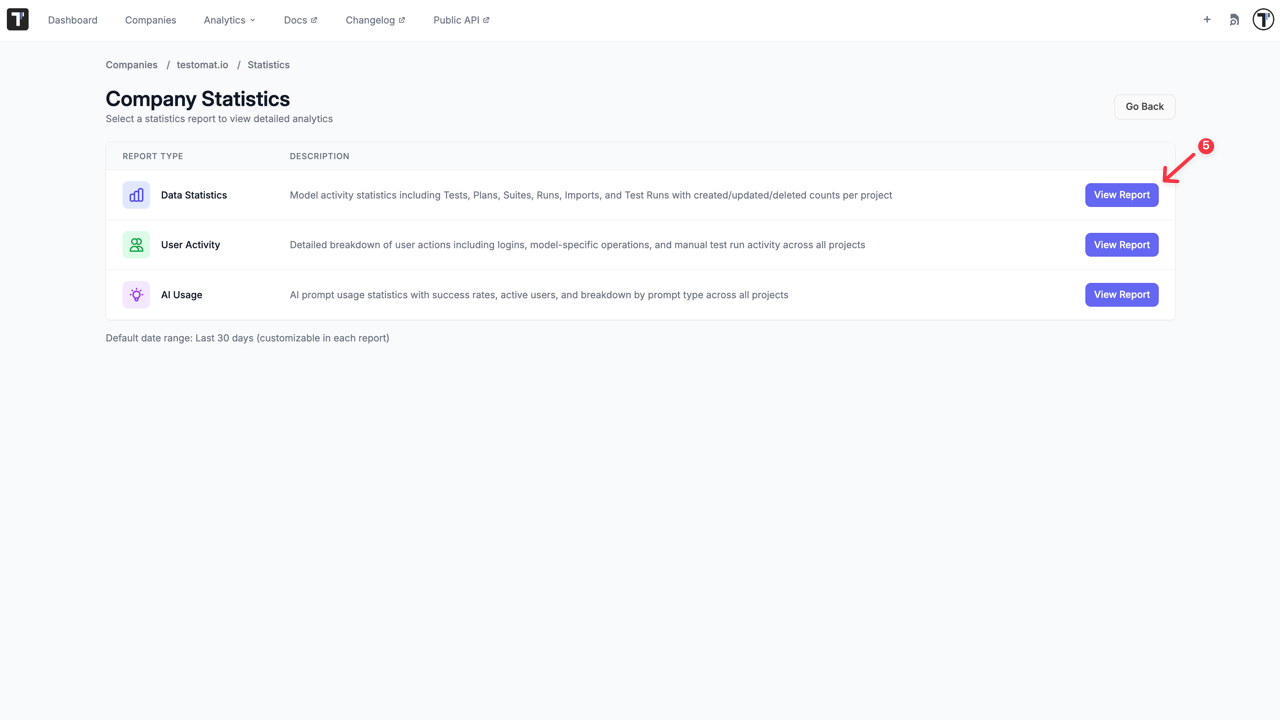
Company Statistics feature includes insightful widgets:
- Usage Statistics provides visibility into how Testomat.io is being used across projects and teams. Available metrics include active users, API requests, AI requests, reported tests, etc. Statistics can be filtered by user, making it easier to understand adoption, monitor resource consumption, and identify usage trends.
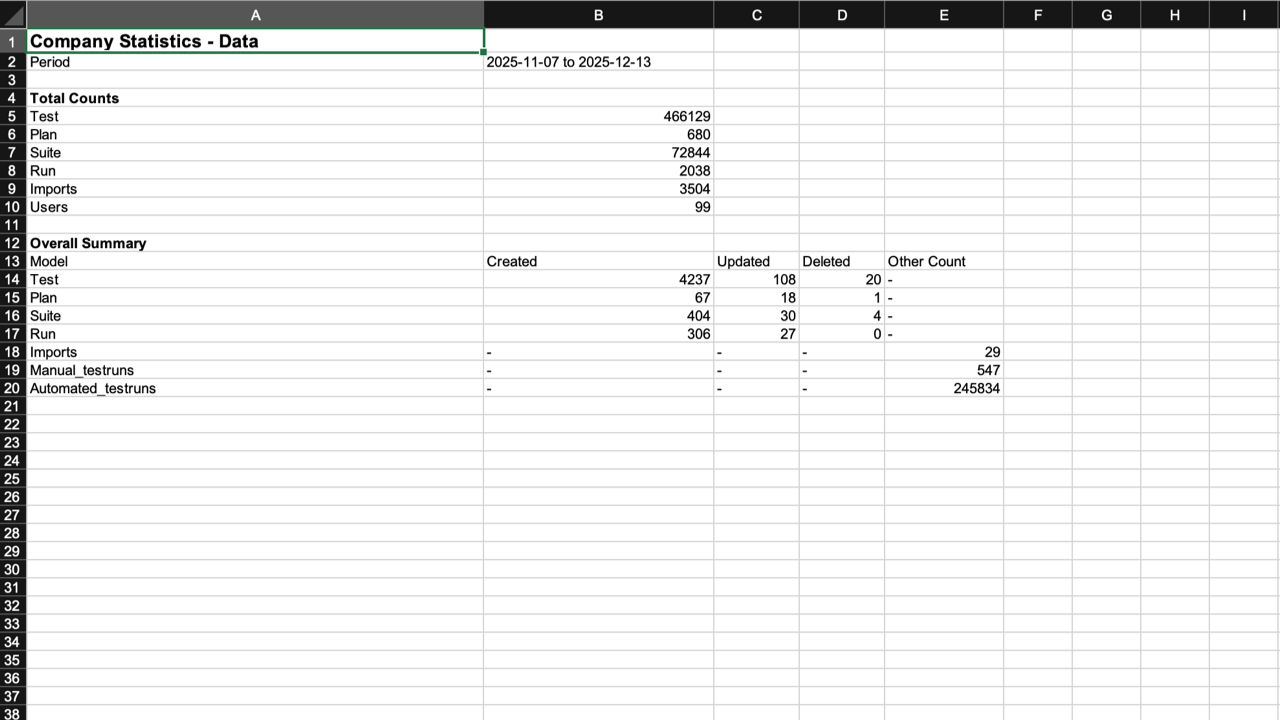
- Data Statistics: Tracks model activity such as Tests, Plans, Suites, Runs, Imports, and Test Runs. Displays created, updated, and deleted counts per project for complete visibility of repository changes.
- User Activity: Shows detailed insights into user behavior, including logins, actions performed on tests and other models, and manual test run activity across the organization.
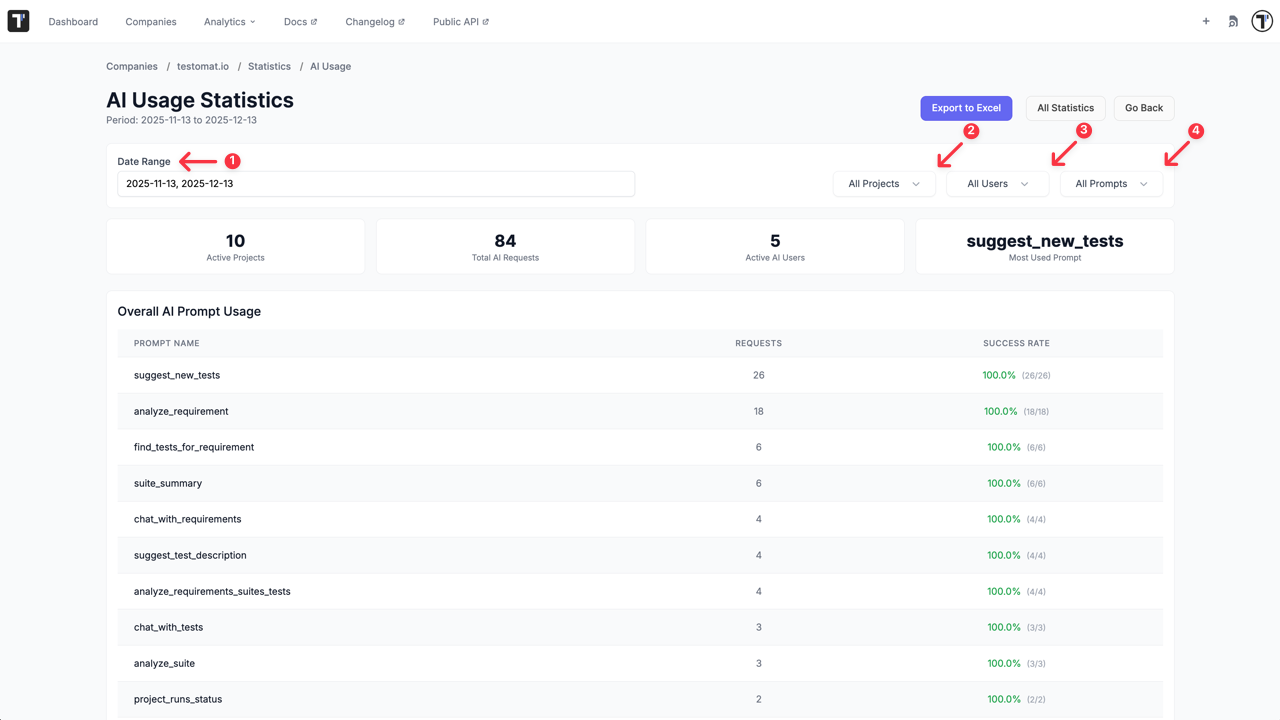
- AI Usage: Monitors AI prompt utilization, displaying success rates, the number of active users, and usage distribution by prompt type across all projects.
How to View and Export Company Statistics
Section titled “How to View and Export Company Statistics”Testomat.io allows you not only view company usage data but also export it to a spreadsheet for reporting, sharing, or deeper analysis.
To export usage data:
- Go to ‘Companies’.
- Open your Company.
- Click ‘Extra menu button’.
- Select ‘Statistics’.
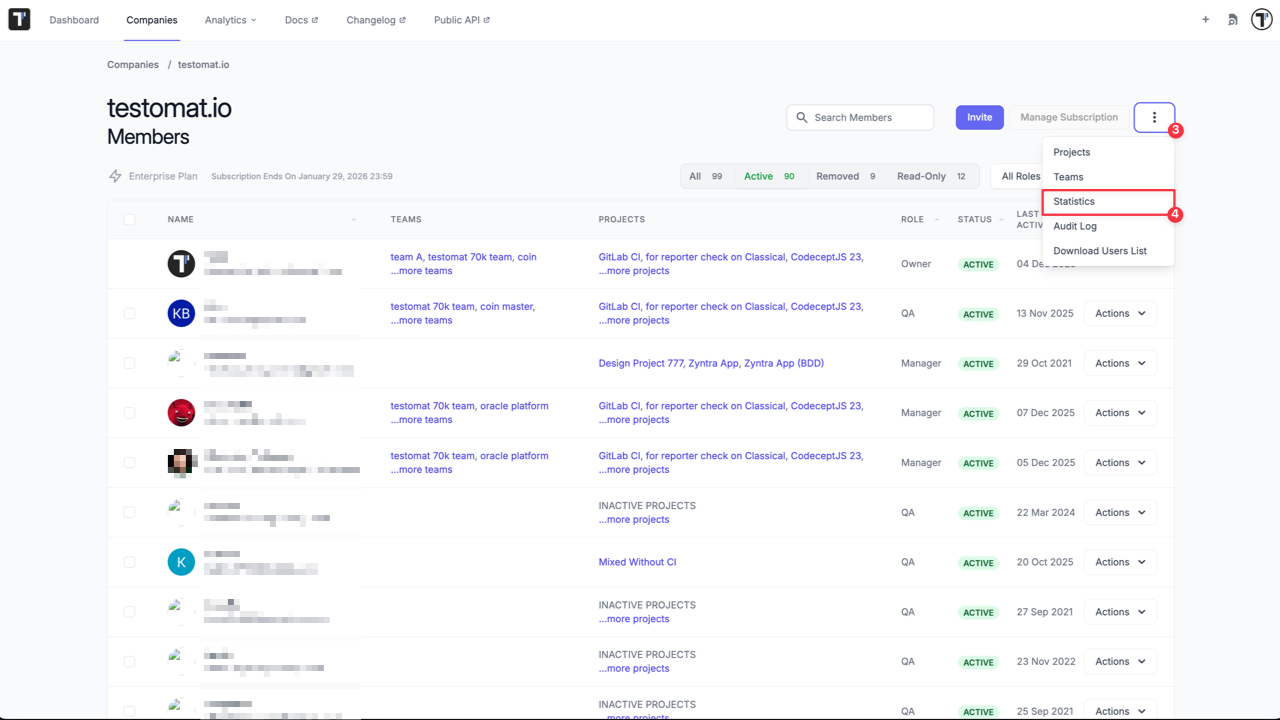
- Click ‘View report’ for select Report type.
- Filter data by date/project/user - optional.
- Click ‘Export to Excel’.

Selected data is downloaded in the xlsx file.
Every report allows you to refine data using specific criteria:
- Date Range: Default date range in all reports is set to Last 30 days but is fully customizable.
- Project: View data for specific project.
- User: Track activity for specific team member.
- AI Prompt: Filter by specific AI prompt types (available only in ‘AI Usage Statistics’).
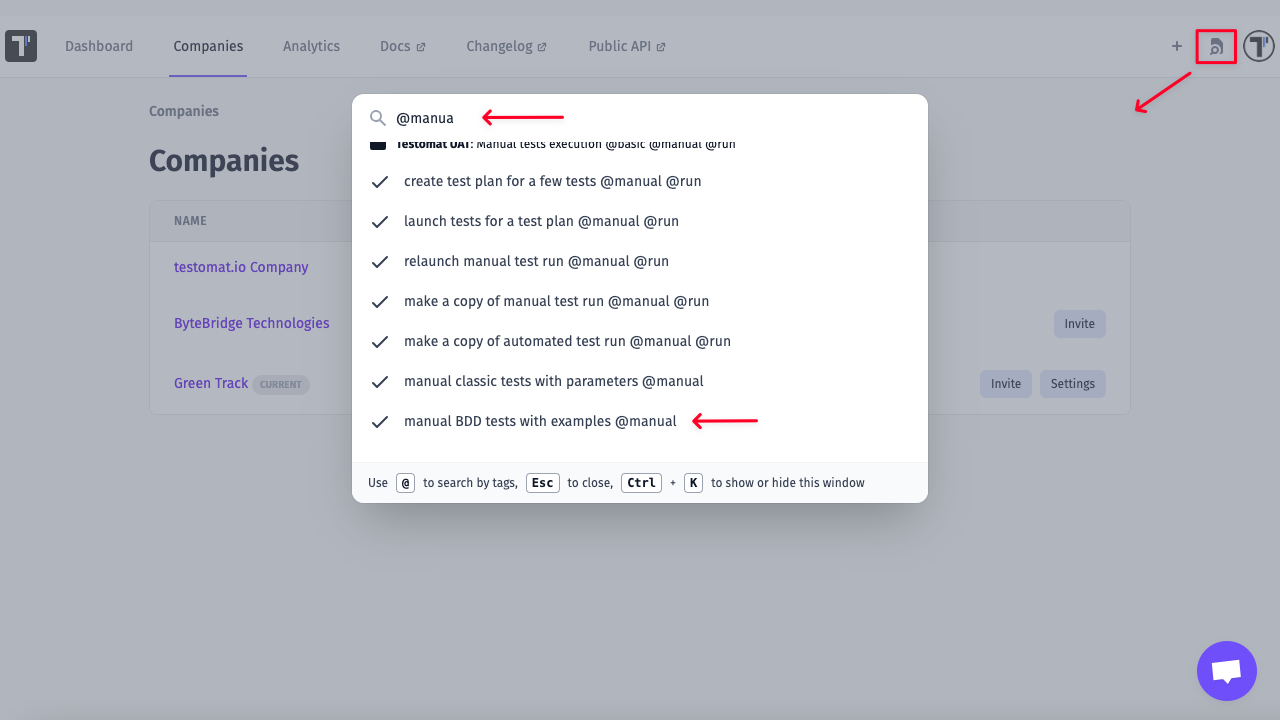
Global Search
Section titled “Global Search”Testomat.io offers a Global Search functionality designed to help you quickly find tests or test suites, even as the number of projects, companies, and tests increases. This feature allows you to search across all companies and projects you have access to, making it easier to navigate and find what you’re looking for.
Global Search is available from the Dashboard, Companies and Analytics tabs. You can search for tests using either keywords or tags, and the results will be displayed in a drop-down list for easy selection.
How to Search
Section titled “How to Search”- In the top right corner, click the Global Search icon to open the search window.
- Enter a keyword or part of it (e.g. module) to search for tests or test suites.
- Search using tags (e.g. @manual).
Managing Projects on the Project Board
Section titled “Managing Projects on the Project Board”Company Owners and Managers can administer projects via the Project board in the Company section.
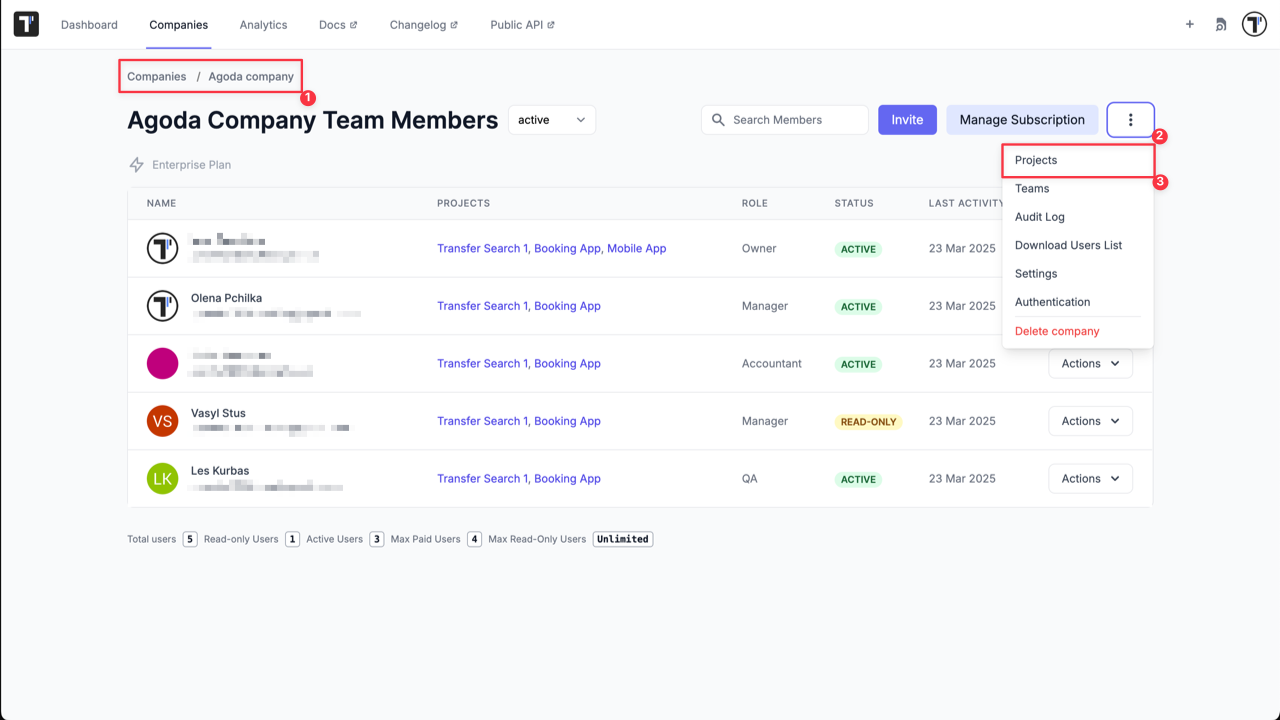
To access the board:
Section titled “To access the board:”- Log in to your account.
- Go to the Companies section.
- Select your company.
- Click the three dots (⋮) next to the Manage Subscription button.
- Select Projects.
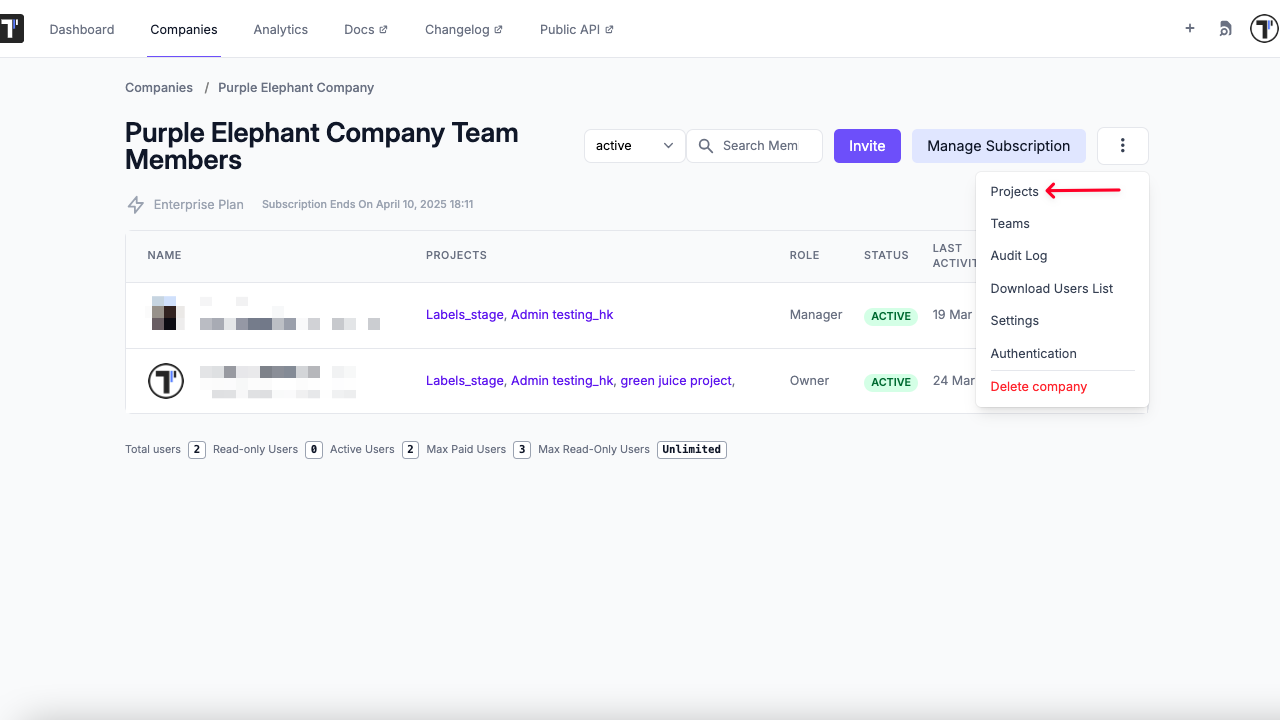
Once you’ve selected Projects, you’ll be directed to the Project board for your Company.
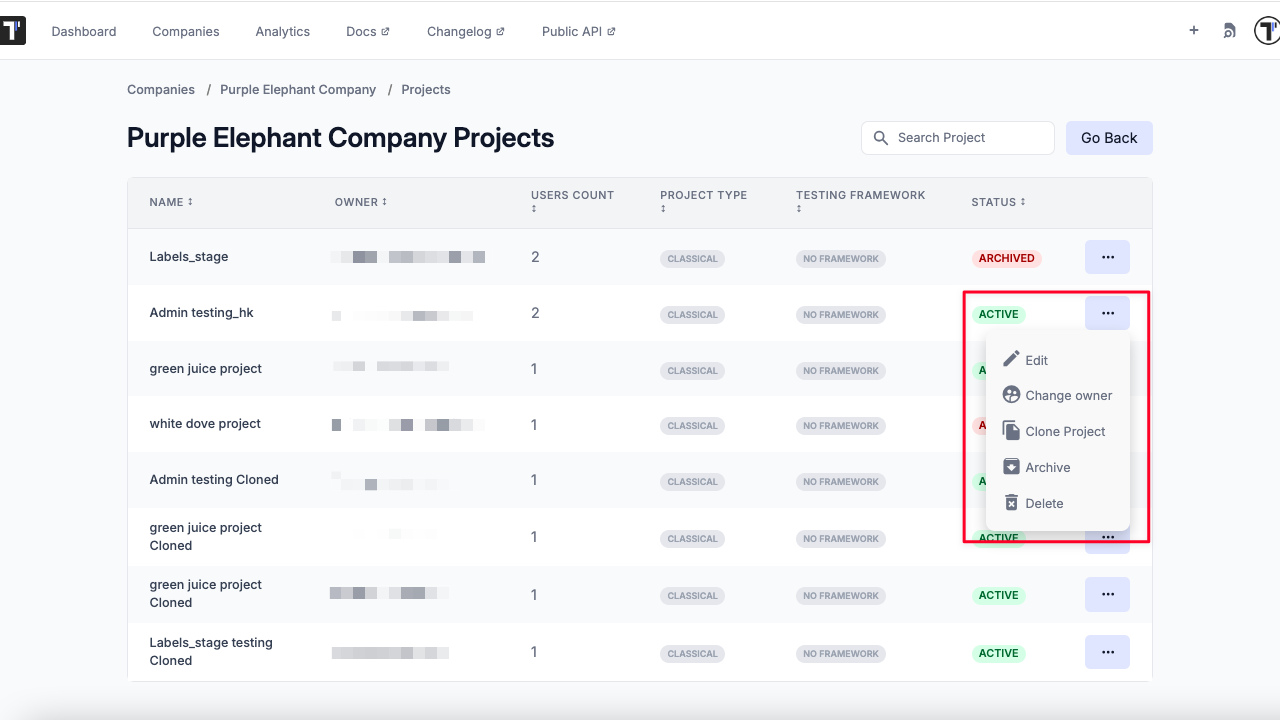
Project Actions
Section titled “Project Actions”Next to each project in the list, you’ll find a three-dot (⋮) menu. You can perform the following actions:
- Edit: Change the project’s name.
- Change Owner: Assign a new owner from the list.
- Clone: Duplicate the project along with all test data (excluding user access).
- Archive/Unarchive: Archive a project to prevent edits while retaining read-only access. Unarchive when needed.
- Delete: Permanently delete a project. Note: This action is irreversible.
Project Archive
Section titled “Project Archive”There may be completed projects that are not being developed or paused for some reason. So you may need to archive such projects not to mix up current work. In this case the archived project is removed from the Dashboard but still displayed on Company Projects page with Archived status, so it can be easily accessed and restored at any time.
How to Archive Project
Section titled “How to Archive Project”- Go to Company page.
- Click on ‘Extra manu’ button.
- Select ‘Projects’ option.
- Click on ‘Extra menu’ button for project that you want to archive.
- Click on ‘Archive’ option.

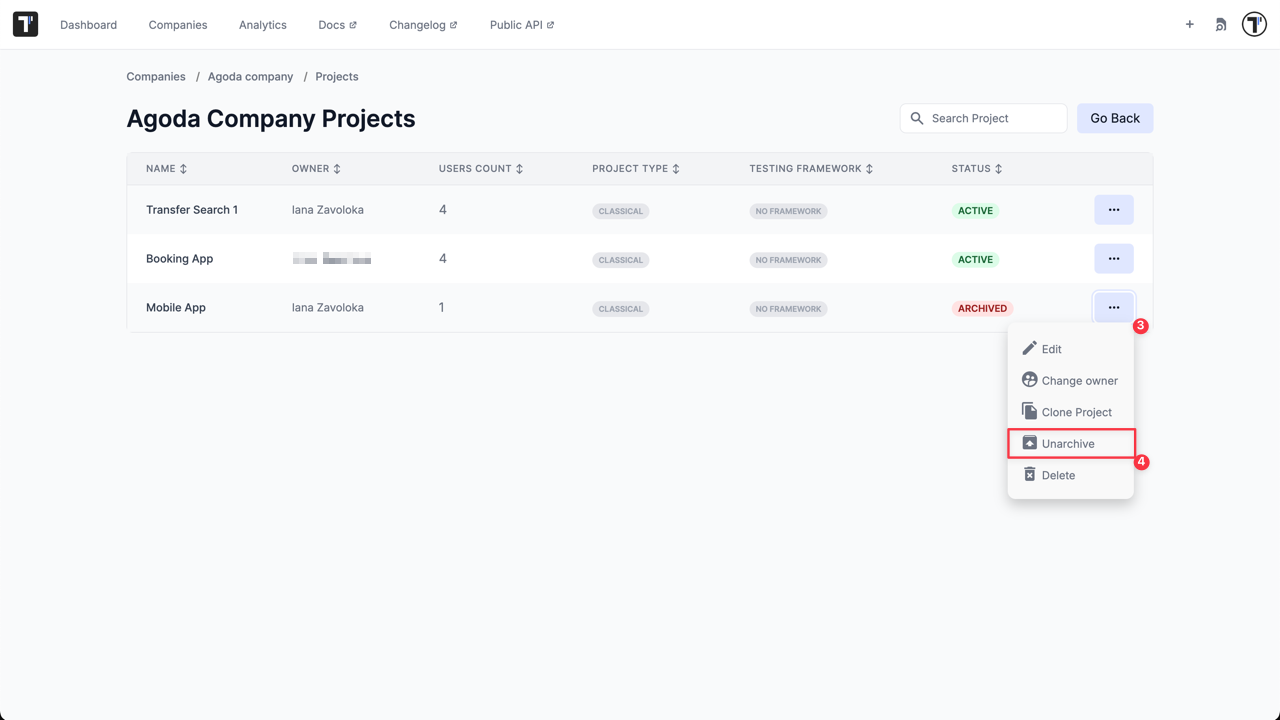
How to Restore Archived Project
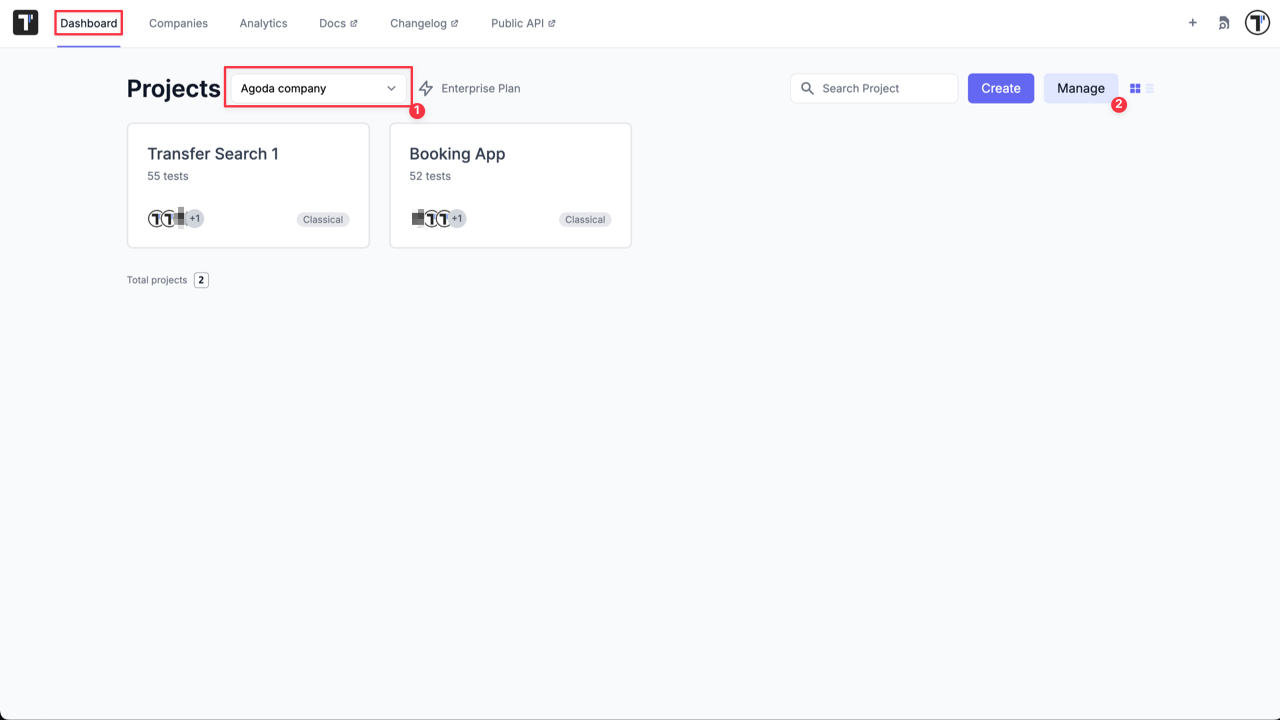
Section titled “How to Restore Archived Project”- Select your company on Dashboard page.
- Click on ‘Manage’ button.
- Click on ‘Extra menu’ button for project with Archived status.
- Click on ‘Unarchive’ option.