WebdriverIO
WebdriverIO Integration with Testomat.io
Section titled “WebdriverIO Integration with Testomat.io”WebdriverIO is an all in one framework for your web app development. It enables you to run small and lightweight component tests as well as running e2e test scenarios in the browser or on a mobile device. This guarantees that you to do the testing in an environment used by your users.
This guide demonstrates how to integrate WebdriverIO with Testomat.io for efficient test management and detailed reporting.
Importing WebdriverIO Tests
Section titled “Importing WebdriverIO Tests”You can easily import your WebdriverIO tests into Testomat.io on the Imports page.
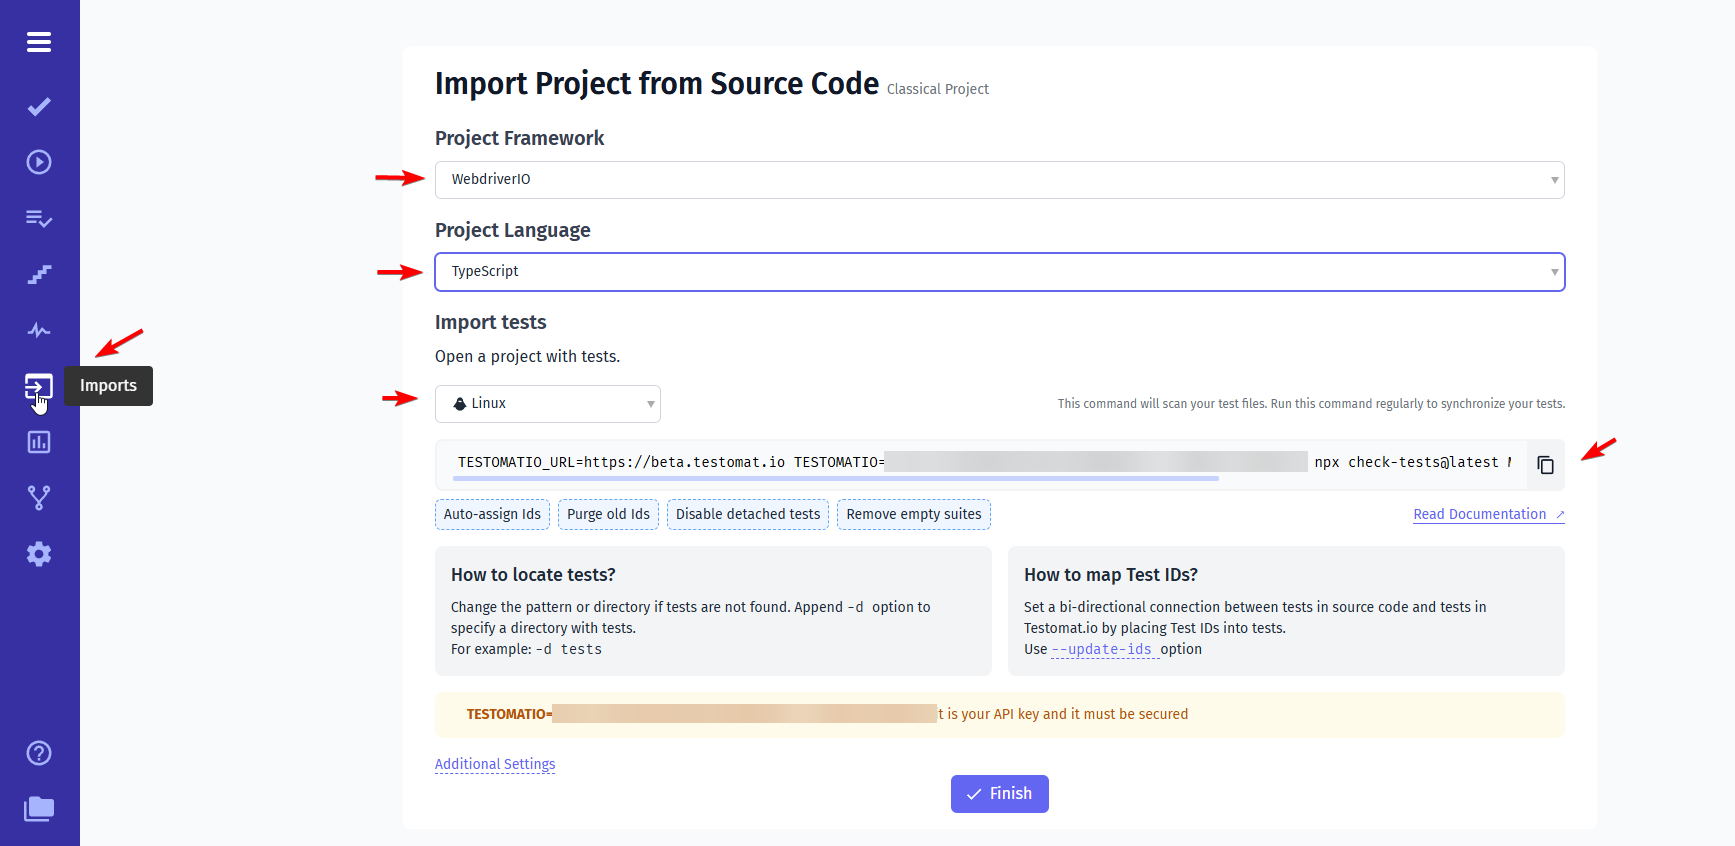
Steps to Import Your Tests
Section titled “Steps to Import Your Tests”- Select Framework: In the
Project Frameworkfield, chooseWebDriver. - Choose Language: Select your project’s language from the
Project Languagefield:JavaScript,TypeScript. - Select OS: Choose your device’s OS (
Mac,Linux, orWindows) underImport tests.
Additional options to customize your import:
Section titled “Additional options to customize your import:”- Auto-assign IDs: Automatically assigns unique IDs to each test.
- Purge Old IDs: Removes previously set IDs from tests.
- Disable Detached Tests: Disables tests marked as detached.
- Prefer Source Code Structure: Maintains your project’s source code structure in the test hierarchy.
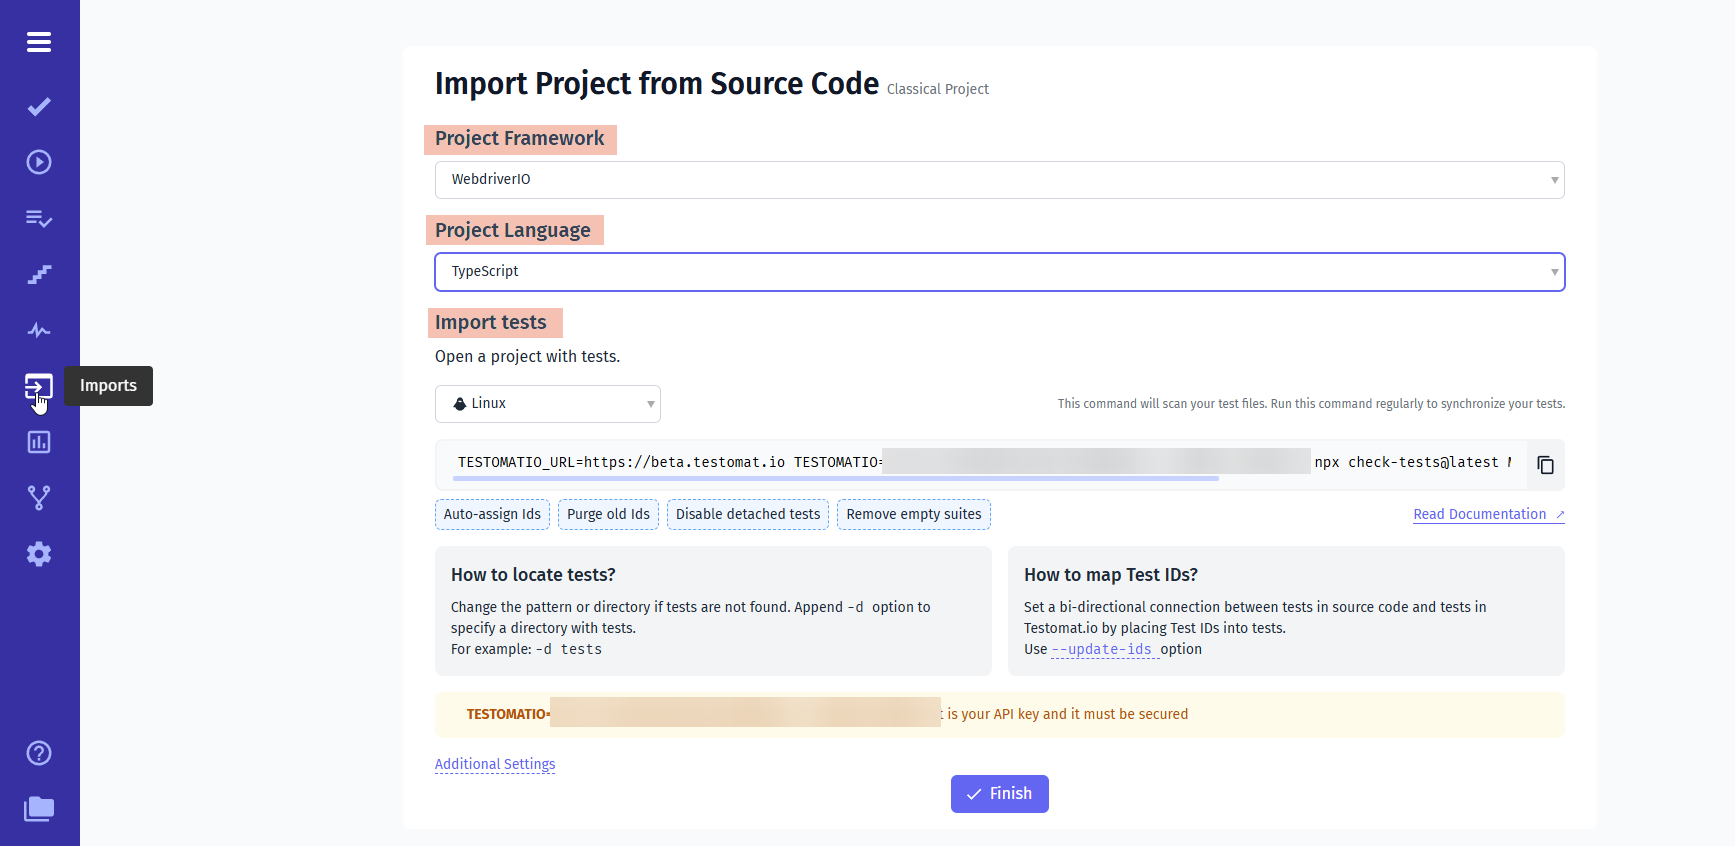
After setting up, copy the generated command and run it in your project’s terminal. Your tests will then appear on the Tests page in Testomat.io.
Example: Try importing using the Testomat.io WebdriverIO example project.
For more details, refer to the Import Tests from Source Code documentation.
Importing Parameterized Tests
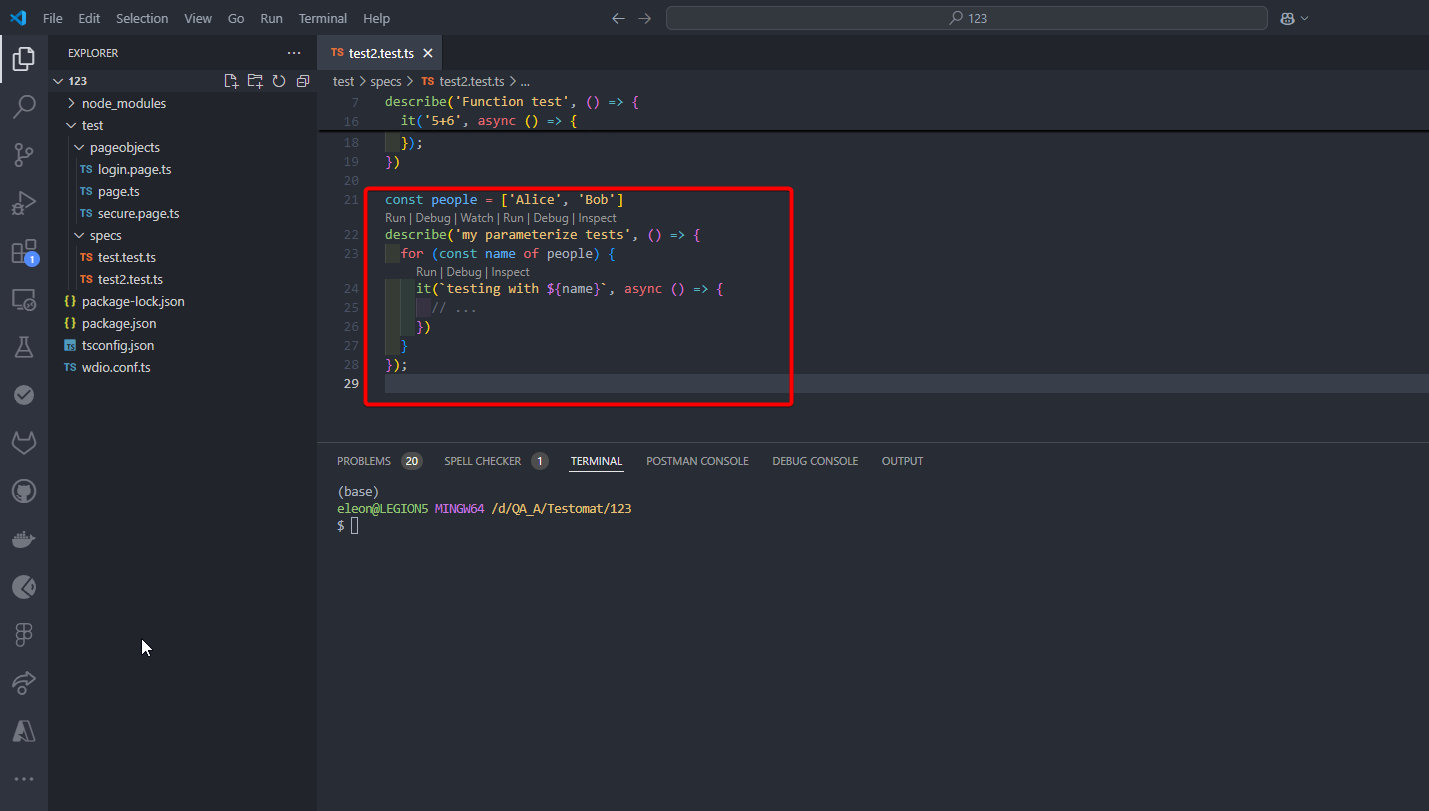
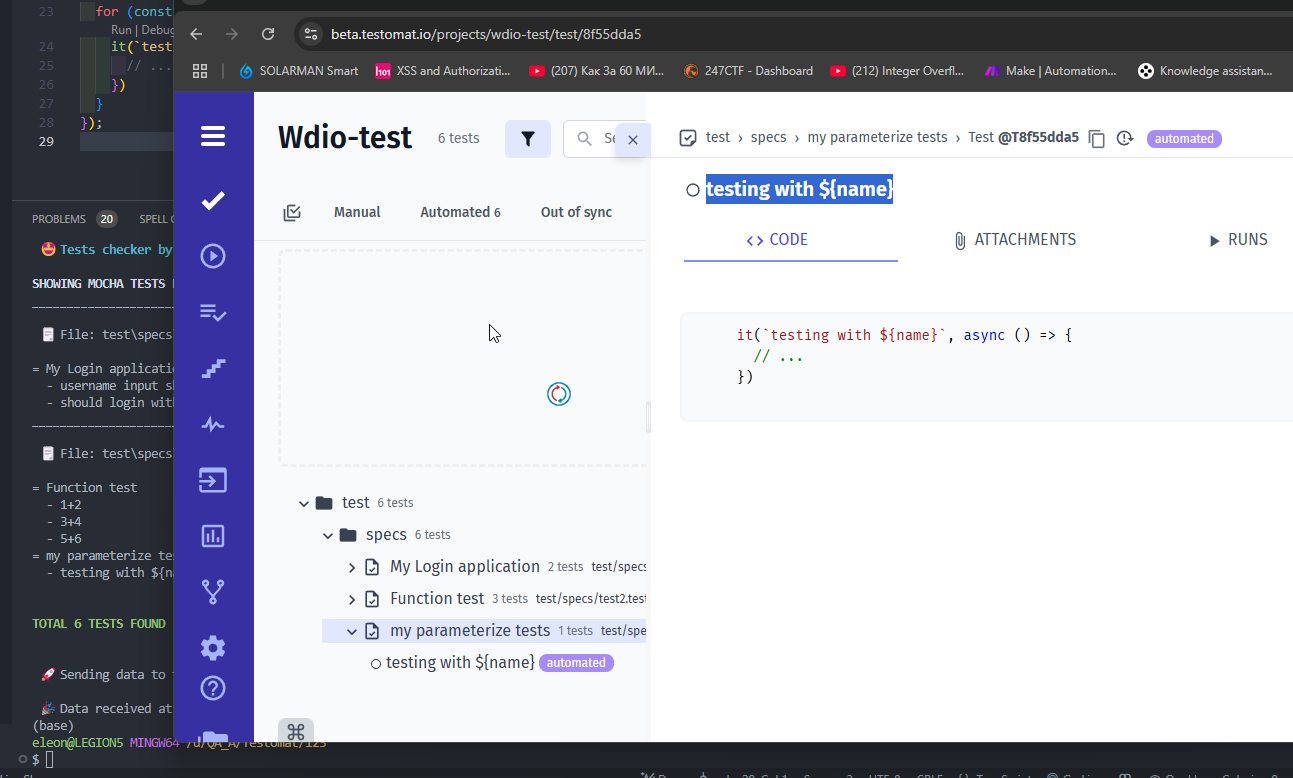
Section titled “Importing Parameterized Tests”When importing parameterized tests, include variable parameters in test names using template literals for better clarity in Testomat.io.
Example Code:
const people = ['Alice', 'Bob'];describe('my tests', () => { for (const name of people) { it(`testing with ${name}`, async () => { // ... }); }});Avoid string concatenation like title + name. Instead, use template literals to make test names dynamic and clear.
This test will be imported with its placeholder in the name, and results will display parameter values in Testomat.io reports.
Auto-assigning Test IDs
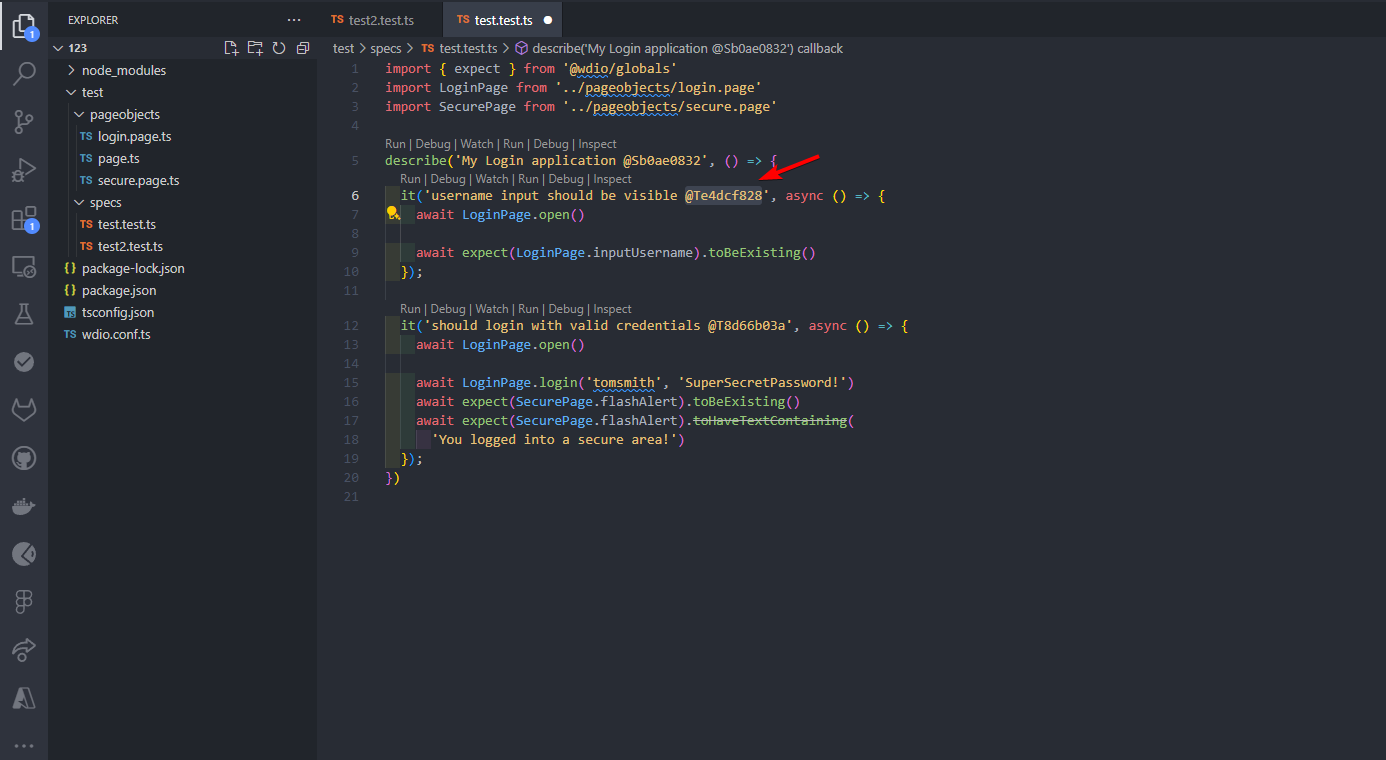
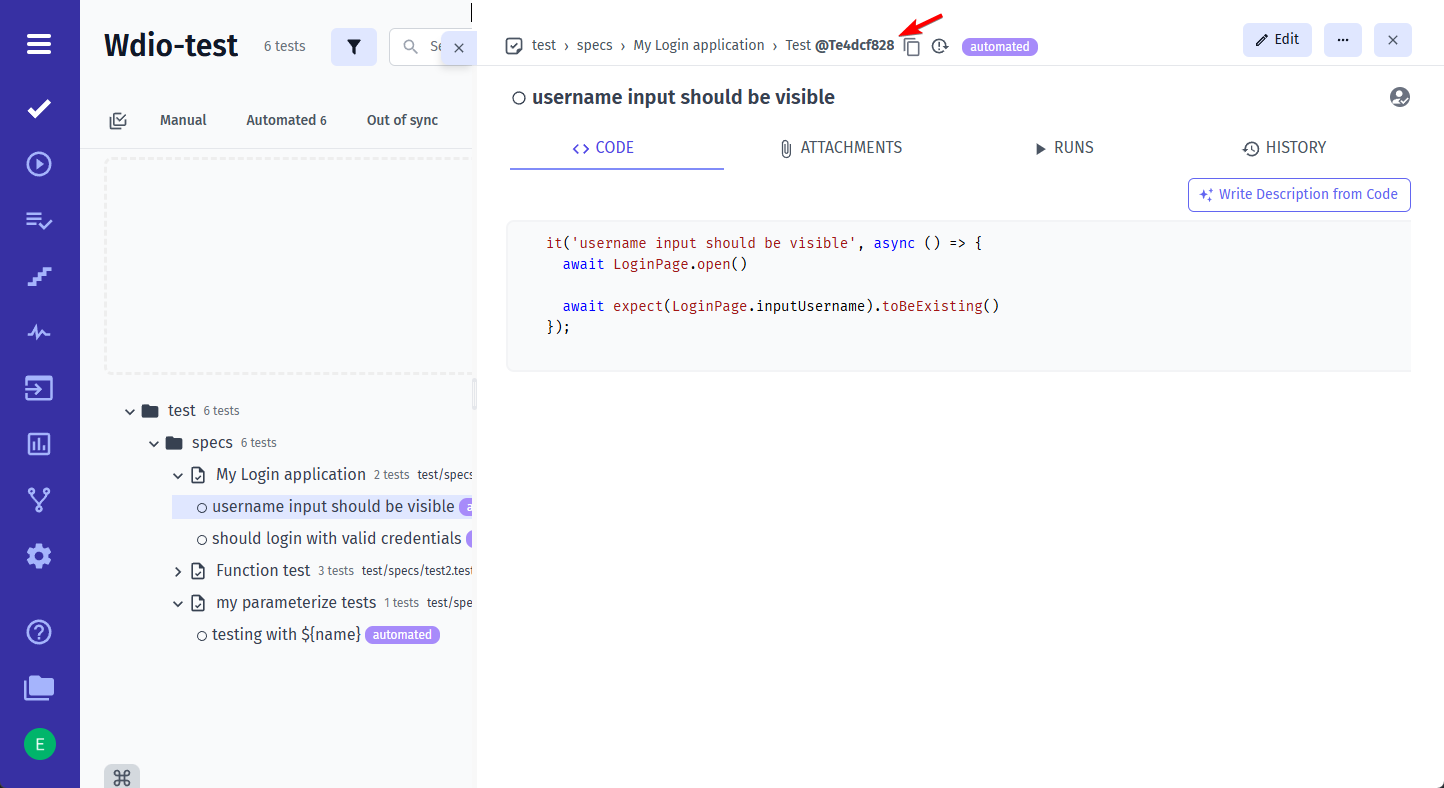
Section titled “Auto-assigning Test IDs”When importing tests, enable Auto-assign Ids (--update-ids) to track changes without duplicating tests when scaling your project. Without this, CI processes may not launch correctly.
it('user should be fine @T12345678', () => { it('user should be fine', () => { expect(user).toBe('fine');});IDs will be automatically assigned in your code and appear in Testomat.io.
Reporting WebdriverIO Tests
Section titled “Reporting WebdriverIO Tests”WebdriverIO allows you to leverage various types of reports, including screenshots, to improve error detection and debugging. Here’s how you can enhance your testing workflow:
Visual Reports with Timeline Reporter
Section titled “Visual Reports with Timeline Reporter”Tools like Timeline Reporter provide a visual representation of your test results. These reports can include screenshots, which help analyze failures and identify issues quickly.
Learn more about Timeline Reporter
Visual Testing with @wdio/visual-service
Section titled “Visual Testing with @wdio/visual-service”WebdriverIO supports visual testing via the @wdio/visual-service plugin. This enables you to capture, save, and compare screenshots of elements, pages, or screens with baseline images. It is an excellent way to detect visual regressions in your application.
Learn more about Visual Testing
Capturing Screenshots
Section titled “Capturing Screenshots”WebdriverIO provides built-in methods such as browser.saveScreenshot() to capture the current state of a webpage or specific elements. These screenshots can be incorporated into your reporting tools for a comprehensive debugging experience.
Learn more about Screenshot
afterTest: async function (test, context, { error, result, duration, passed, retries }) { if (error) { await browser.takeScreenshot(); } }By integrating these features into your WebdriverIO setup, you can enhance the efficiency of error detection and resolution, leading to more robust and reliable tests.
Artifacts in WebdriverIO with Testomat.io Reporter and S3
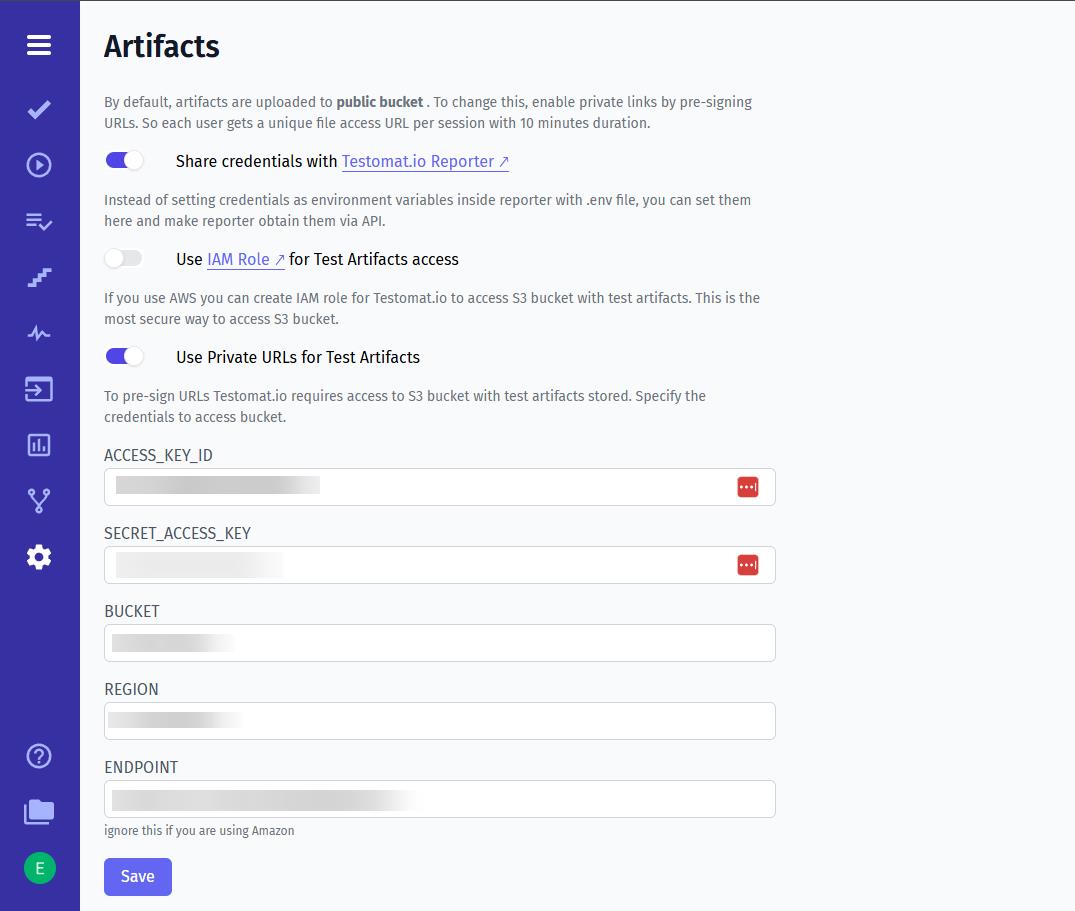
Section titled “Artifacts in WebdriverIO with Testomat.io Reporter and S3”Artifacts like screenshots, videos, and logs are essential for debugging. With the Testomat.io reporter, these artifacts can be automatically uploaded to an S3 bucket and linked to test cases in the Testomat.io dashboard. Read more about Artifacts
- Configure Artifacts: Enable options in Playwright (e.g., recordVideo, screenshot, logs).
- Setup S3 and Testomat.io Reporter: Link your S3 bucket with Testomat.io for smooth integration.
- View and Debug: Access artifacts in Testomat.io for easy downloading and analysis.
Steps to Configure Artifacts:
Section titled “Steps to Configure Artifacts:”- Enable options in WebdriverIO (e.g.,
takeScreenshot,captureLogs). - Link your S3 bucket with Testomat.io.
- Access artifacts in Testomat.io for easy debugging.
Code Example for Screenshots:
await driver.takeScreenshot().then((image) => { require('fs').writeFileSync('screenshot.png', image, 'base64');});Steps to Enable:
Section titled “Steps to Enable:”- Set up an S3 Bucket (See Documentation).
- Enable third-party cookies in your browser.
- Run your tests.
- In
Test Run, click the test, then select the trace log to open.
Parallel Execution Reporting
Section titled “Parallel Execution Reporting”Report parallel test executions to the same Testomat.io run by assigning a shared title and setting the TESTOMATIO_SHARED_RUN environment variable.
Example:
TESTOMATIO_TITLE="Parallel Test Run ${GIT_COMMIT}" TESTOMATIO_SHARED_RUN=1 <actual run command>To extend the shared run timeout (default: 20 minutes), use the TESTOMATIO_SHARED_RUN_TIMEOUT variable.
Example:
TESTOMATIO_SHARED_RUN_TIMEOUT=120 TESTOMATIO_SHARED_RUN=1 <actual run command>We strongly recommend to use Testomat.io cli to run your WebdriverIO tests in parallel mode, it will handle each worker/process automatically.
npx @testomatio/reporter run 'npx wdio wdio.conf.js'
For more details, refer to the Testomat.io cli docs and the WebdriverIO guide.
---
This guide outlines the process of integrating WebdriverIO with Testomat.io for effective test management and reporting. For more information, visit the [Testomat.io Documentation](https://docs.testomat.io/).