Microsoft Entra ID (formerly Azure AD)
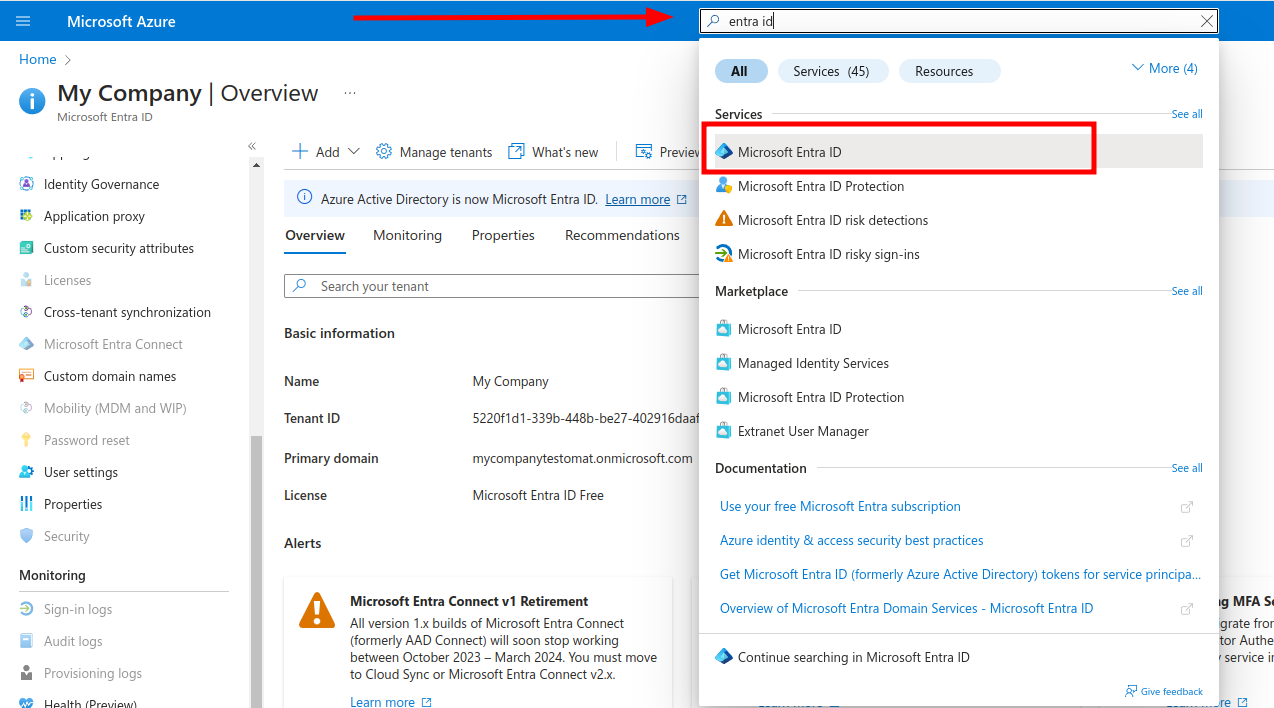
Open Azure portal and search for Entra ID service:
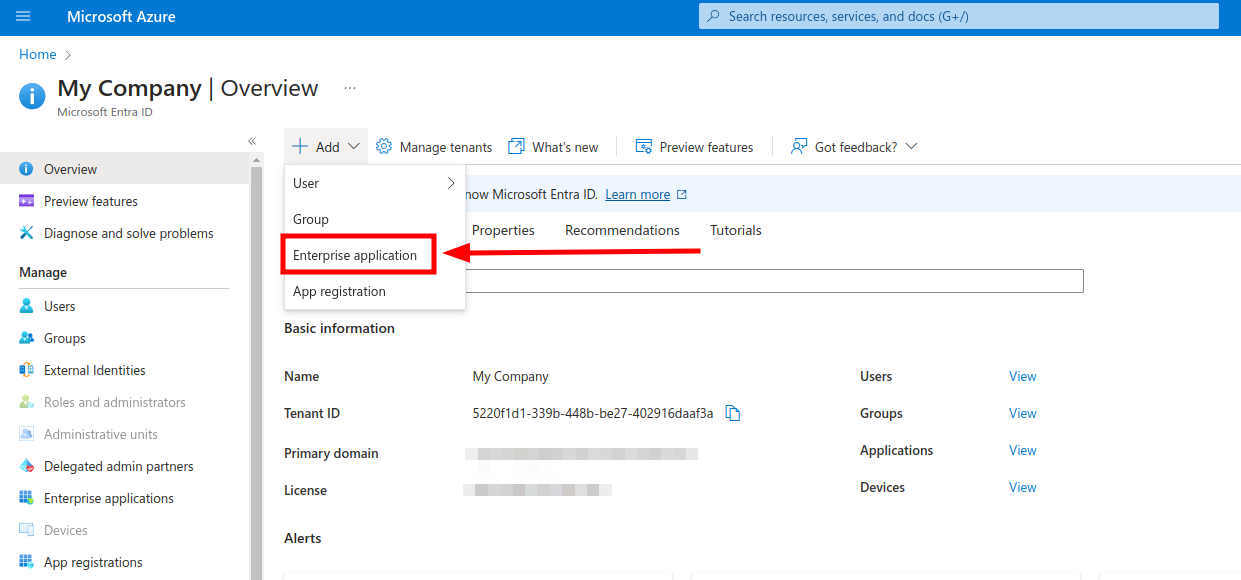
Add new Enterprise application
On the next screen create a new Application
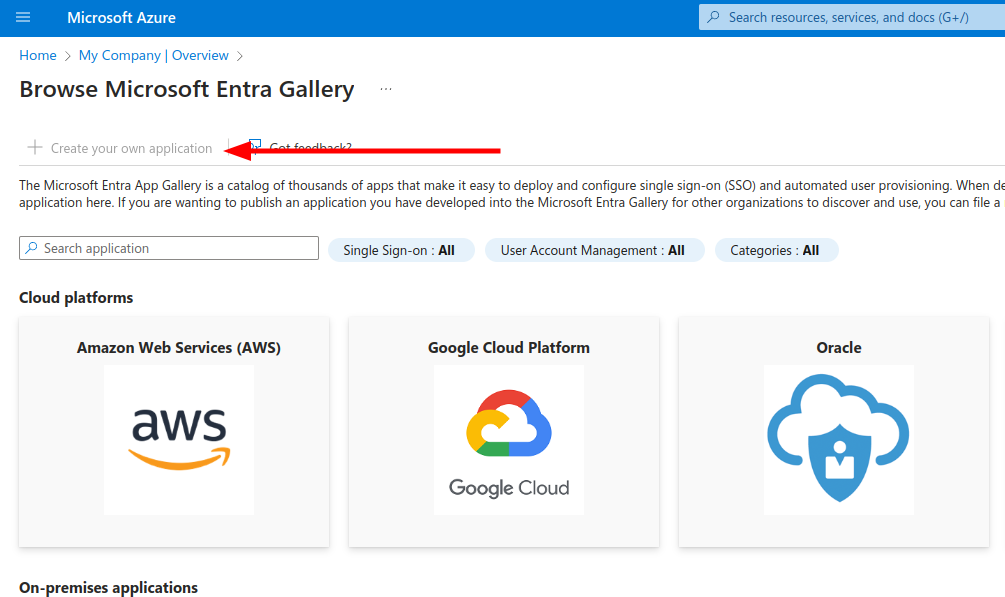
Enter the “Testomat” as the name of integration, select Integrate any other application you don’t find in the gallery (Non-gallery) and click Create.
Select Single Sign On on the left and click “SAML” to configure connection settings.
On the Basic SAML Configuration fill in following values
Identifier (Entity ID)→https://app.testomat.io/users/saml/metadataReply URL (ACS URL)→https://app.testomat.io/users/saml/authSign on URL→https://app.testomat.io/users/sso
Save this form. Now edit Attributes & Claims.
Remove default attributes.
Add the following attributes that will be sent to Testomat.io:
http://schemas.xmlsoap.org/ws/2005/05/identity/claims/emailaddress→emailhttp://schemas.xmlsoap.org/ws/2005/05/identity/claims/name→namehttp://schemas.xmlsoap.org/ws/2005/05/identity/claims/givenname→first_namehttp://schemas.xmlsoap.org/ws/2005/05/identity/claims/surname→last_name
Close the dialog.
On SAML Signing Certificate card download Certificate (Base 64).
On Set up Testomat card copy following values
- Login URL
- Azure ID Idenitifier
Add Users to application on the Users and Groups section in sidebar. This users will be able to log in to Testomat.io via SAML.
Now, open Company page in Testomat.io and select Single Sign On options
If you don’t see Single Sign On option, check that you are an owner of this company
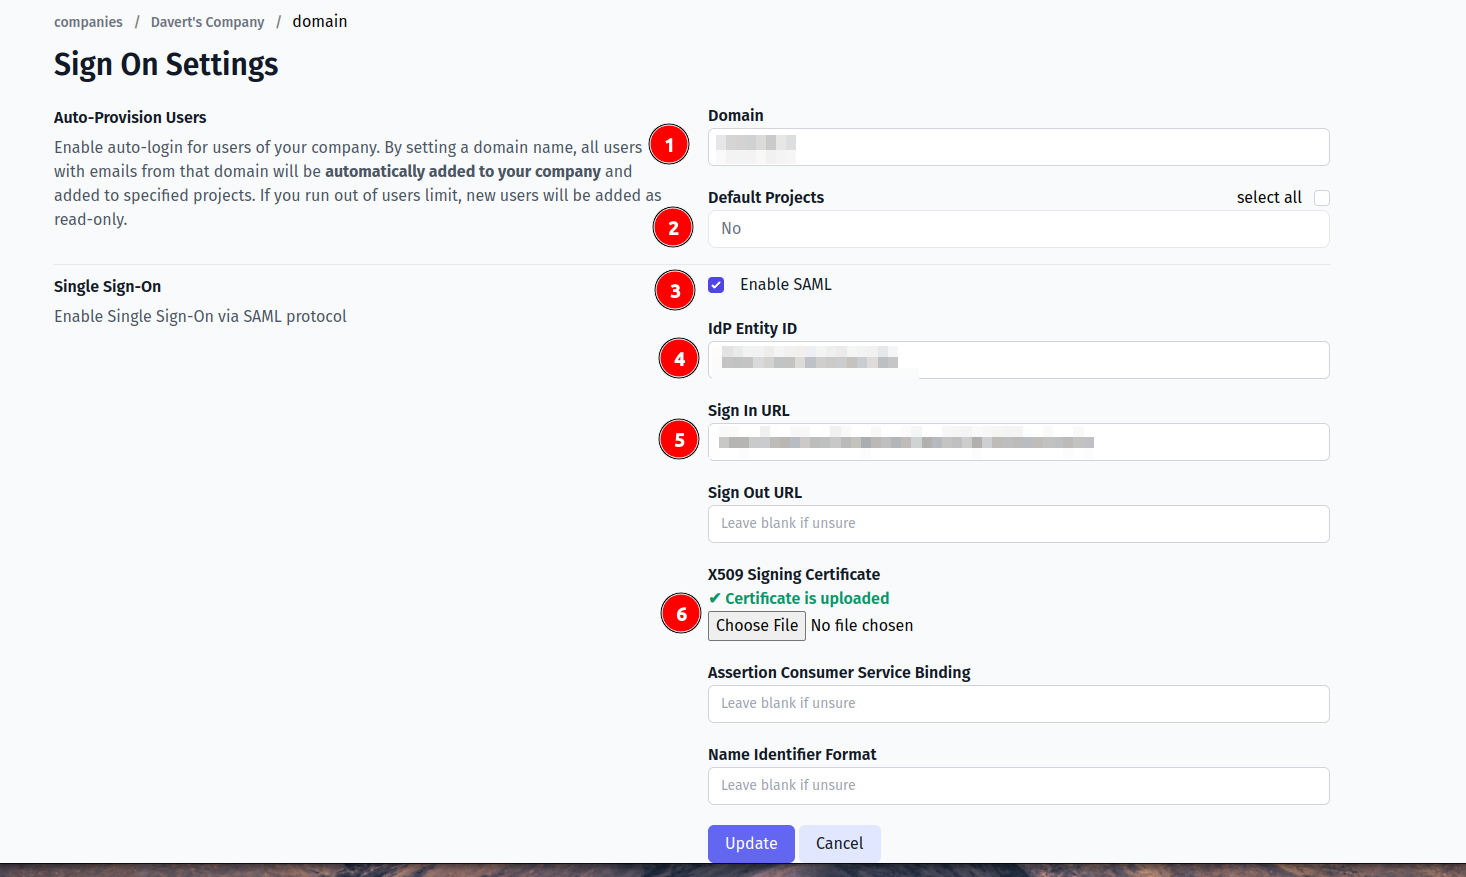
Fill in the form:
- Company domain. This is required to identify SSO connection by user’s email. Example:
mycompany.com. - Default Projects. Select projects to new users will be added to (optional).
- Enable SAML:
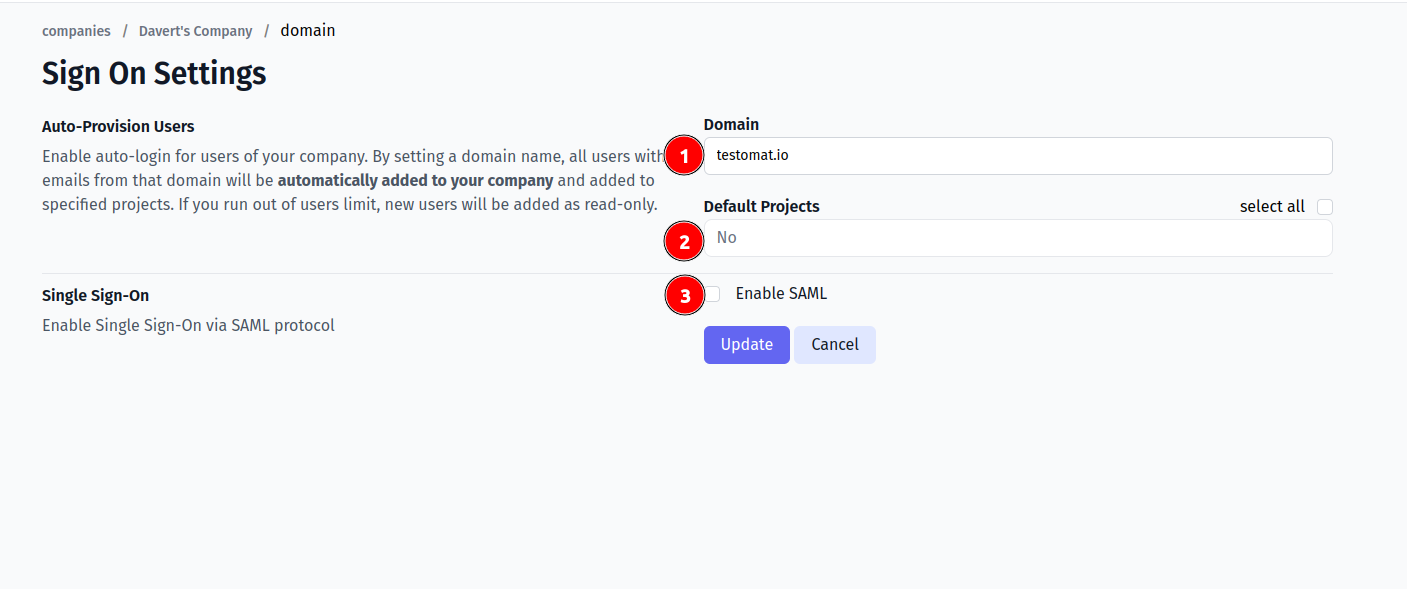
- Set Azure ID Idenitifier (or Azure Entra ID) from Microsoft Entra ID (formerly Azure AD) as IdP Entity ID. Should be like
https://sts.windows.net/.../(ensure it ends with/) - Set Login URL from Microsoft Entra ID as Sign In URL
- Upload certificate.
- Set
Authn Contextby selecting “Password Protected Transport”. The actual value should become:
urn:oasis:names:tc:SAML:2.0:ac:classes:PasswordProtectedTransport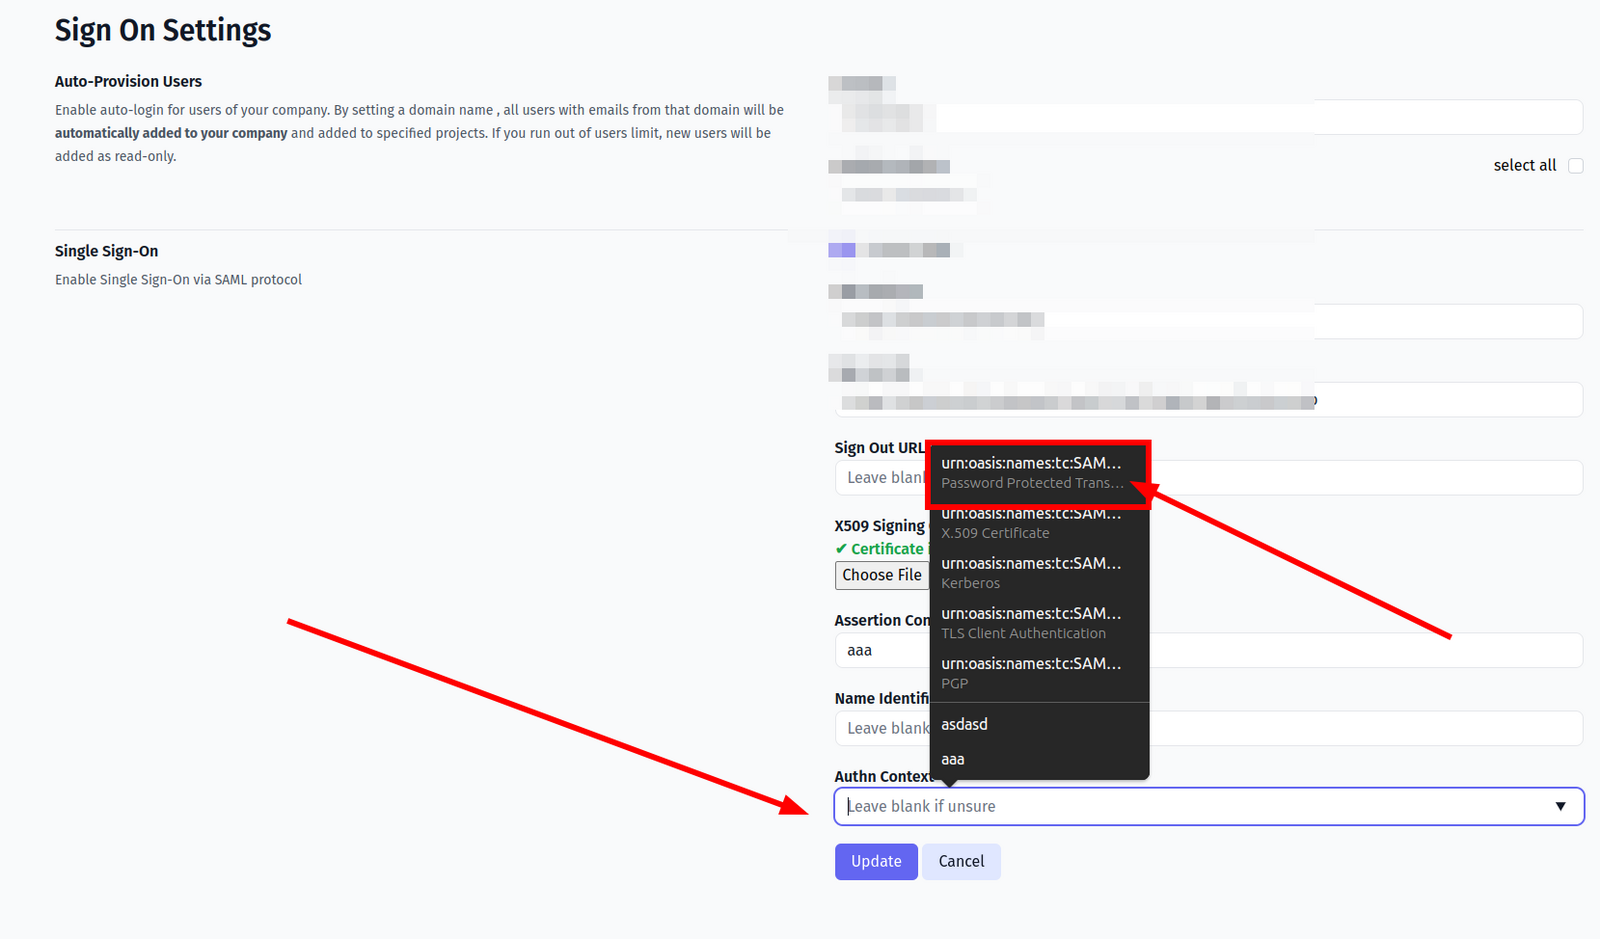
And save the form.
Now, use any assigned user from Microsoft Entra ID (formerly Azure AD) to Log In into Testomat.io. Select “SSO” on the Sign In page, enter the email, and if everything is correct user will get inside Testomat.io, assigned to your company and added to default projects.
In case user sees 404 page on Microsoft Entra ID (formerly Azure AD), check that Single Sign-On URL was correctly set.