Azure Pipelines
To connect Azure DevOps to Testomat.io, first you need to create an Private Access Token (PAT). Learn how to create a PAT following the link - Create PAT.
And follow the instructions below:
- Create a PAT in your Azure DevOps account with permission to Read & Execute Build.

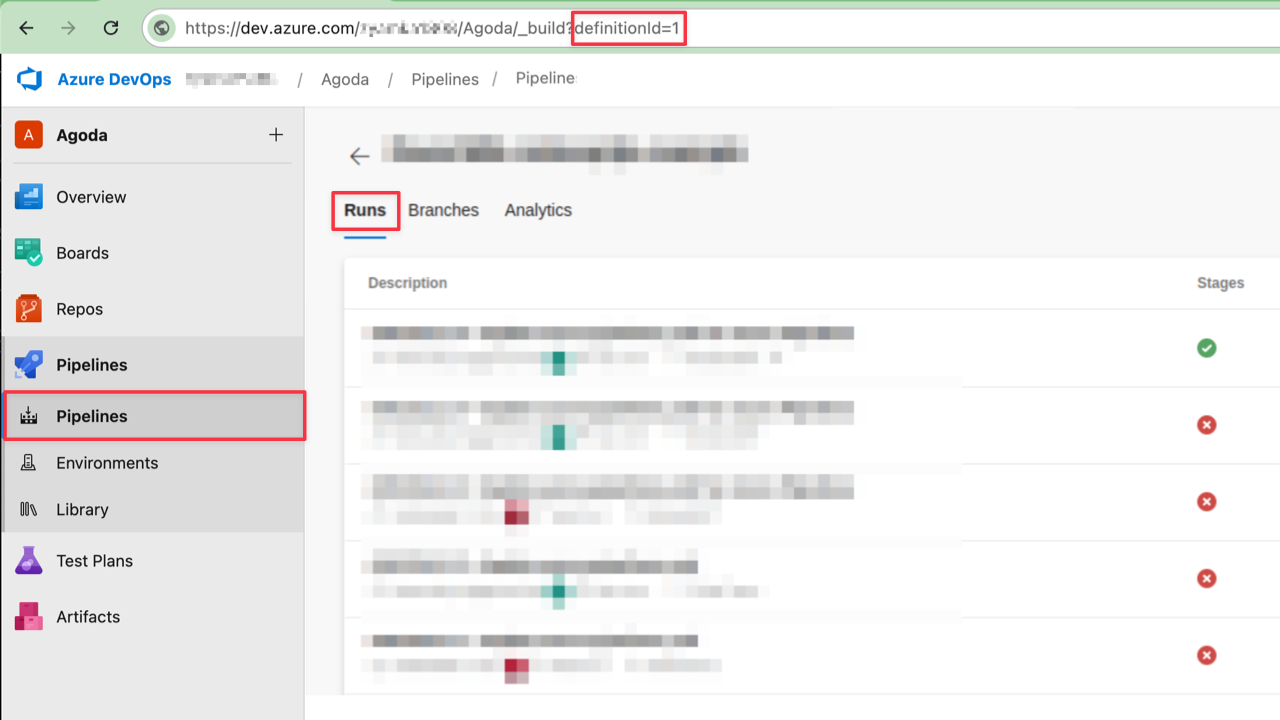
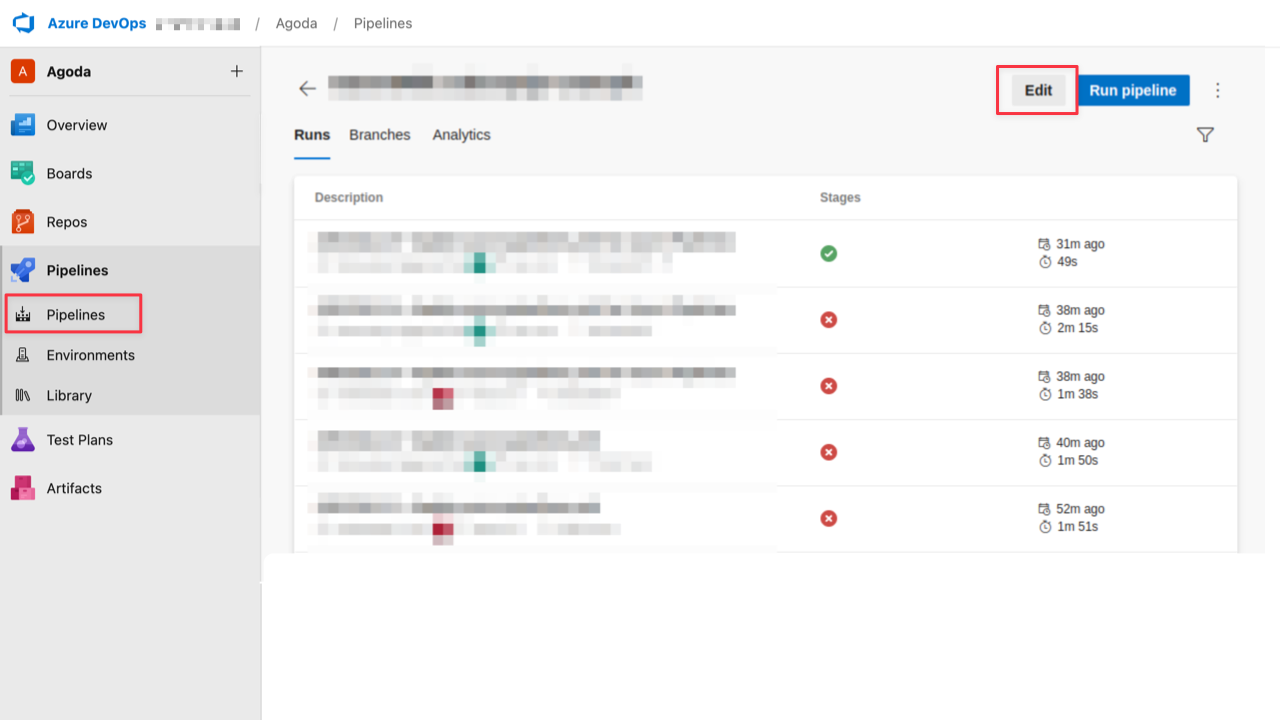
- Obtain the ID of a Pipeline you want to execute. Open a Pipeline and copy its ID from
definitionIdquery parameter. On this screenshot the ID is1.
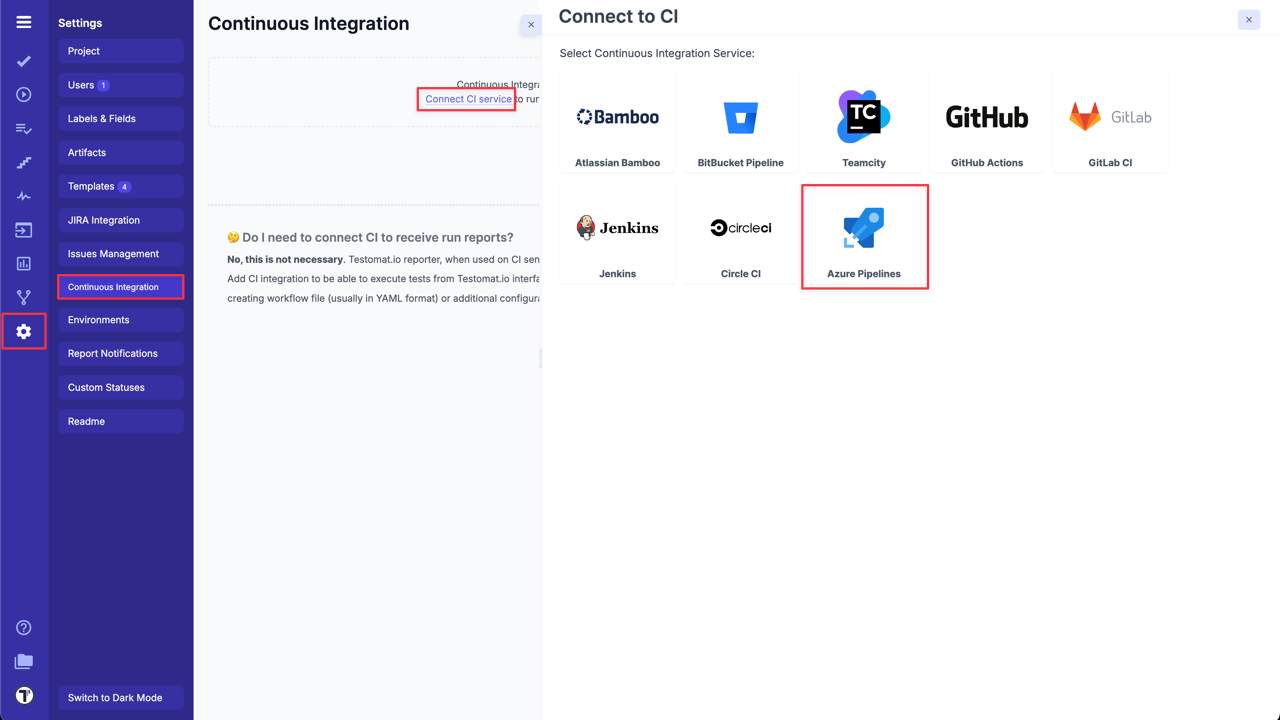
- Create a new CI connection inside your project in Testomat.io: go to ‘Settings’ -> ‘Continuous Integration’ -> click ‘Connect to CI’ select ‘Azure Pipeline’
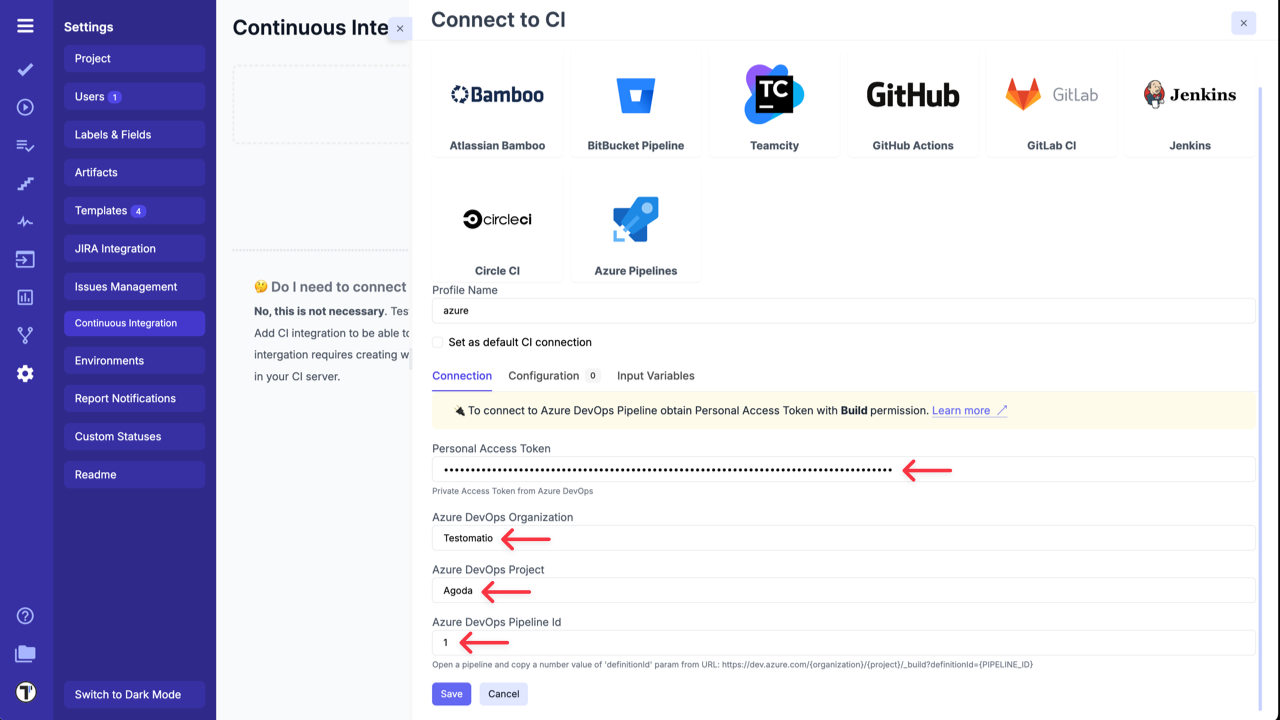
- Enter following details on the ‘Connection’ tab:
Personal Access Token- PAT created, in Azure DevOps during Step 1.Azure DevOps Organization.Azure DevOps Project.Azure DevOps Pipeline Id- open a pipeline and copy a number value ofdefinitionIdparam from URL (in our casedefinitionId = 1).
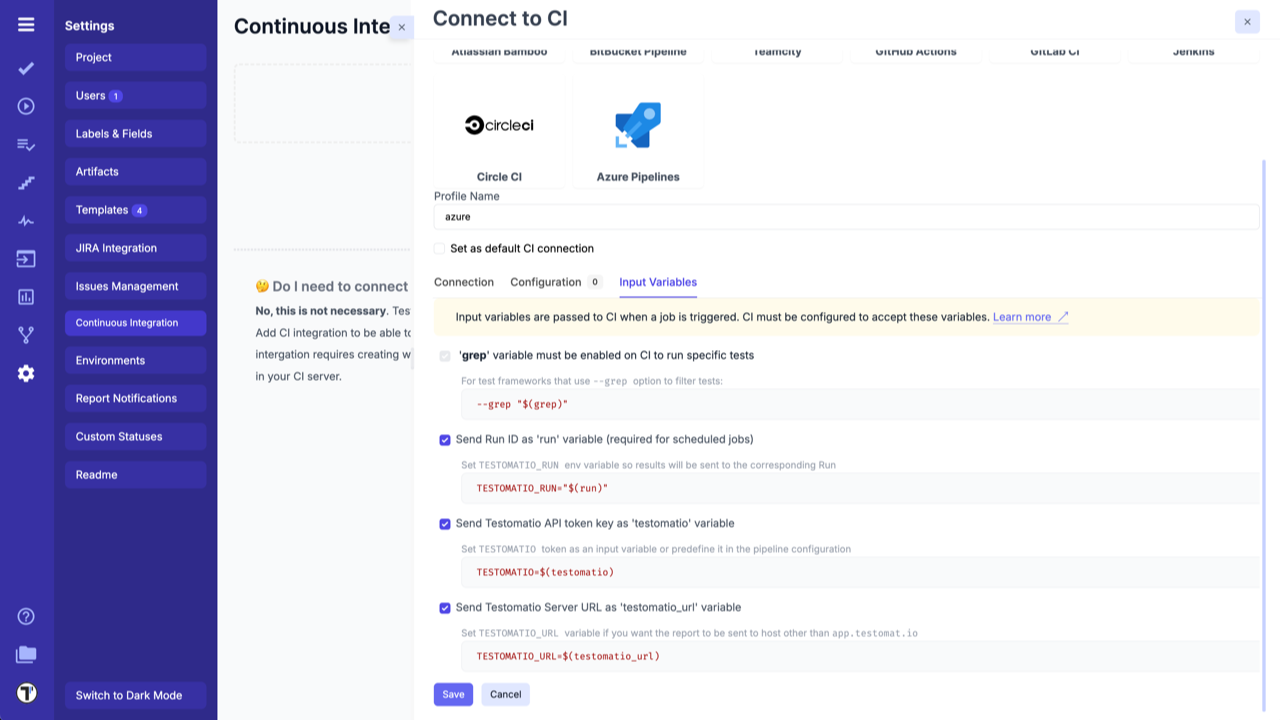
- Switch to ‘Input Variables’ tab and select checkboxes:
- Send Run ID as
runinput (required for scheduled jobs). - Send Testomat.io API key as
testomatioinput. - Send Testomat.io Server URL as
testomatio_urlinput (if you use on-premise setup).
- Save the conection
- Testomat.io will need to send Input Variables into a Pipeline. For this, you need to enable them inside a Pipeline using Azure DevOps UI. Open a Pipeline and edit it.
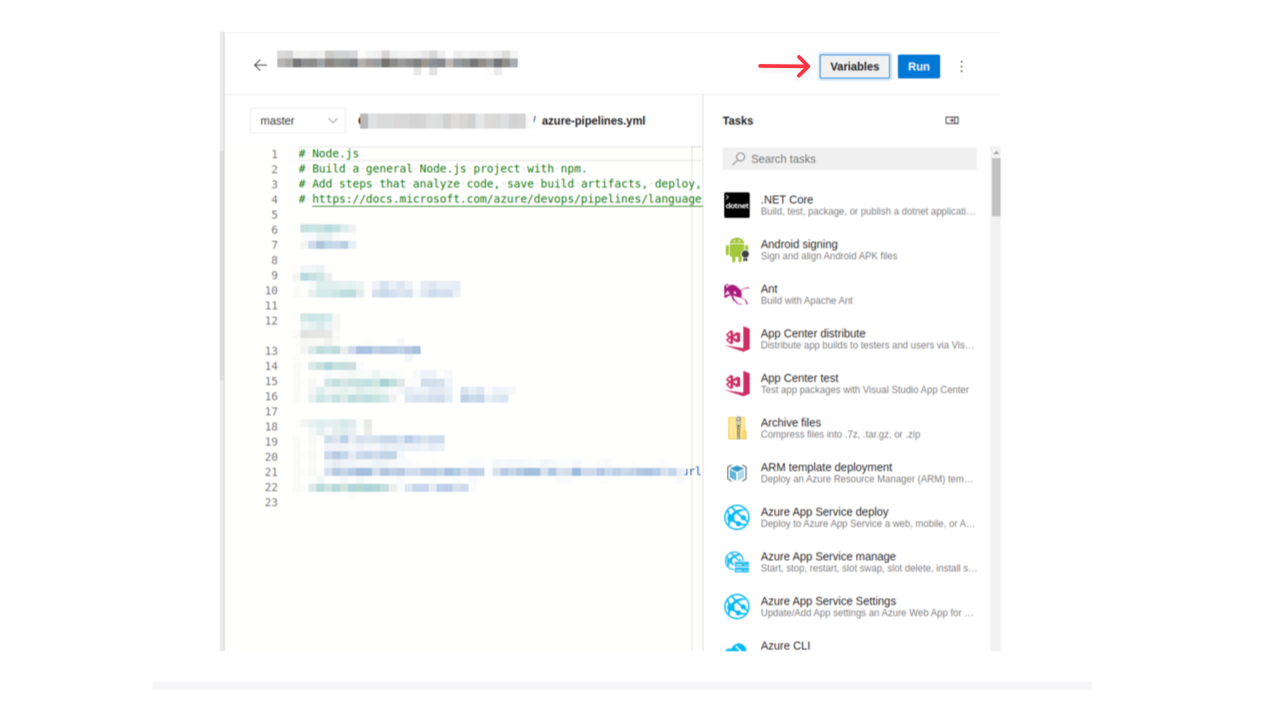
- Click ‘Variables’ button
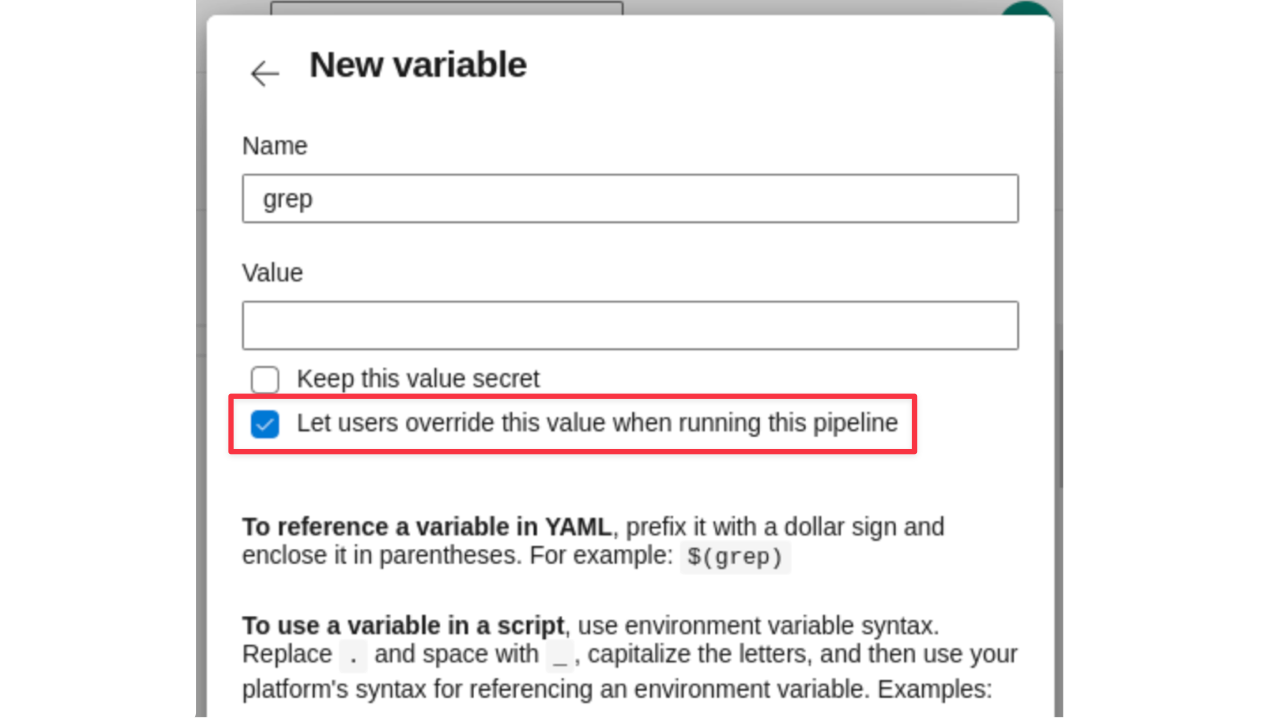
- Create the following variables:
grepruntestomatiotestomatio_url

Do not set defaults to this variable and tick ‘Let users override this value when running this pipeline’ so Testomat.io could set these variables via API request.
- Update the Pipeline to use passed variables. Update the script and pass environment variables to a test runner. Each variable can be accessed as
$(variable). For CodeceptJS this command will look the following way:
- script: | TESTOMATIO=$(testomatio) TESTOMATIO_URL=$(testomatio_url) TESTOMATIO_RUN=$(run) npx codeceptjs run --grep="$(grep)" displayName: 'run tests'You can pass more custom variables into a Pipeline defining them in a Pipeline UI first and listing them in Testomat.io configuration as well. These variables should be set in Azure in the same way as grep. See Environment Configuration to see how they can be configured in Testomat.io.
To specify a different branch to run tests add ref parameter on ‘Configuration’ tab specifying target ref.
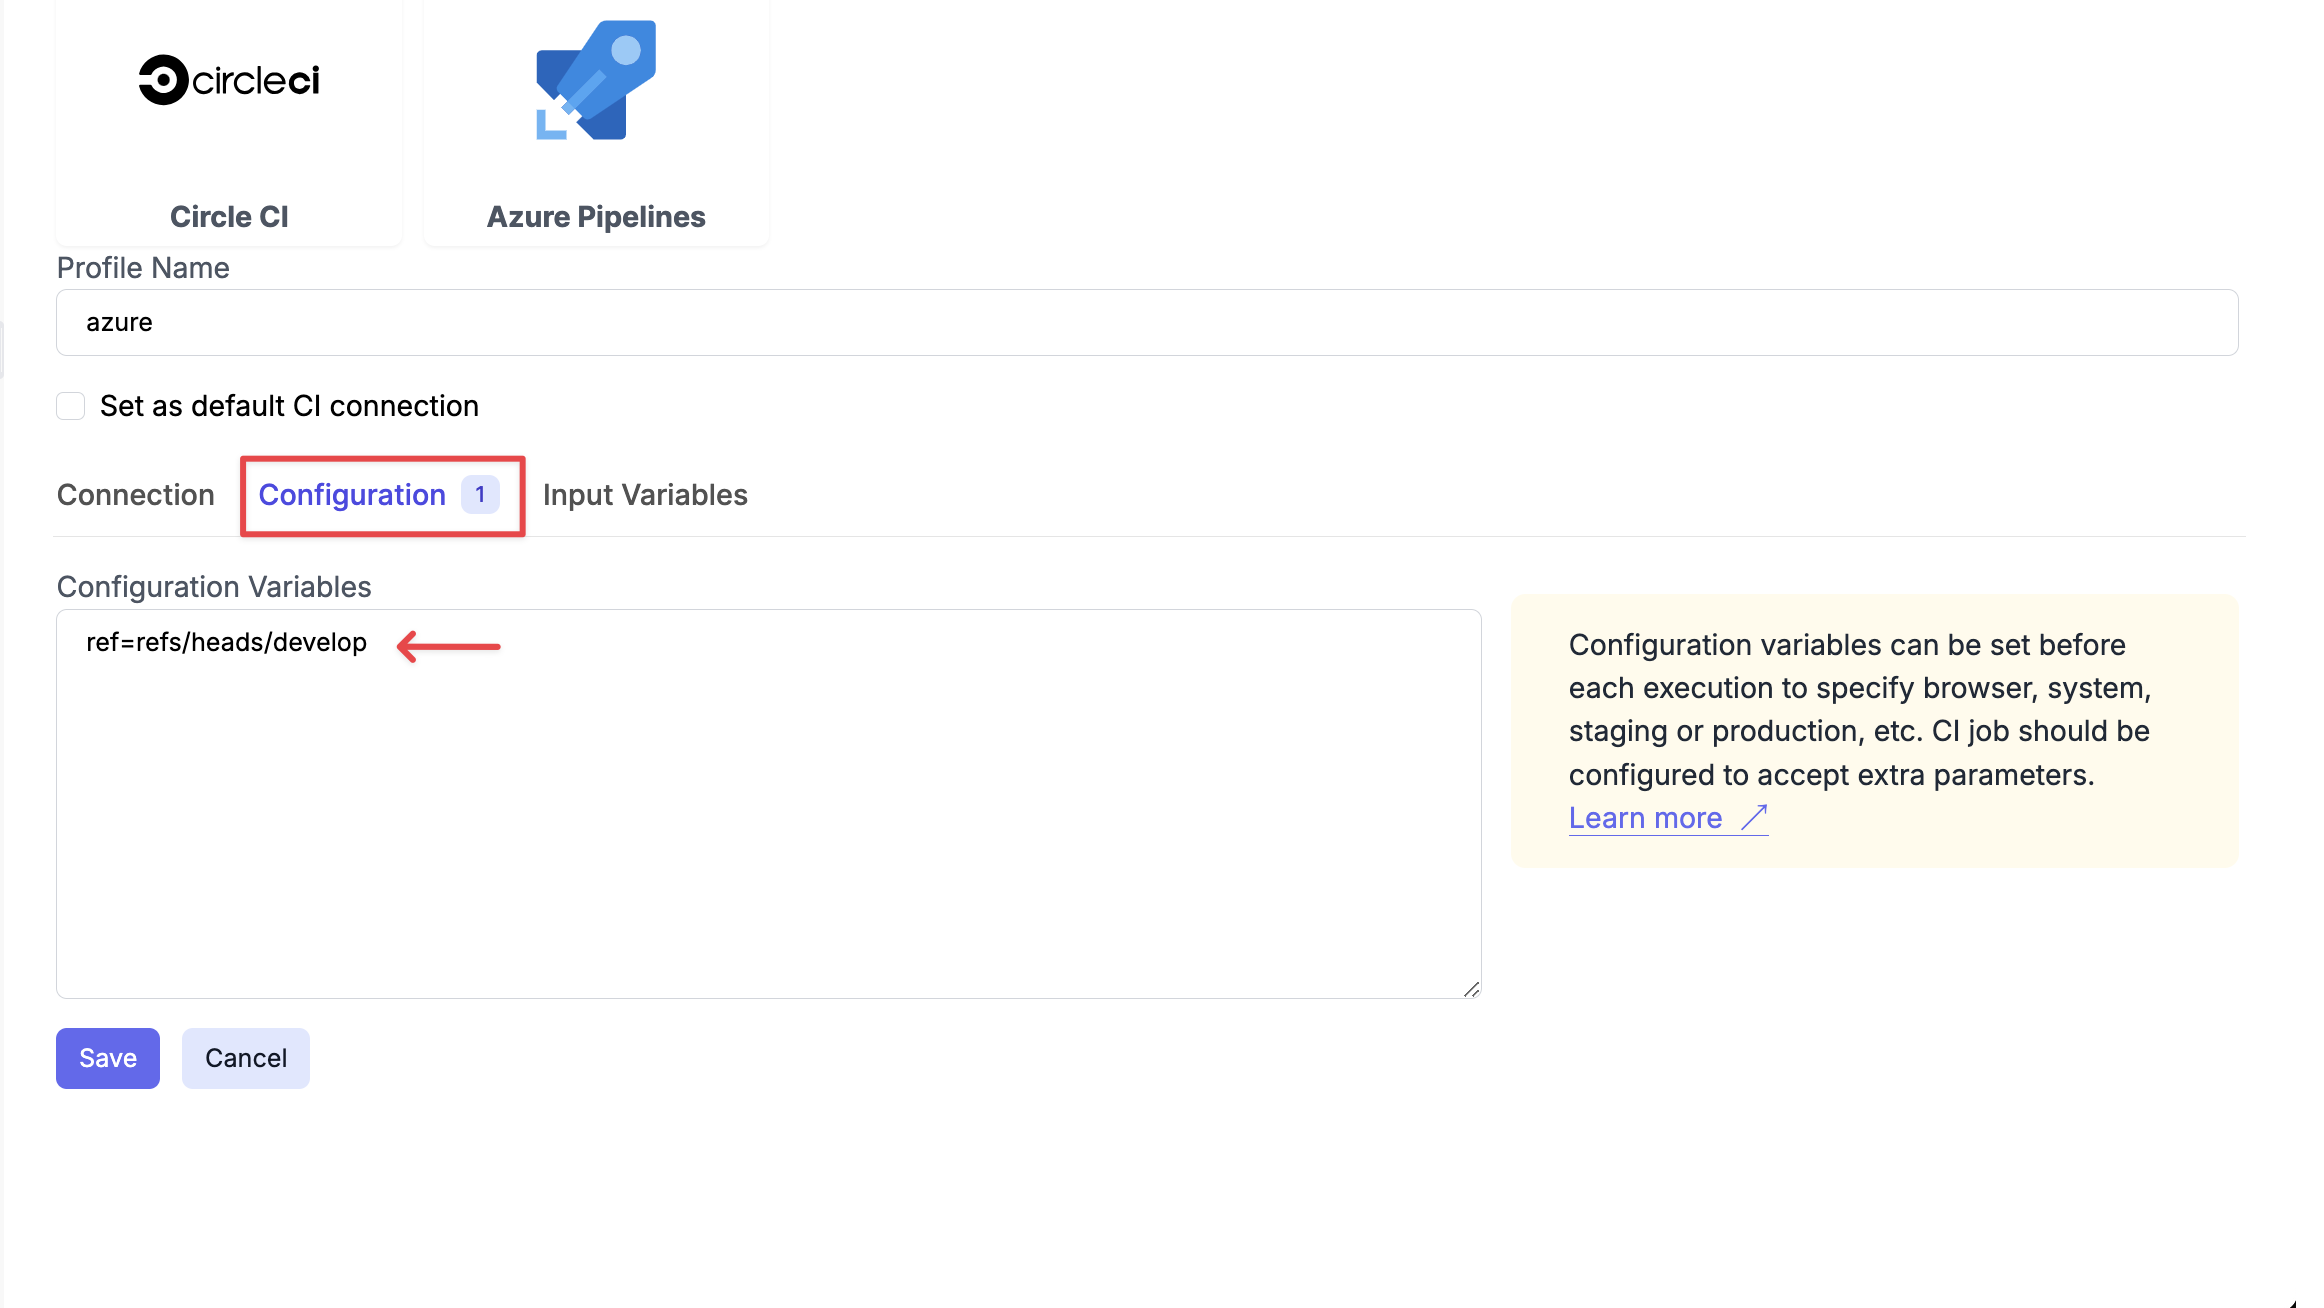
To specify develop branch add this as config parameter:
ref=refs/heads/develop