Project setup and management
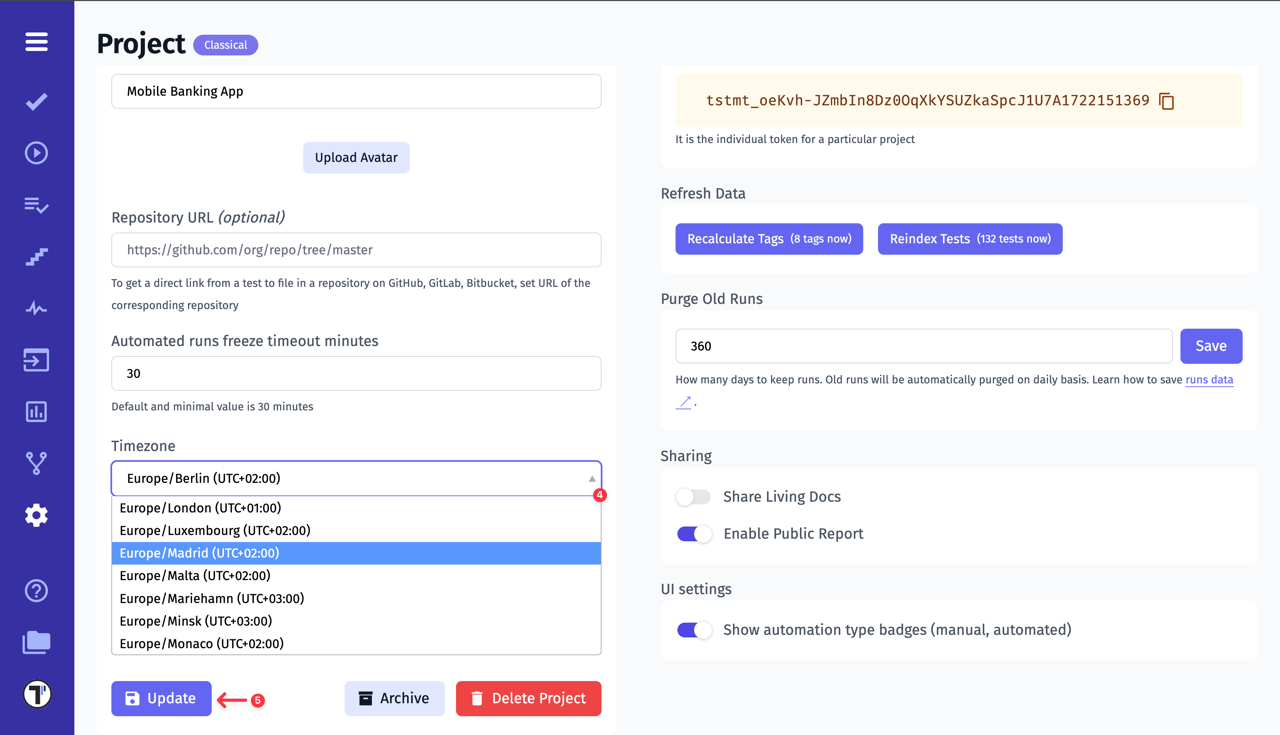
Project Timezone
Section titled “Project Timezone”If you have a multi-national team and everyone is working in different parts of the world, you need to avoid time mismatches. All your actions in the project will be displayed at UTC+00:00 by default. So you need to specify the project time manually.
To do this, follow these steps:
- Click on Settings in the sidebar
- Click the Project button
- Active Administration mode
- Select the required time in the Timezone field
- Click the Update button to save changes
Project Testing Framework & Language
Section titled “Project Testing Framework & Language”A testing framework provides a structured set of rules and best practices to ensure effective and reliable test automation. It helps testers create and manage test cases more efficiently, reducing effort and improving consistency. By using a testing framework, teams can minimize testing time and costs, decrease the risk of errors, and enhance test accuracy.
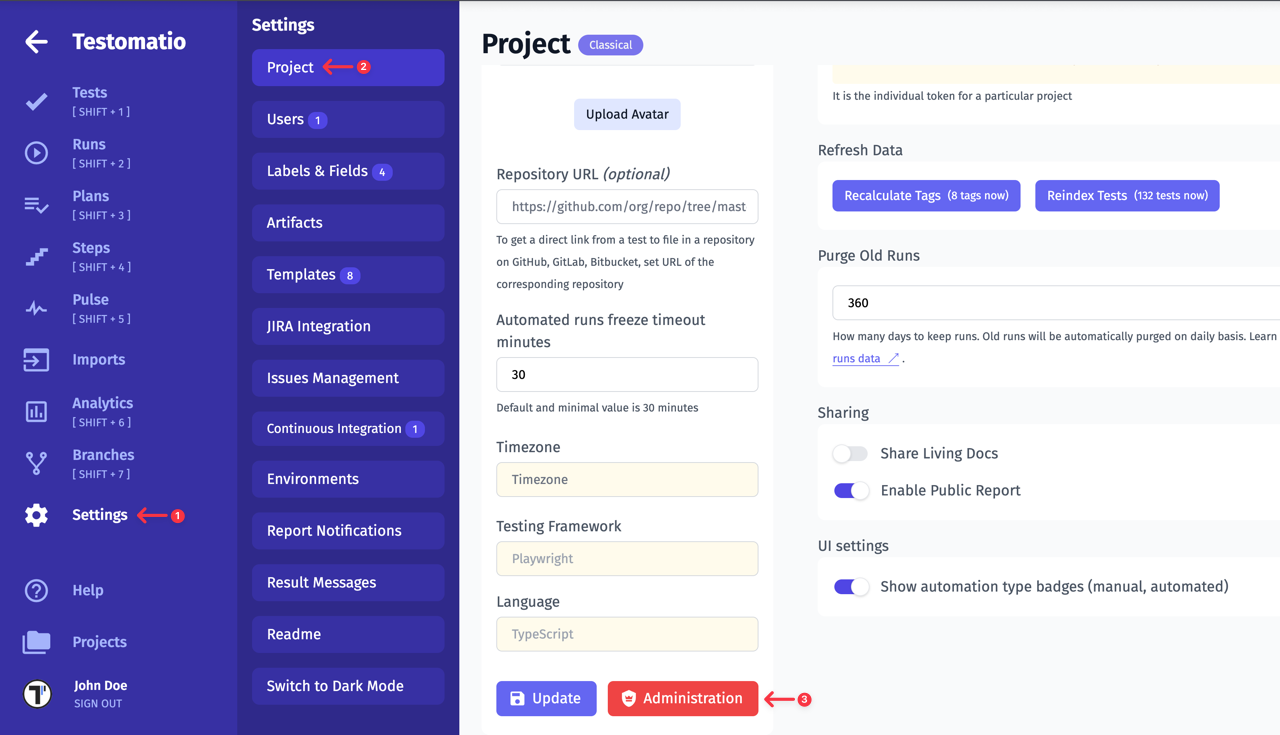
How to Change the Testing Framework
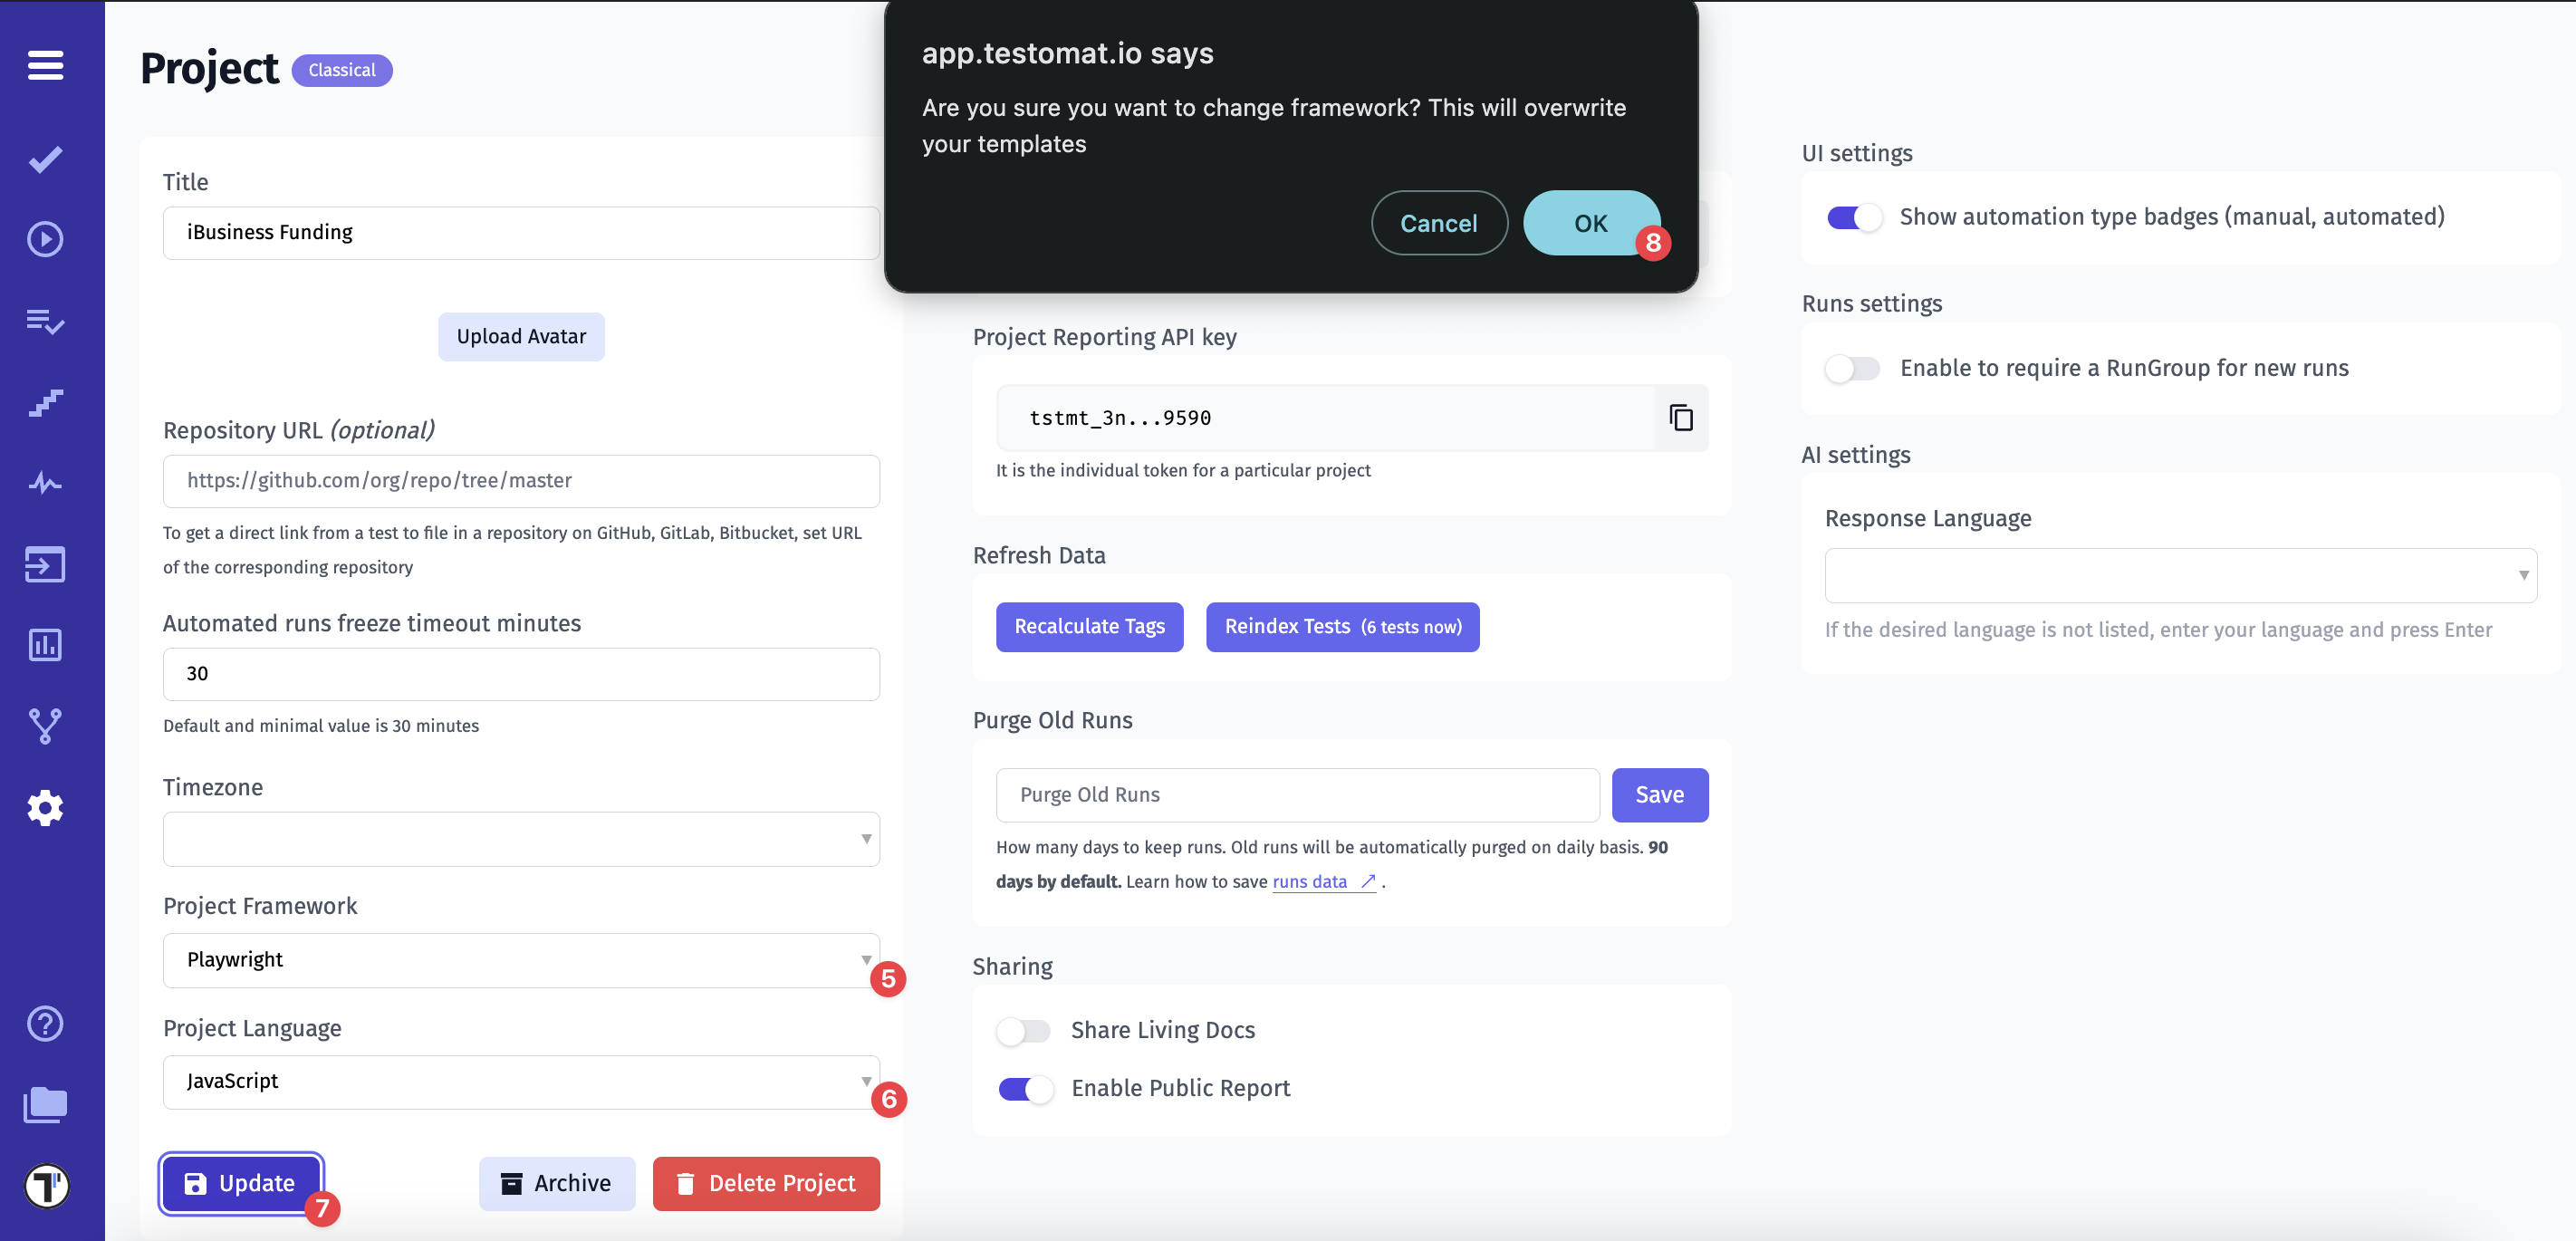
Section titled “How to Change the Testing Framework”You can change the testing framework to meet your needs. To do this, follow these steps:
- Click on Settings in the sidebar
- Click the Project button
- Enable Administration mode
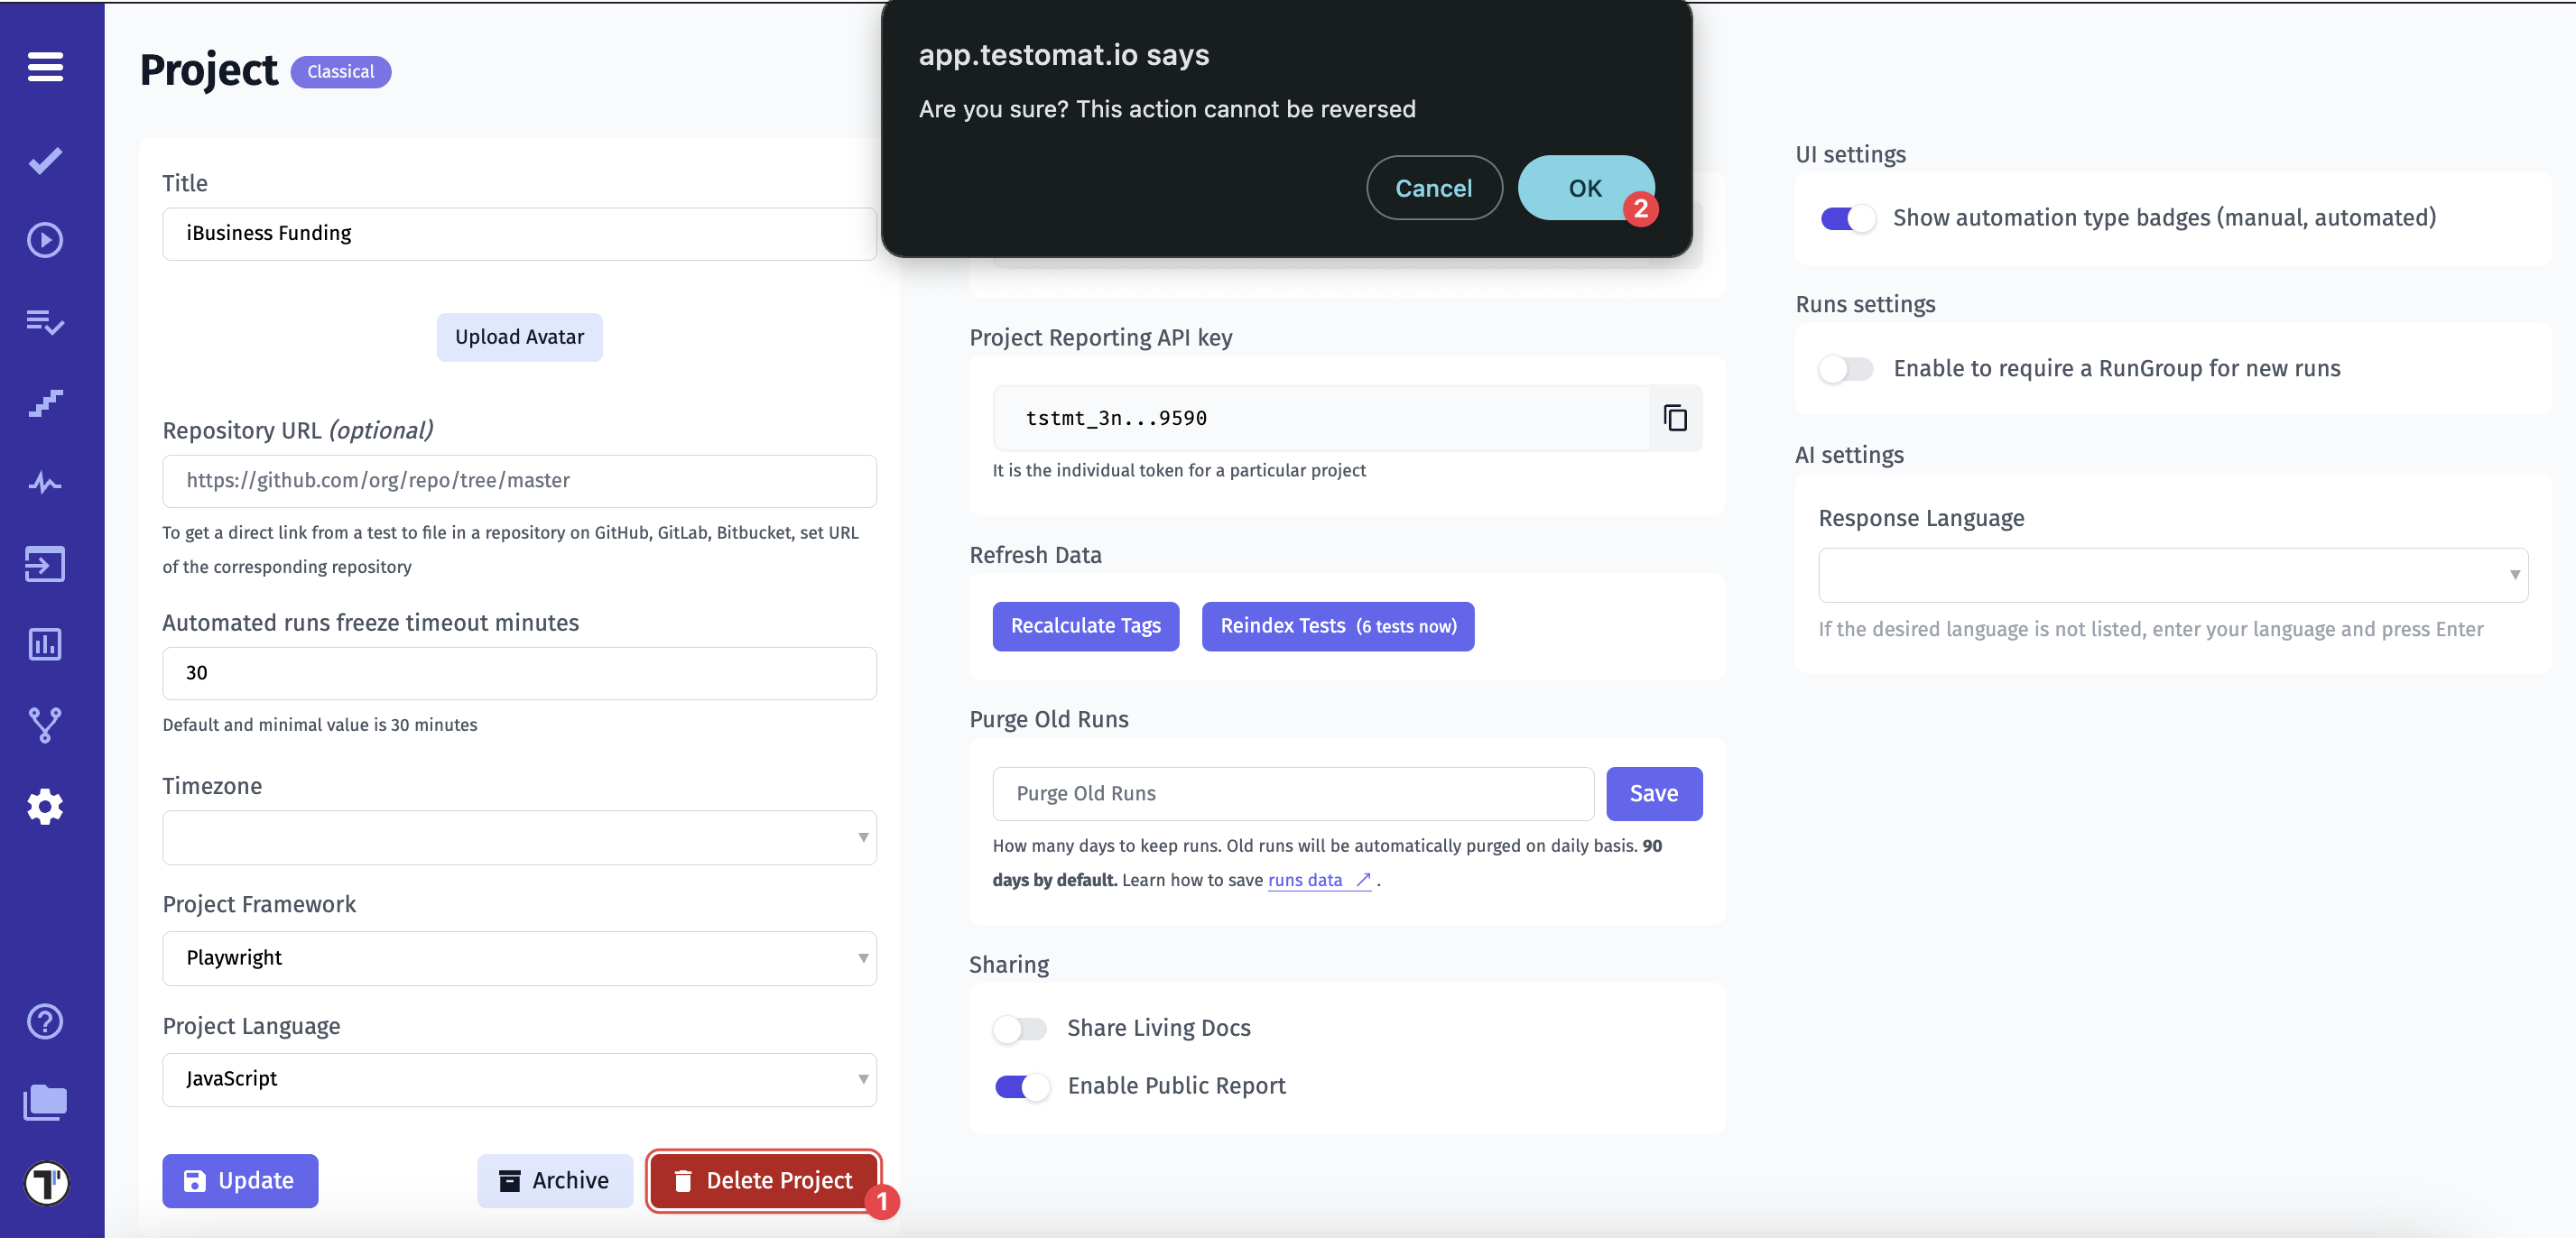
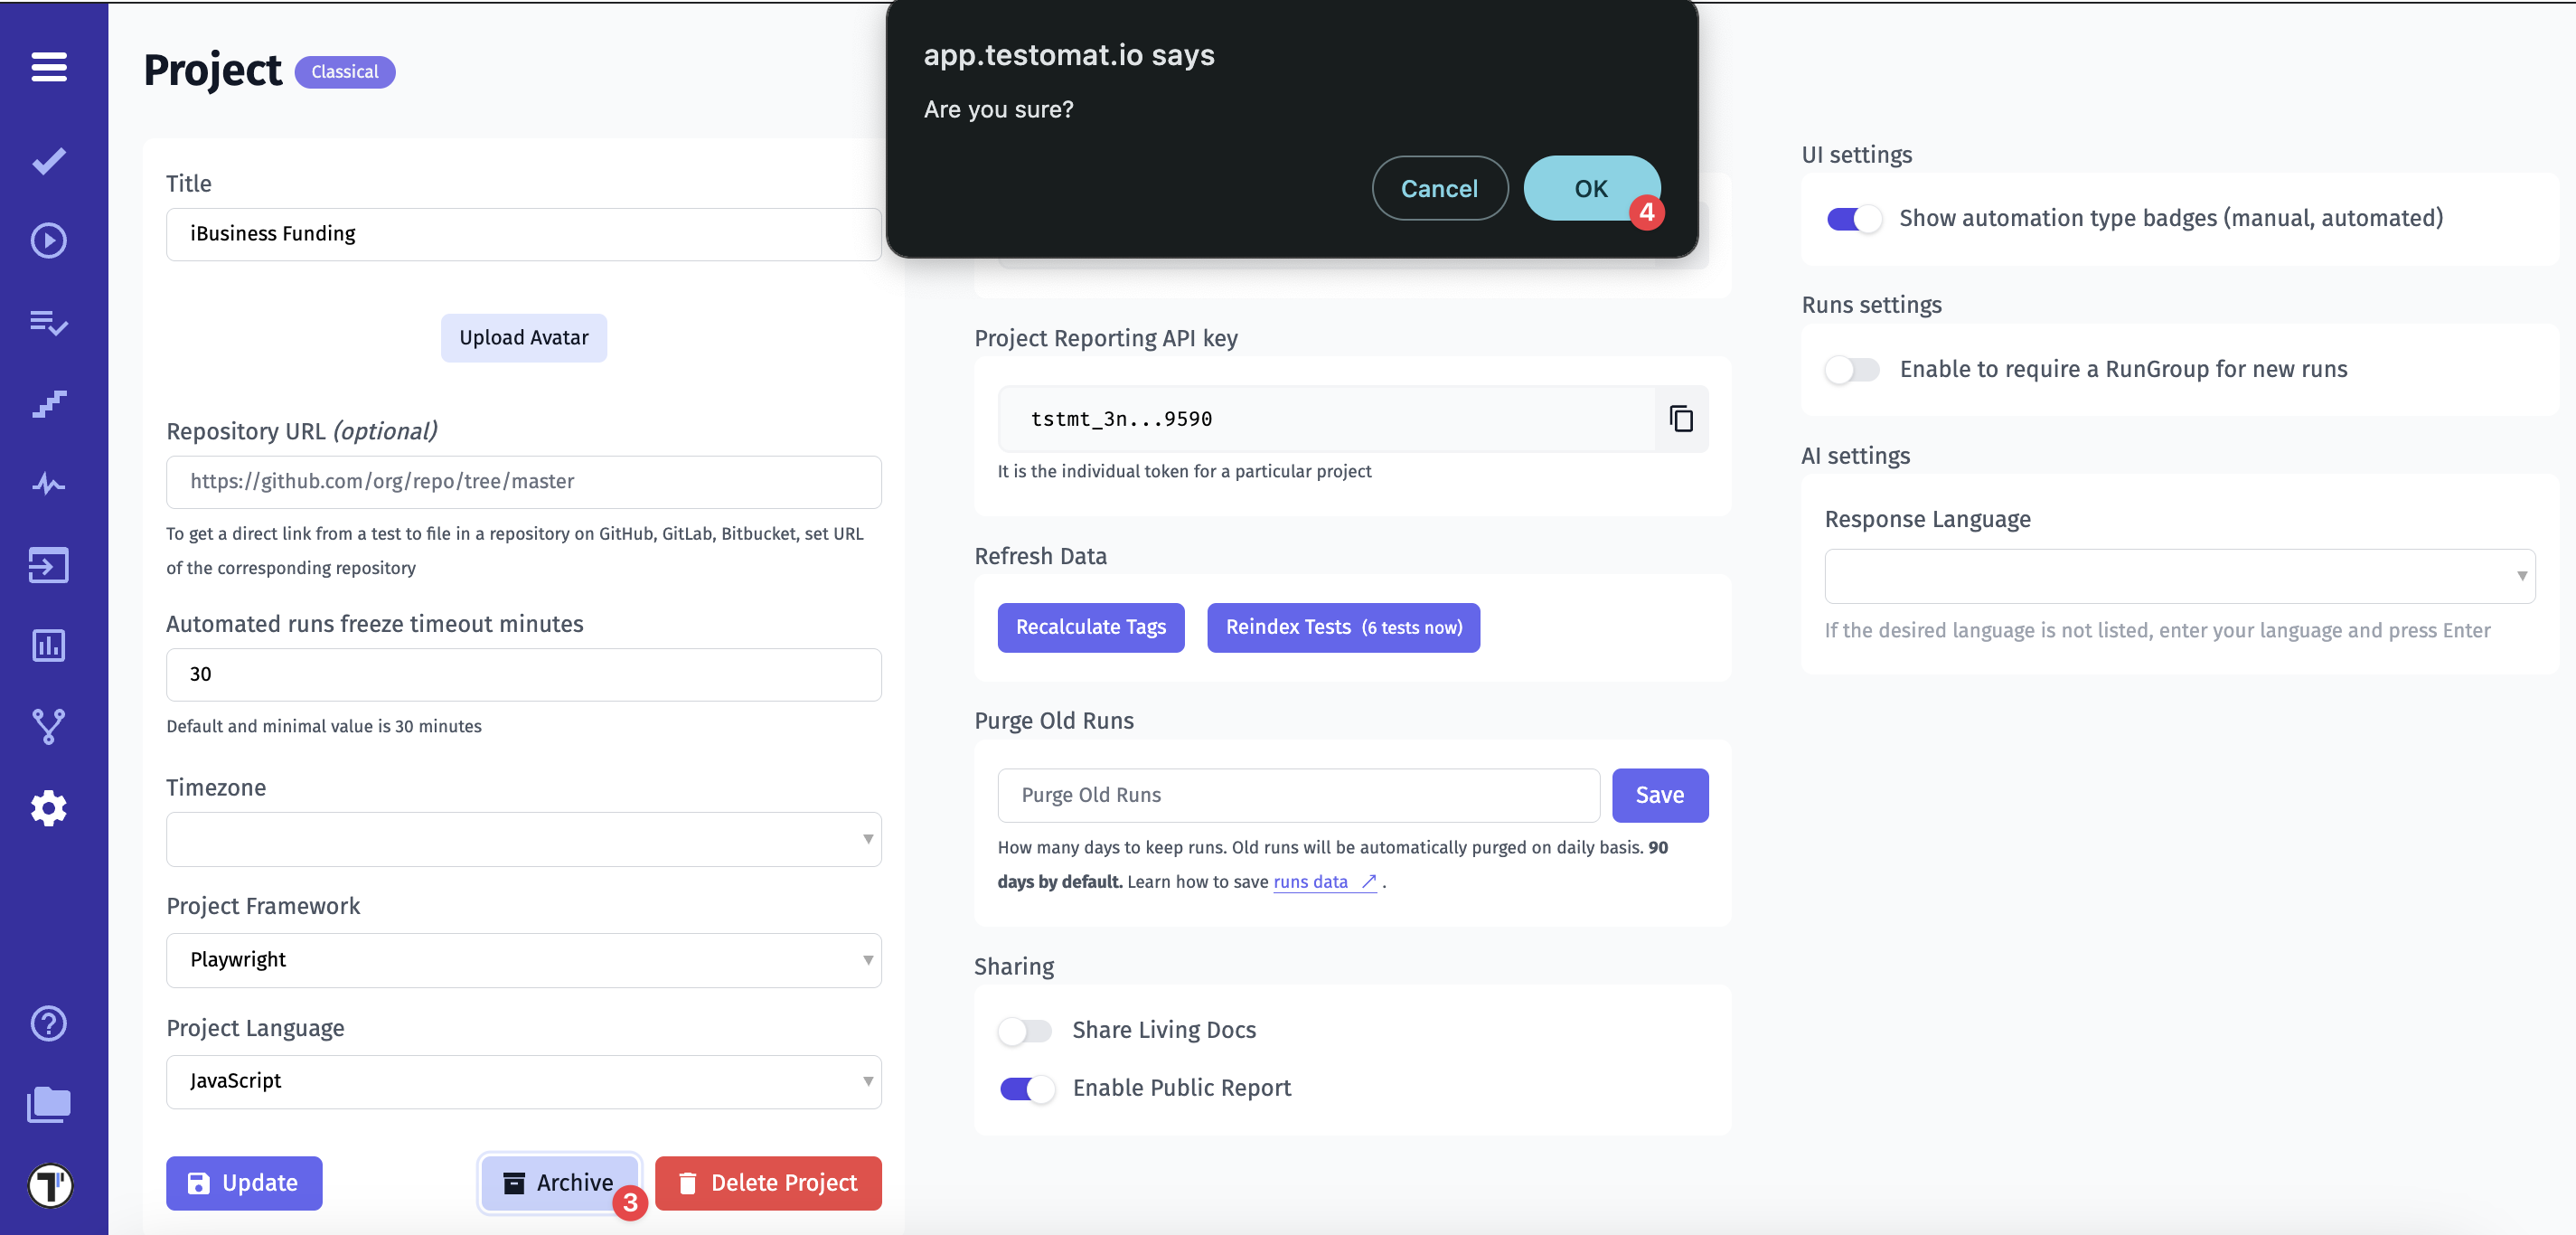
- Click OK in the popup ’Are you sure?’
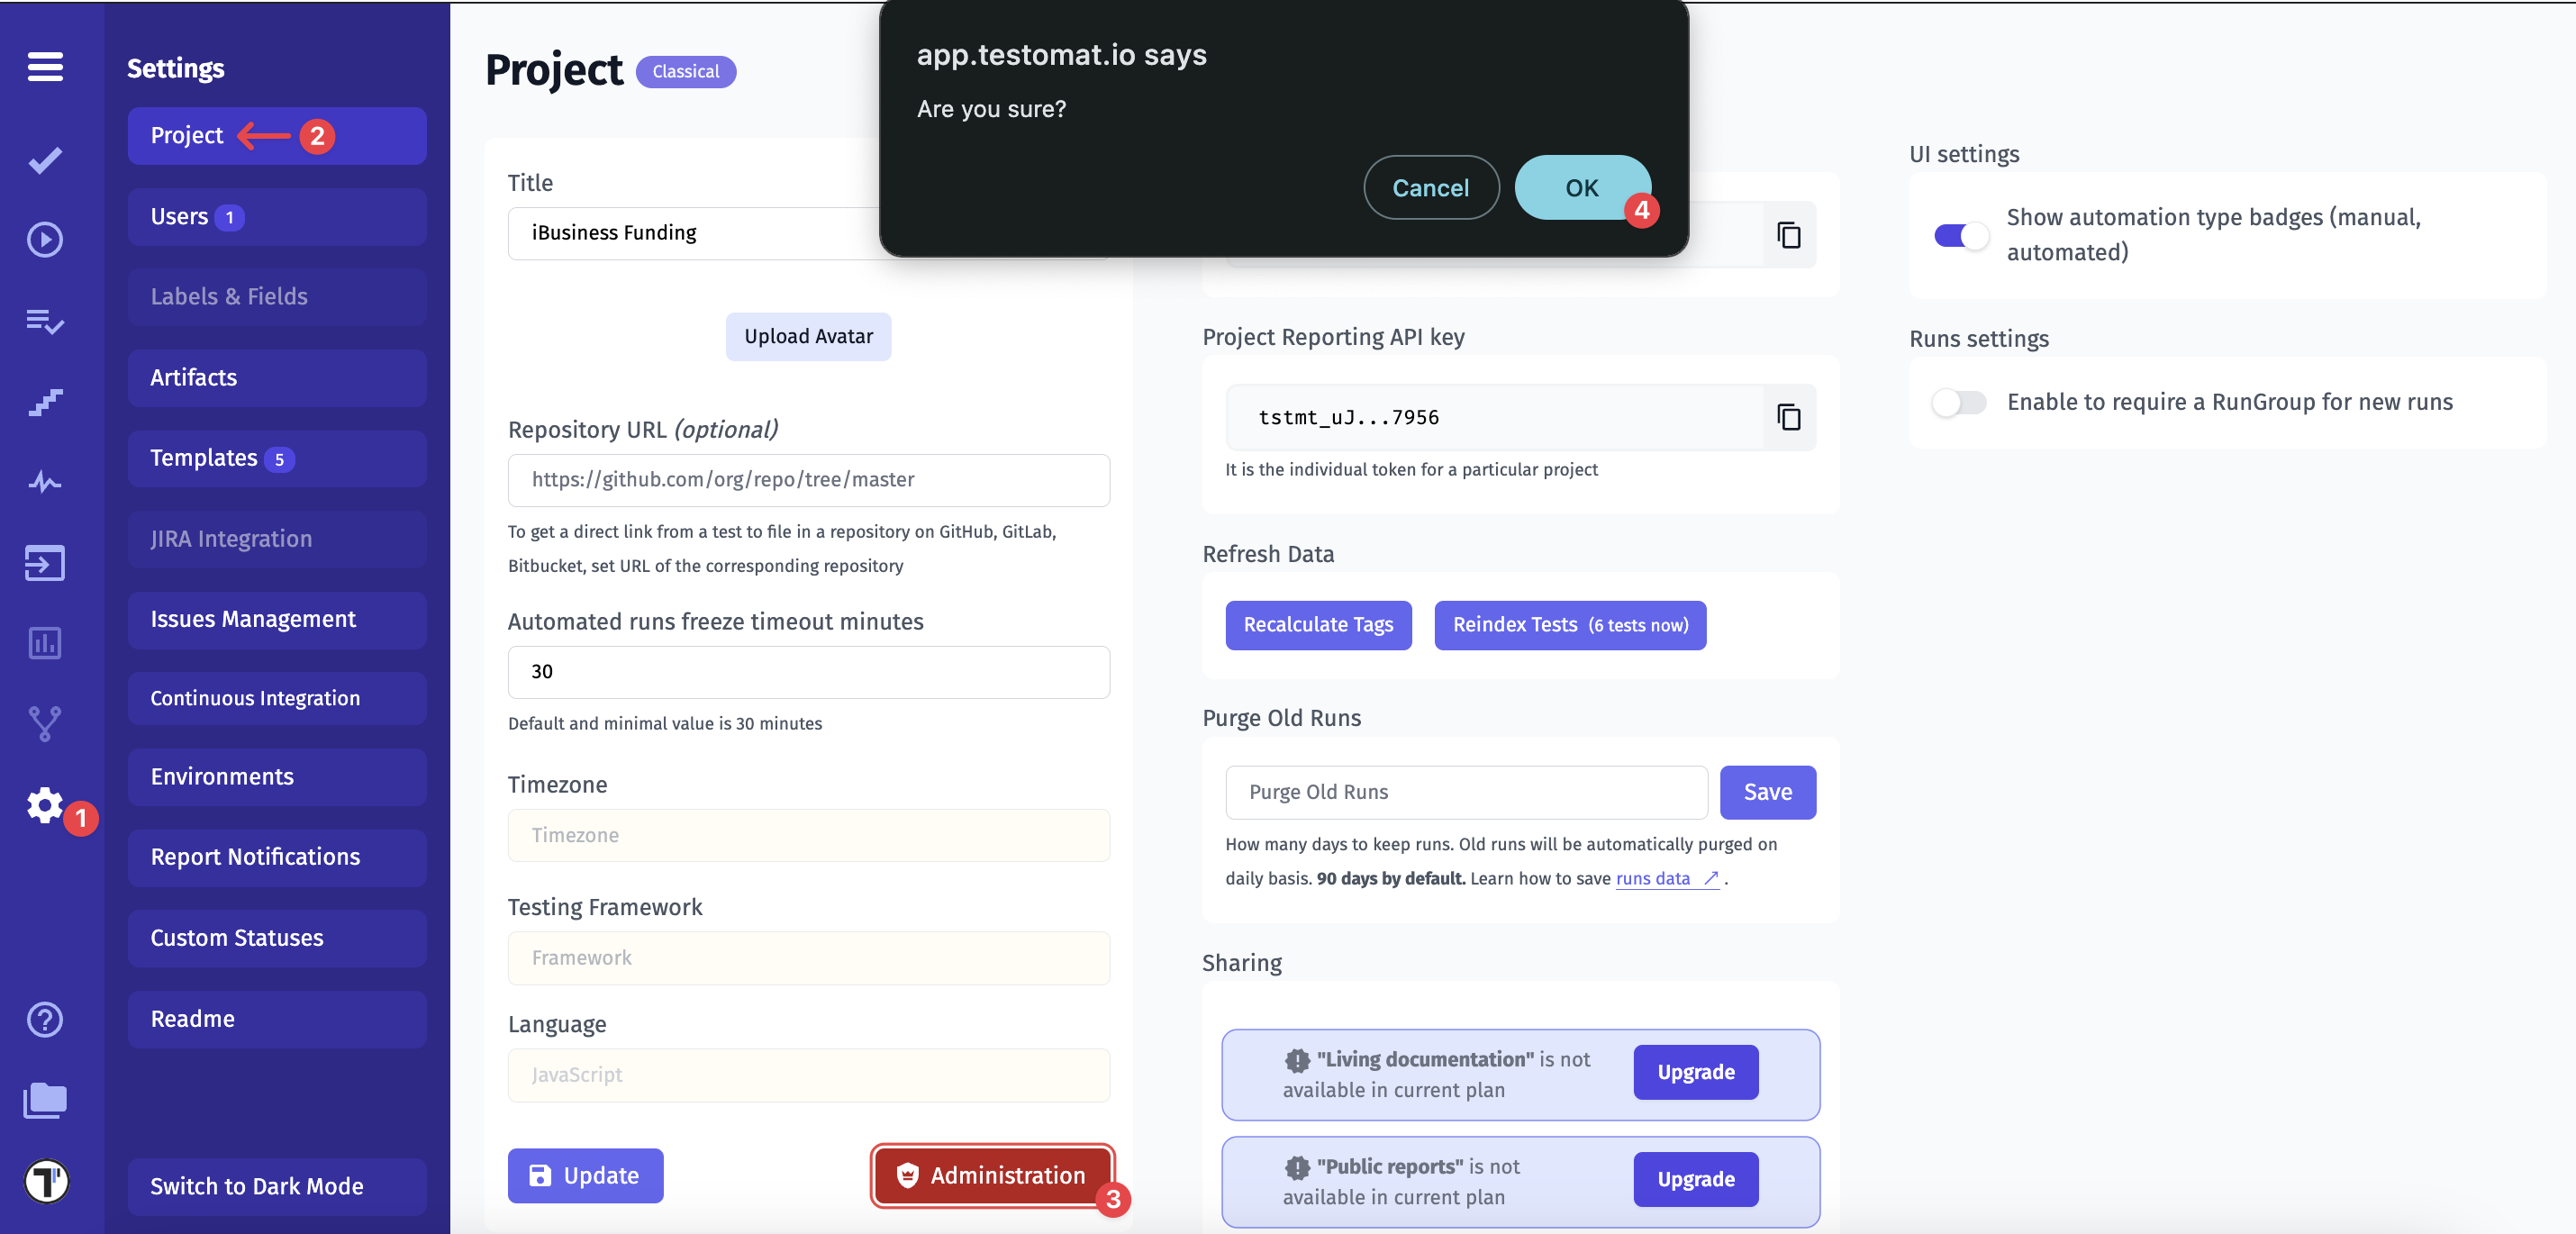
- Select ’Project Framework’ from the dropdown
- Select a programming language you use in ’Project Language’ dropdown
- Click Update button
- Click OK to save the changes
In addition, when ’Administration’ mode is activated, you can:
- Delete the project – Click the ’Delete Project’ button
- Then confirm by clicking ’OK’ in the popup
- Archive the project – Click the ’Archive’ button
- Then confirm by clicking ’OK’ in the popup
If you don’t see ’Administration’ mode, please note that this option is available only to users with Manager or Owner roles at the company level. For more details on ’How to Manage Company Roles’, please explore here Manage Company Roles
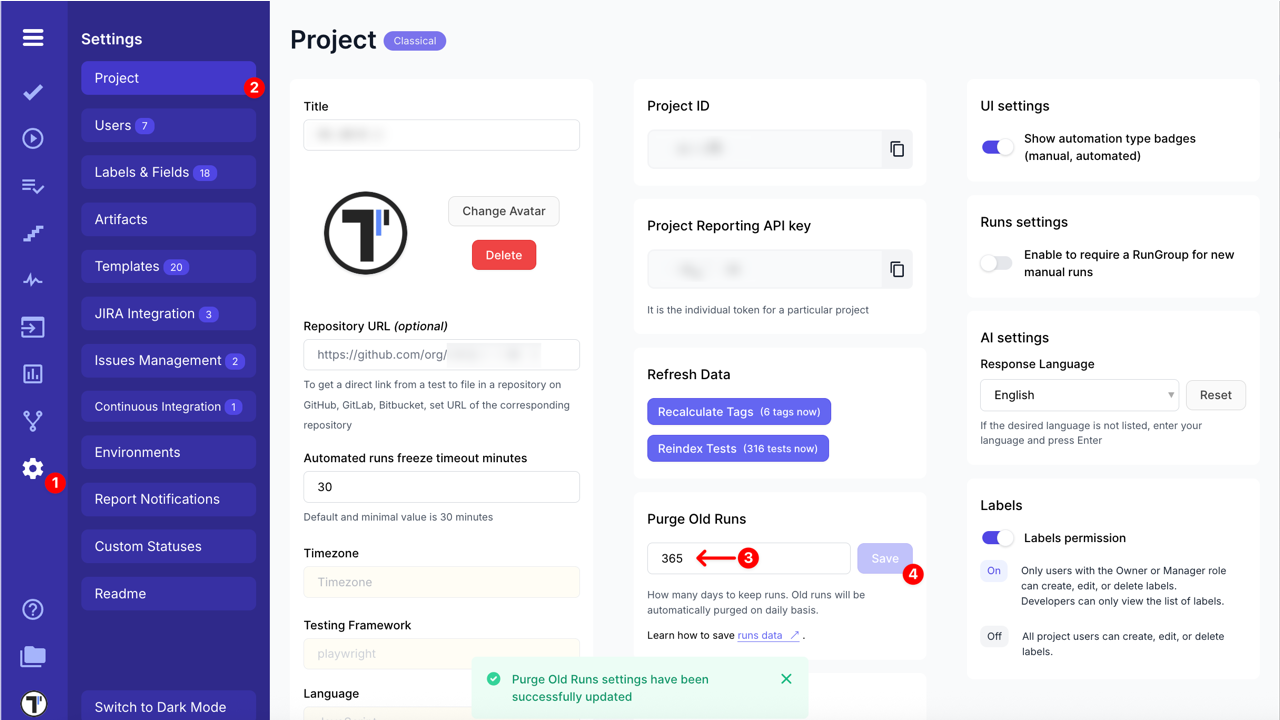
Purge Old Runs
Section titled “Purge Old Runs”To help manage storage and keep your test runs organized, the system automatically removes old runs based on a configurable storage period. Below are key details and guidelines about how this feature works and how you can control it:
- By default, all test runs (both archived and unarchived) are stored for 90 days
- Only users with Owner or Manager roles can change the storage period to any value up to 365 days
- Test runs (both archived and unarchived) that exceed the configured storage period are automatically and permanently deleted on a daily basis
- Changing the storage period affects the next daily purge according to the new setting
- Deletion is permanent and irreversible — deleted runs (both archived and unarchived) cannot be restored, even via the Pulse page
To adjust the storage period:
- Click on Settings in the sidebar
- Click the Project button
- In the Purge Old Runs section, set the number of days (up to 365) you wish to keep the test runs
- Click the Save button to apply the changes
After saving, a confirmation message will appear: ‘Purge Old Runs settings have been successfully updated’