Using Bulk Edit and YAML Format in Testomat.io
Bulk Edit is an advanced tool that allows to restructure tests within a project. With Bulk edit, you can
- reorder tests
- create new suites
- move tests to another suite
- delete tests
Enabling Bulk Edit
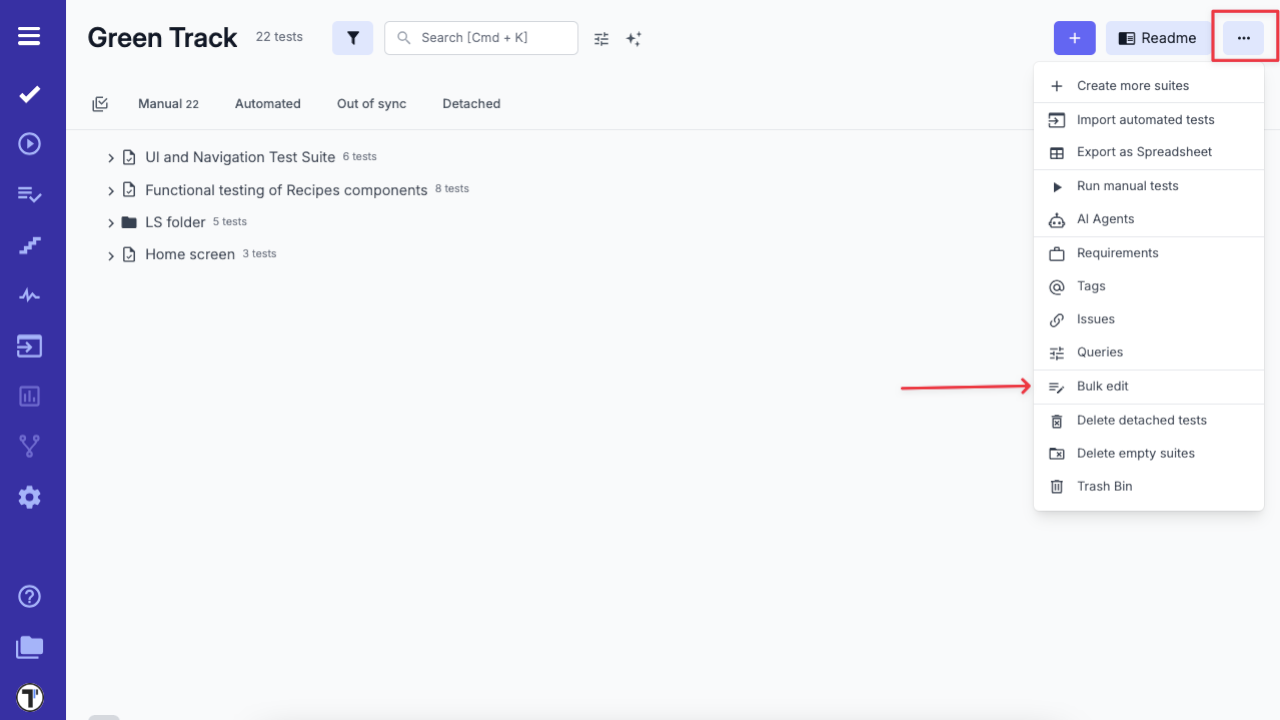
Section titled “Enabling Bulk Edit”Bulk edit mode can be opened from the Tests screen:
A bulk editor may look confusing at first:

Bulk Editor Overview
Section titled “Bulk Editor Overview”The Bulk Editor provides a powerful interface for managing your project in a structured text format. Here’s a breakdown of its key features:
-
Text-Based Editor - Edit your project directly in YAML format for precise control and bulk updates.
-
Live Preview - Instantly see a visual representation of your changes as you make them.
-
YAML Guide Link - Access a quick reference guide to better understand and work with the YAML format.
-
‘Learn More’ Button - Opens a mini-tutorial section with tips and examples for using the Bulk Editor effectively.
-
‘Read Docs’ Link - Redirects you to the official Testomatio documentation for in-depth guidance.
-
‘Show Tests’ Toggle - Switch between viewing both test suites and test cases or just the test suites.
-
‘Preview’ Button - Displays a summary of your changes before applying them.
Note: Don’t worry, clicking “Preview” won’t execute any changes on the project. You will see the list of planned changes and a confirmation button to accept them.
-
‘Cancel’ Button - Closes the editor and discards any unsaved changes.
To make yourself comfortable with bulk editor follow the next sections:
YAML format
Section titled “YAML format”We use YAML format to structure data. If you are not familiar with YAML, learn its basics before following the guide. The YAML format was chosen as the most popular for defining data structures in text-only mode. It is very powerful as you can edit a whole project from a text editor without extra clicking. YAML is used in Ansible, Kubernetes, CI configs, etc, so it is very popular in the developer community.
Working with Structure
Section titled “Working with Structure”In “Bulk Edit” mode all suites and tests are presented in YAML format.
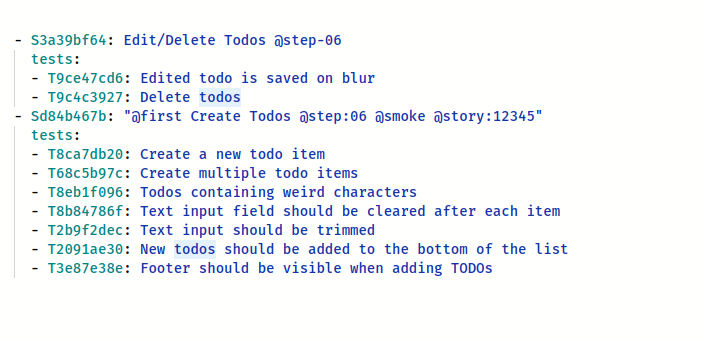
It may be hard to understand it from start. Let’s explain it step by step:
- On the top-level we have a list of suites:
- Each element on the top level should start with
-char to indicate that it is a part of suites list. - Suites are defined as objects in YAML
- A new suite should start with
suite:key
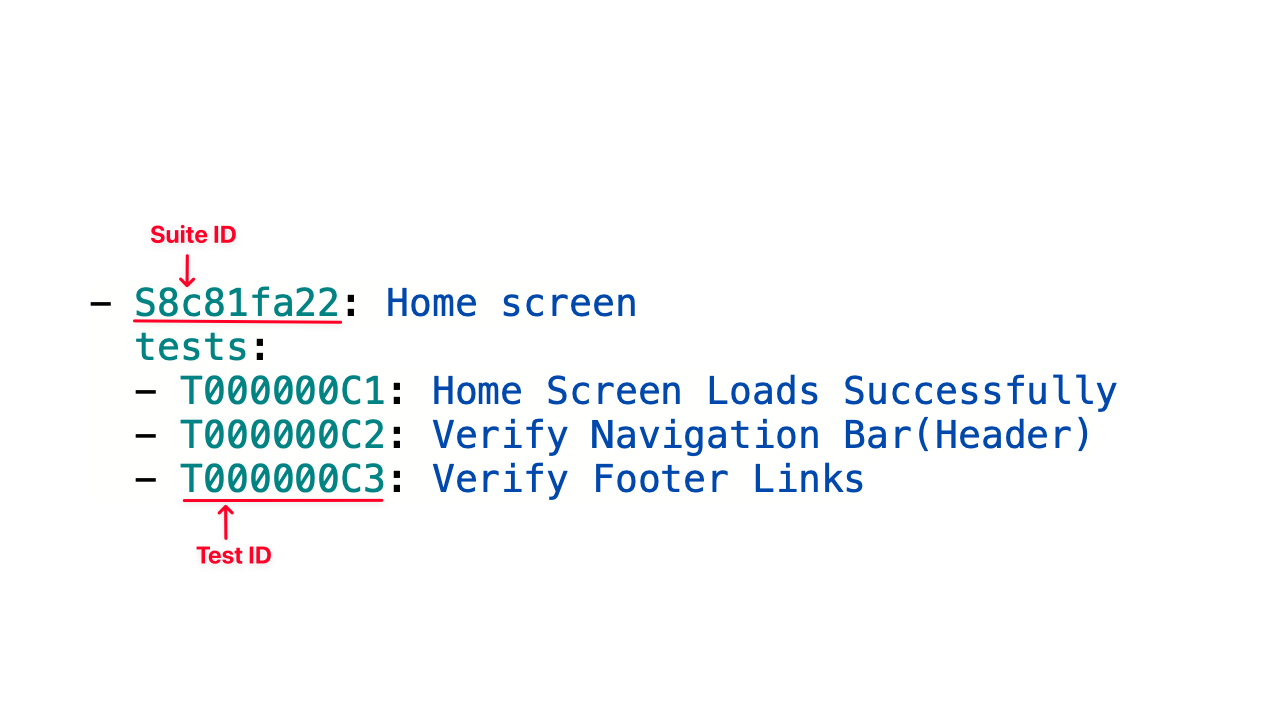
- suite: A new suite- Existing suite starts with
Schar plus a suite ID, similarly to this:
- S12345678: Existing suite- A suite can contain other suites under
suiteskey of the same object. Inside it you can have a list of child suites:
- S12345678: Existing suite suites: - S22345678: Existing sub-suite 1 - suite: New sub-suite 2 - suite: New sub-suite 3- A sub-suite can also contain a list of suites… Now you may see the power of YAML format!
- S12345678: Existing suite suites: - S22345678: Existing sub-suite 1 suites: - suite: A new sub-sub-suite!Please note that we indent our data with 2 spaces (
) to indicate which level we are at. We got down to 3rd level in this example, so we used 6 spaces before- suite: A new sub-sub-suite!
- A suite may contain tests under
testskey. Tests should be also represented as a list. If a test hastest:key or no key at all, it is treated as a new test:
- suite: User Management tests: - test: A new test 1 - A new test 2 # short formatThis structure creates 2 new tests under the new suite “User Management”
- Existing test starts with
Tchar plus a test ID, similarly to this:
- S12345678: Existing suite tests: - T12345679: Existing test- to delete a test or a suite - remove it from the structure
- to change the order of tests or suites - move them up or down in the structure
These rules are important to keep in mind when working in Bulk Edit mode.
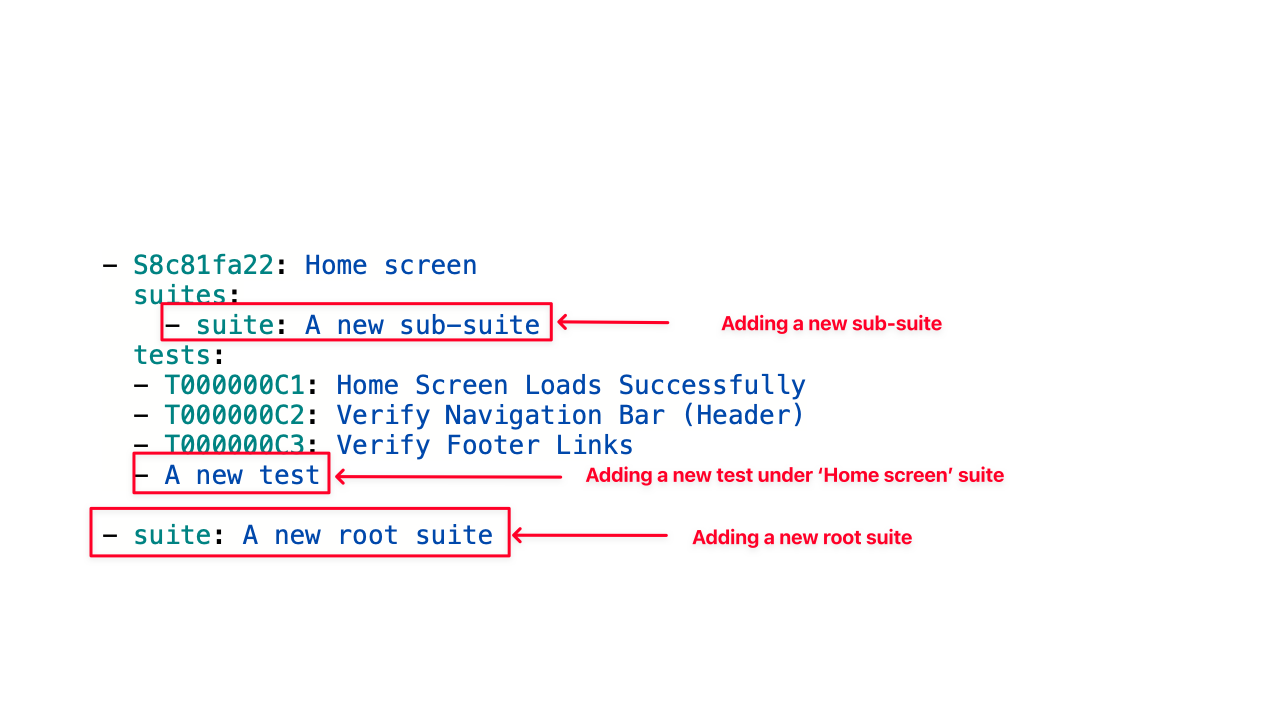
Let’s sum up what we learned so far:
- listing existing suites and tests
- adding new tests and suites:
Keyboard Shortcuts
Section titled “Keyboard Shortcuts”To unleash the full power of bulk edit learn these keyboard combinations that will speed up your work.
- Use Alt+Up to move current line one level higher.
- Use Alt+Down to move one level lower.
- Also you may select a block of text and move it with Alt+Up or Alt+Down
- Use Cmd+Right or Ctrl+Right to indent a block to move it to next nesting level
- Use Cmd+d or Ctrl+d to make a multiple selection. This allows replace values on the fly.