

Using AI in Testing
Welcome!
This tutorial turns on Testomat.io’s AI features and walks them through a full testing cycle: you start from a requirement, generate tests from it, describe them, then analyze the run and question your analytics. AI here is a helper that saves you typing and digging, not a replacement for your judgment.
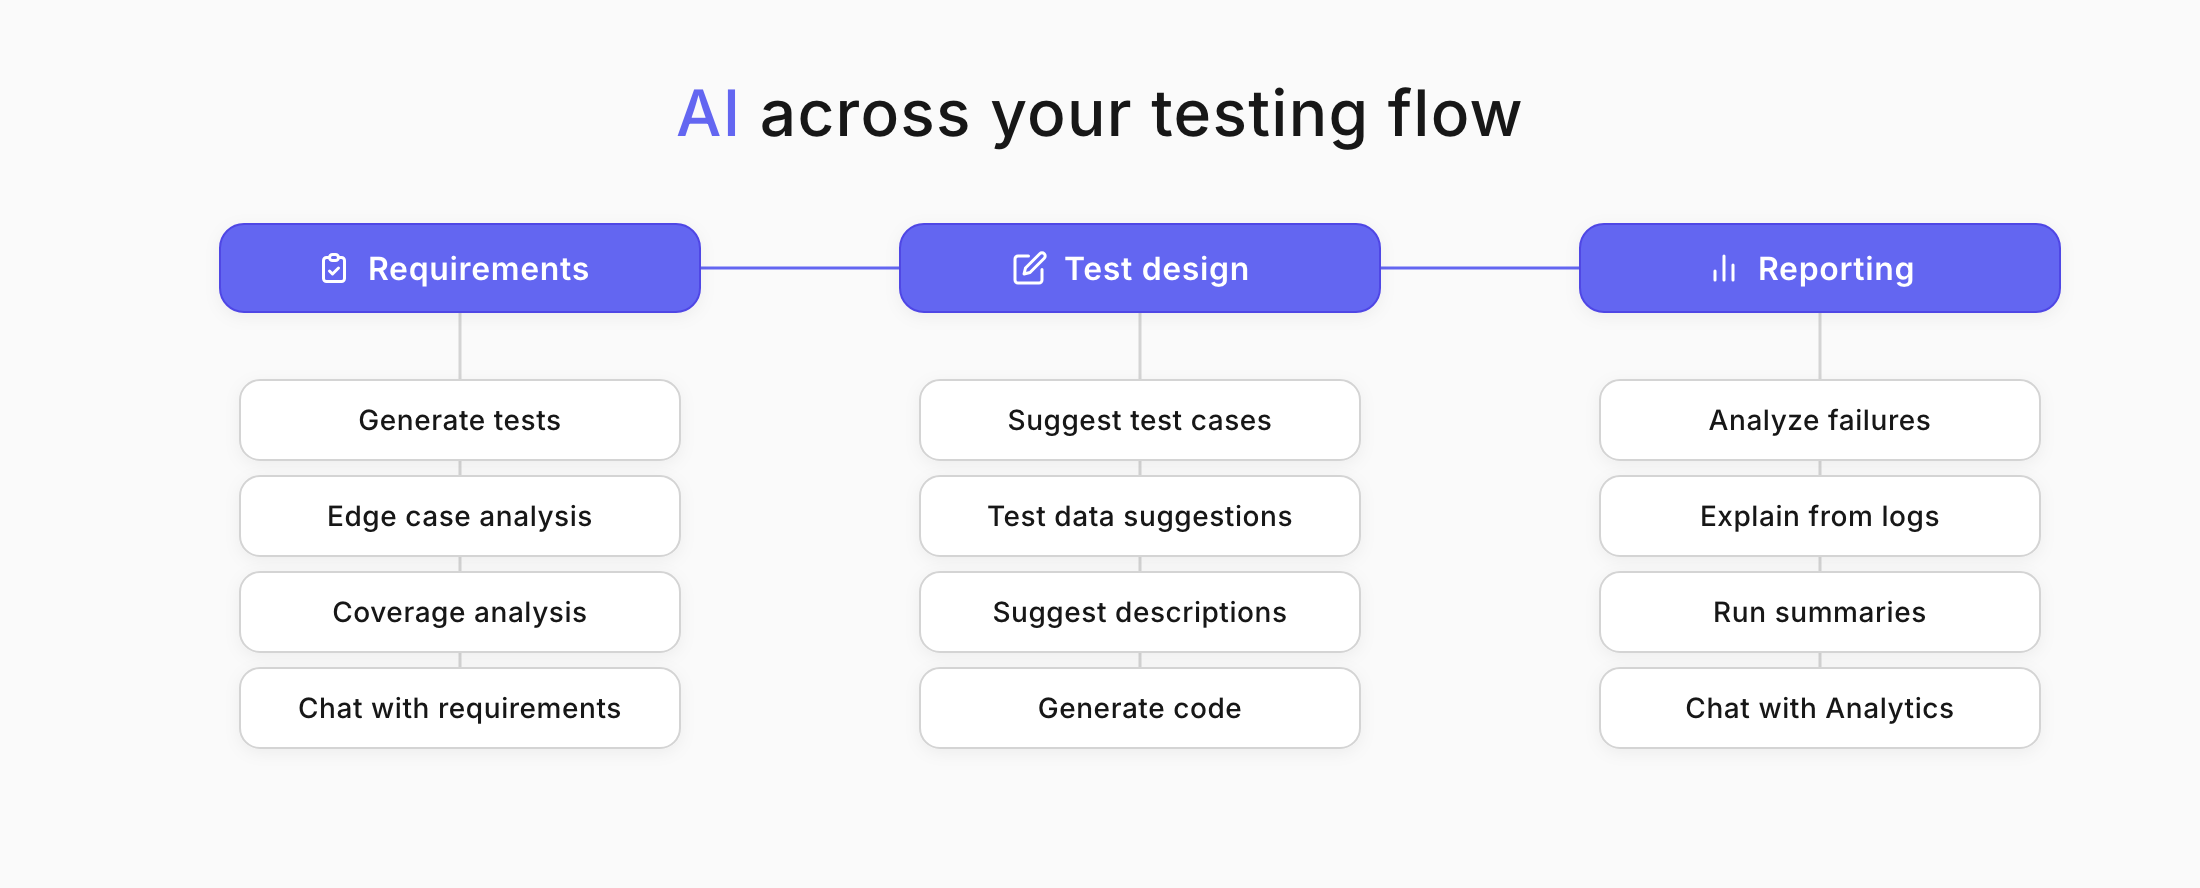
What you will do:
- Enable AI for your company.
- Add a requirement to your project.
- Generate tests from the requirement.
- Generate a test description.
- Analyze a run with AI.
- Chat with Analytics.
Before you start
Section titled “Before you start”AI features are off by default. A Company Owner turns them on, and only your company’s chosen AI provider sees the content you send.
Enable AI
Section titled “Enable AI”To integrate and begin working with AI features in your Testomat.io account, follow these steps:
- Open Company Settings.
- Go to the Administration section.
- Turn on the AI Features.
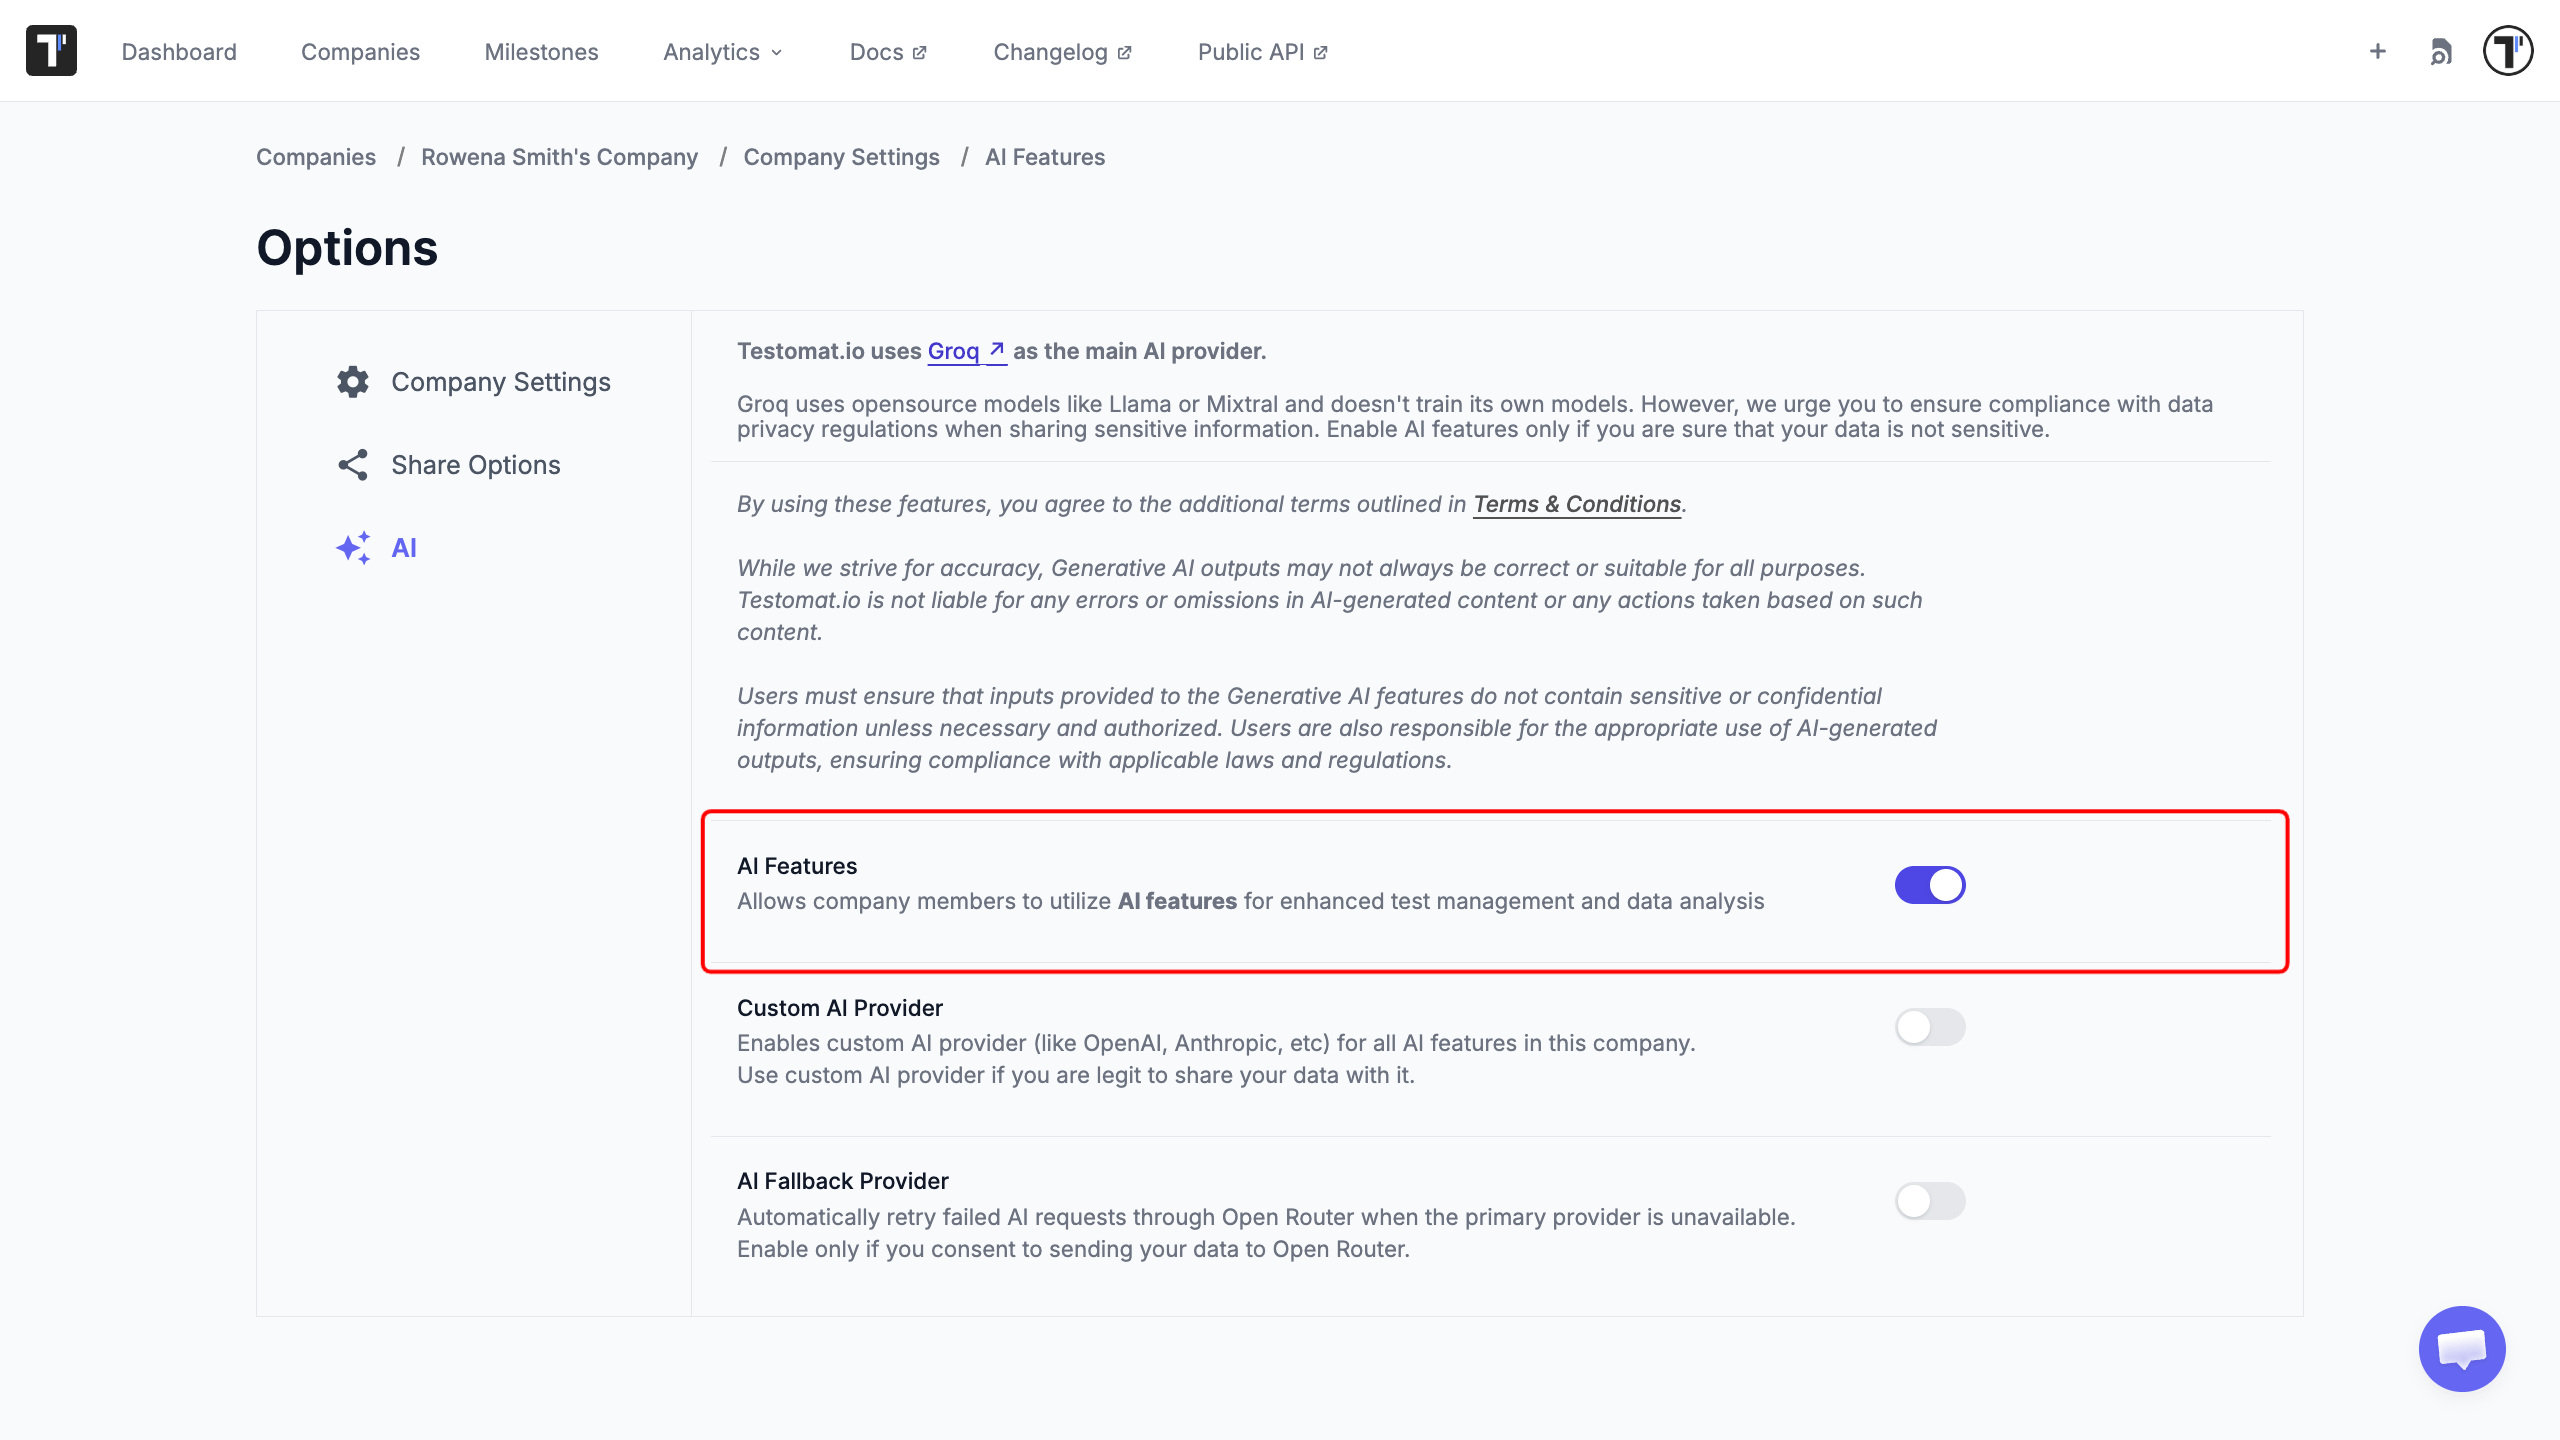
Once enabled, the AI actions appear across your project. See AI settings for the details.
Use your own AI provider
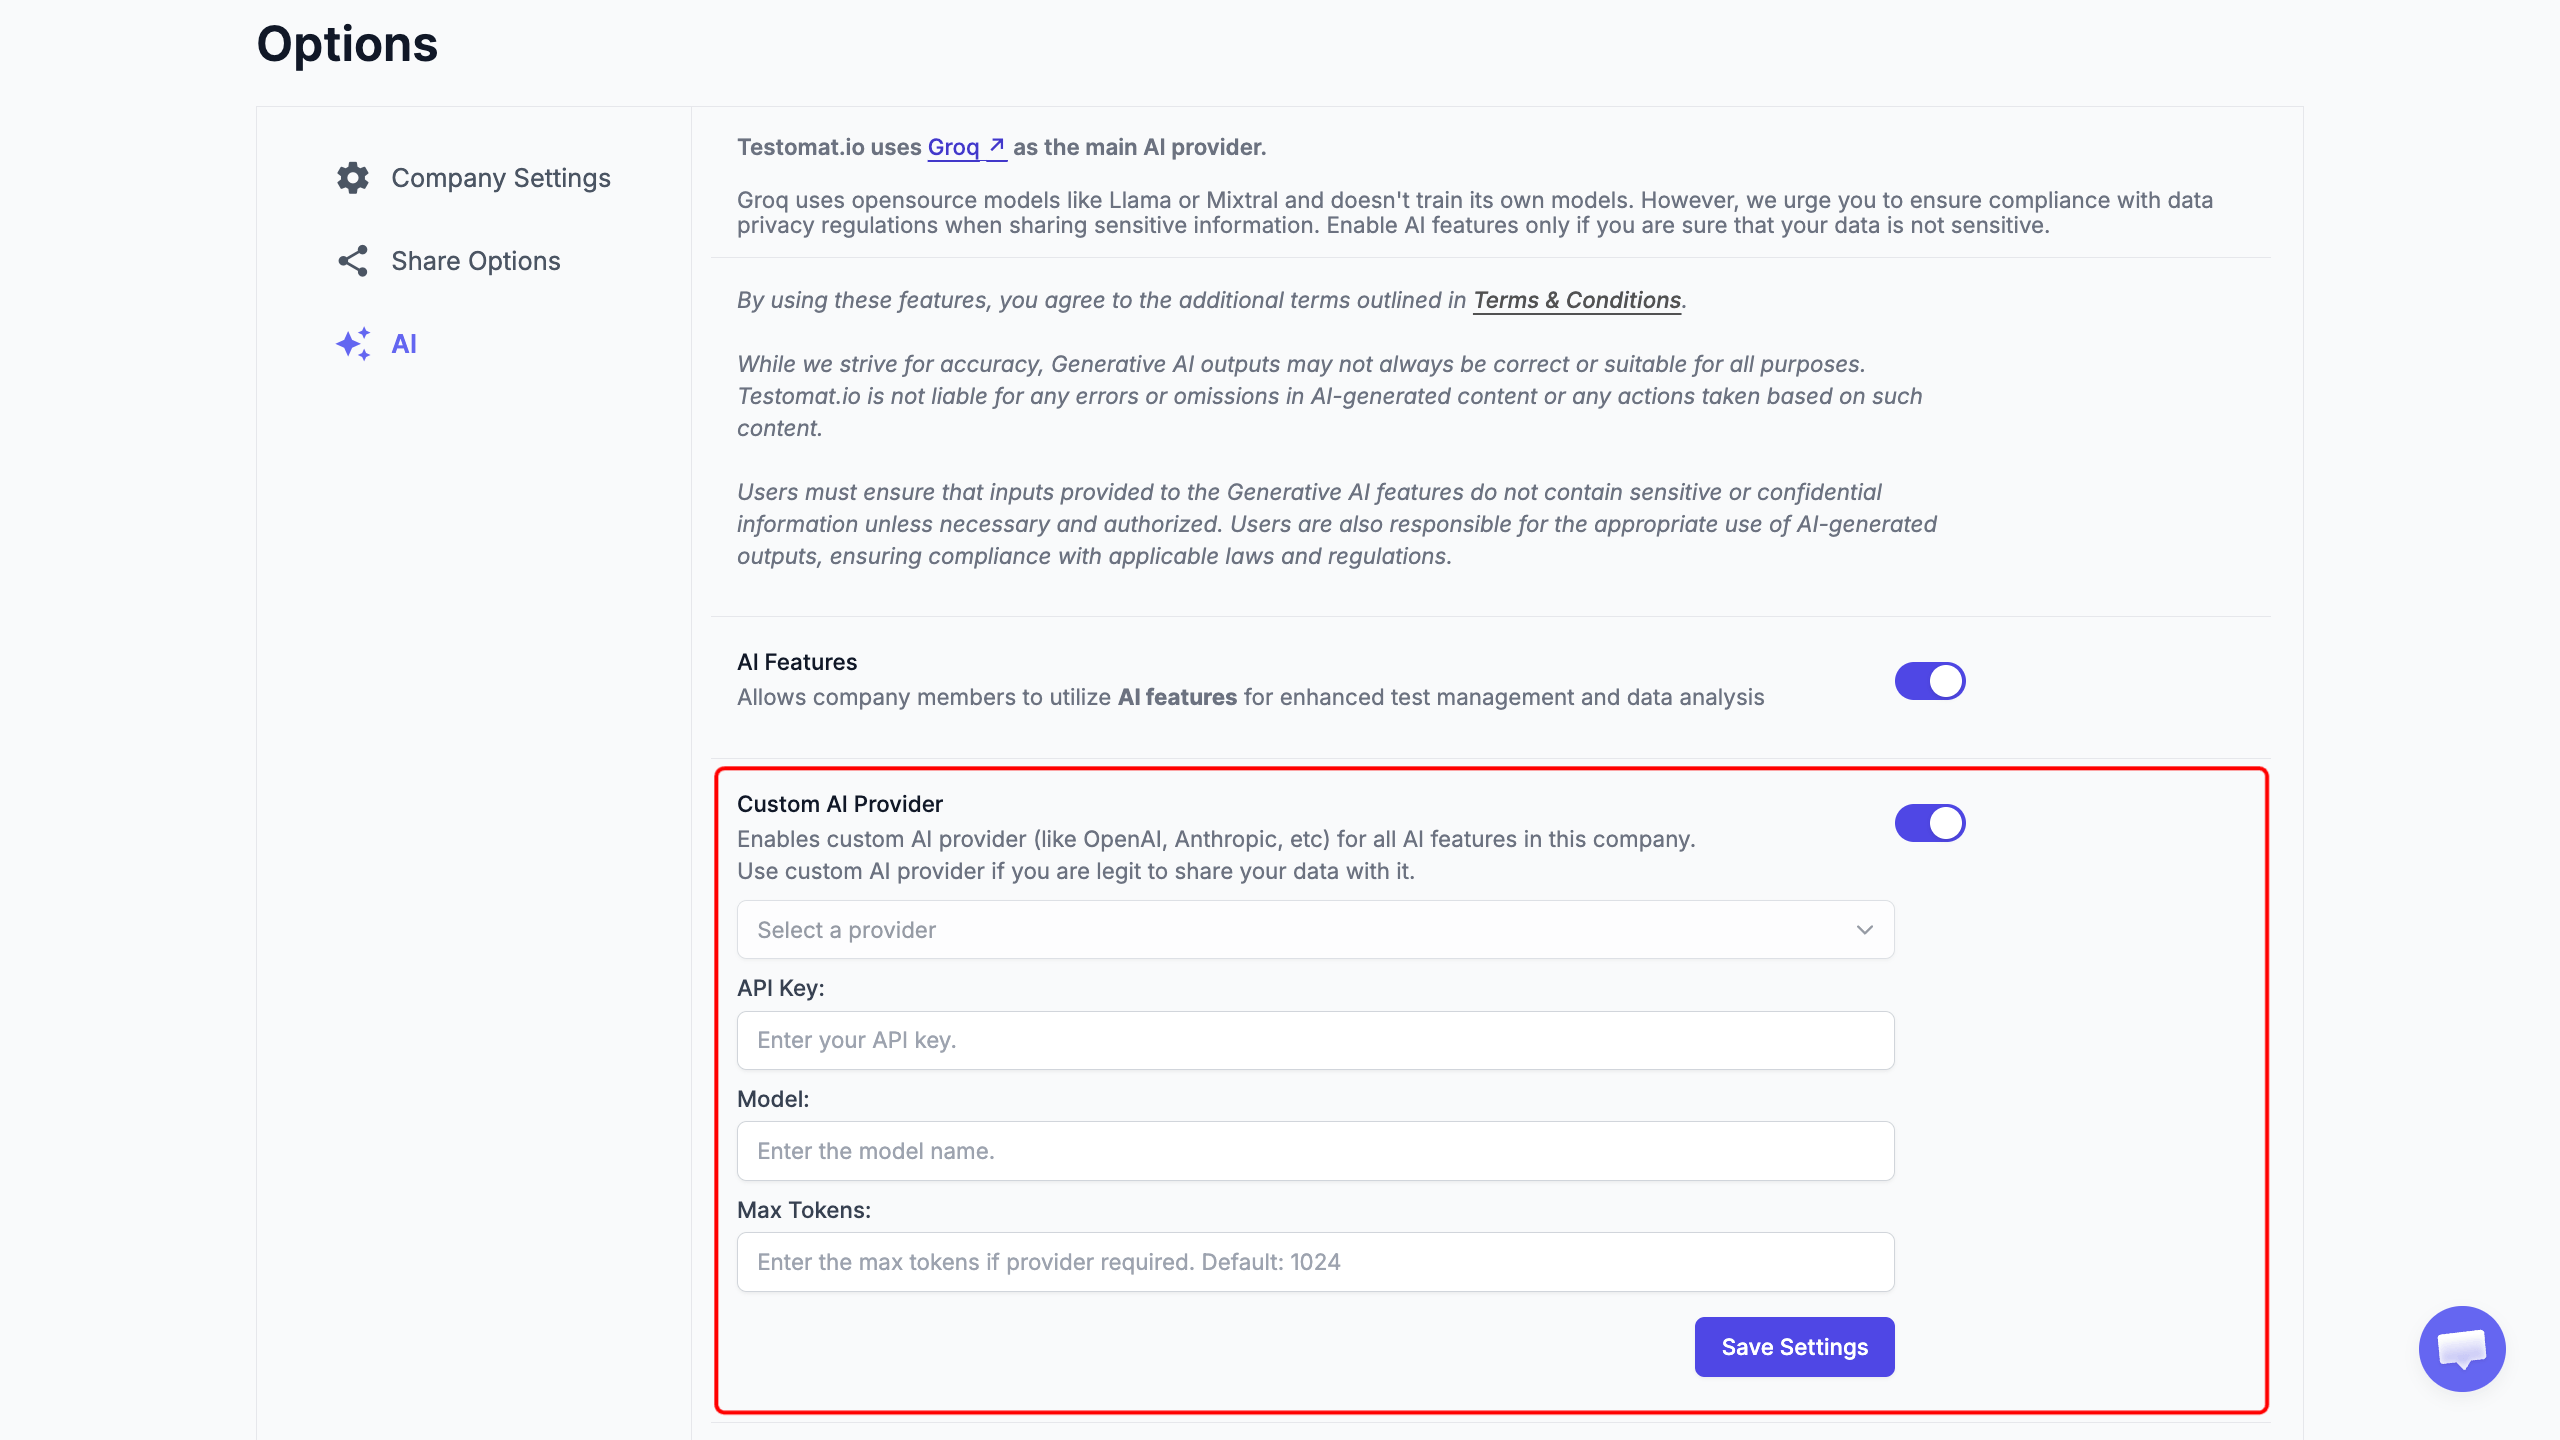
Section titled “Use your own AI provider”If your company prefers an AI provider it already trusts, Testomat.io can connect to a third-party service such as OpenAI, Anthropic, and others. You keep all the same AI features while choosing the provider that fits your security and compliance rules.
- In the AI settings, turn on the Custom AI Provider option.
- Select a provider from the dropdown.
- Enter the API Key.
- Enter the Model name.
- Enter Max Tokens, if your provider requires it.
- Click Save Settings.
Add a requirement
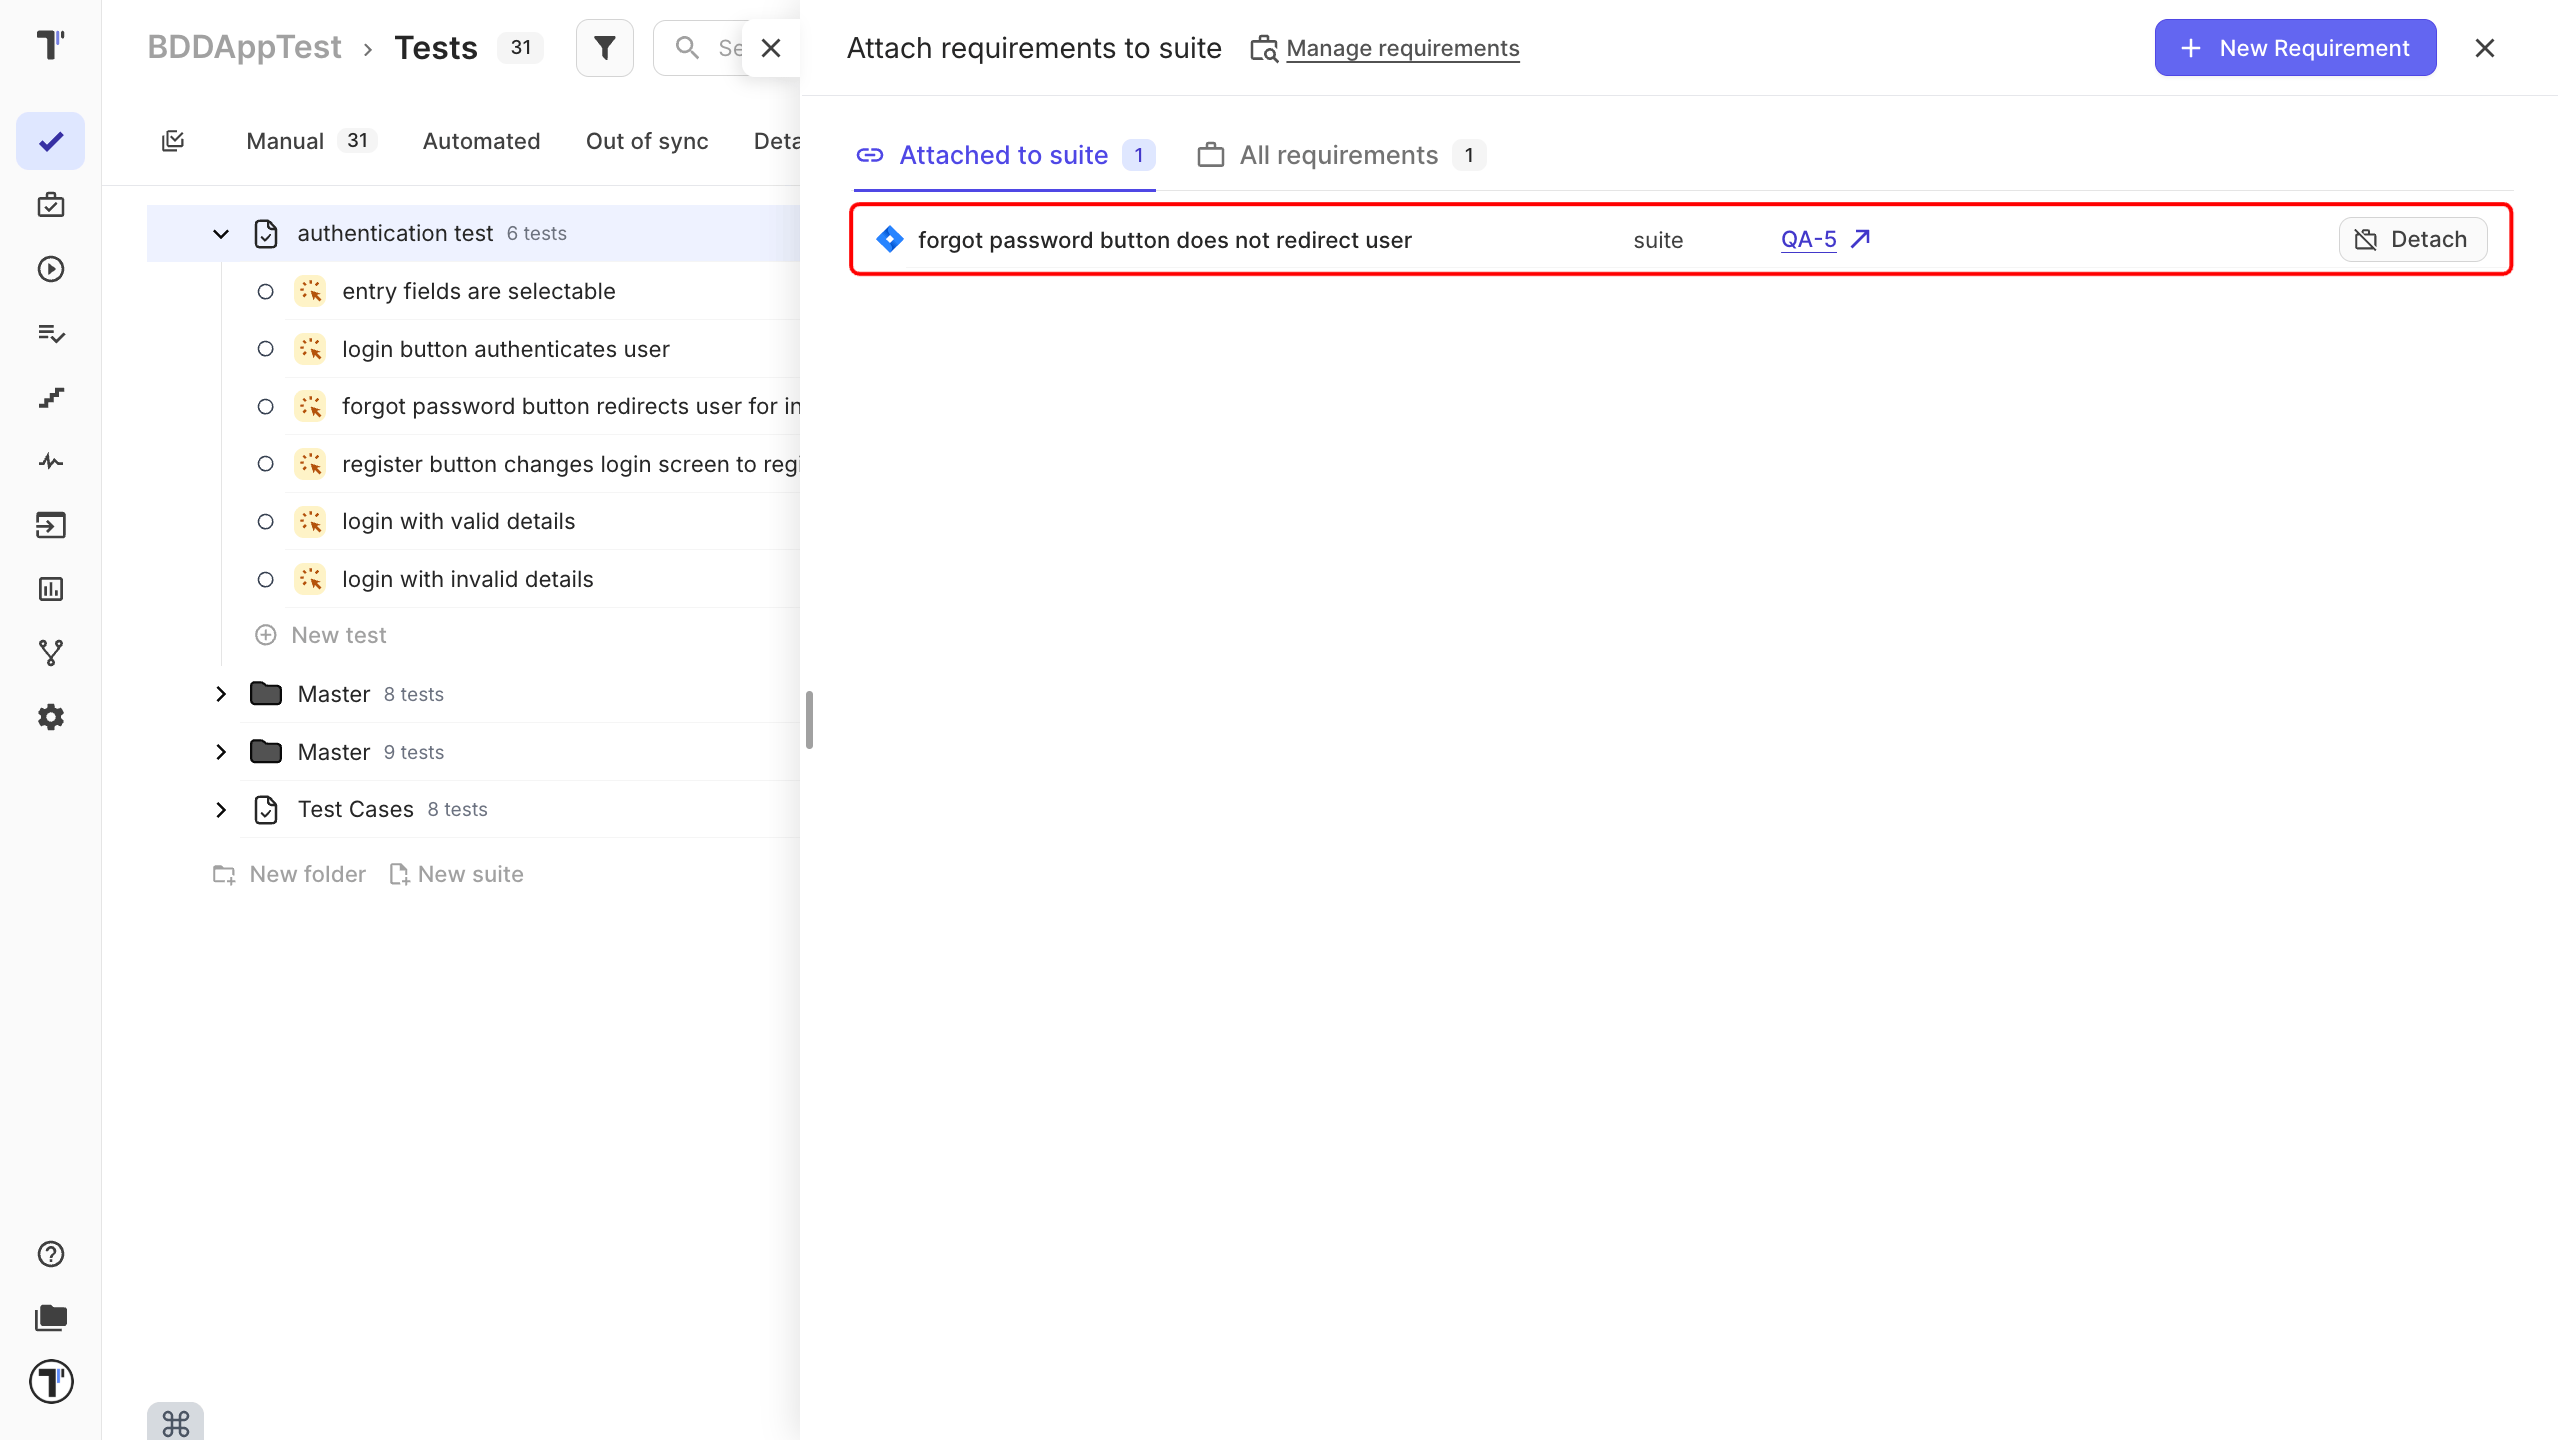
Section titled “Add a requirement”Requirements are what your tests exist to cover, so the cycle starts here. Link one to your project and AI can generate tests from it.
First, set up the integration for your requirement source. See Jira or Confluence for the steps. Then add the requirement:
- Open the Requirements page.
- Click + New Requirements or + Add Requirement.
- Select your requirement source, for example Jira.
- Enter the source identifier, such as the Jira Issue ID.
- Click Save.
Generate tests from the requirement
Section titled “Generate tests from the requirement”With the requirement linked, AI reads it and proposes the test cases that cover it, so you start from a draft instead of a blank suite.
- Open the Requirements page and click your requirement.
- On the Summary tab, click Analyze Requirement.
- Click Add tests to {Suite_name} Suite.
- Review the suggested cases and click Add on the ones you want.
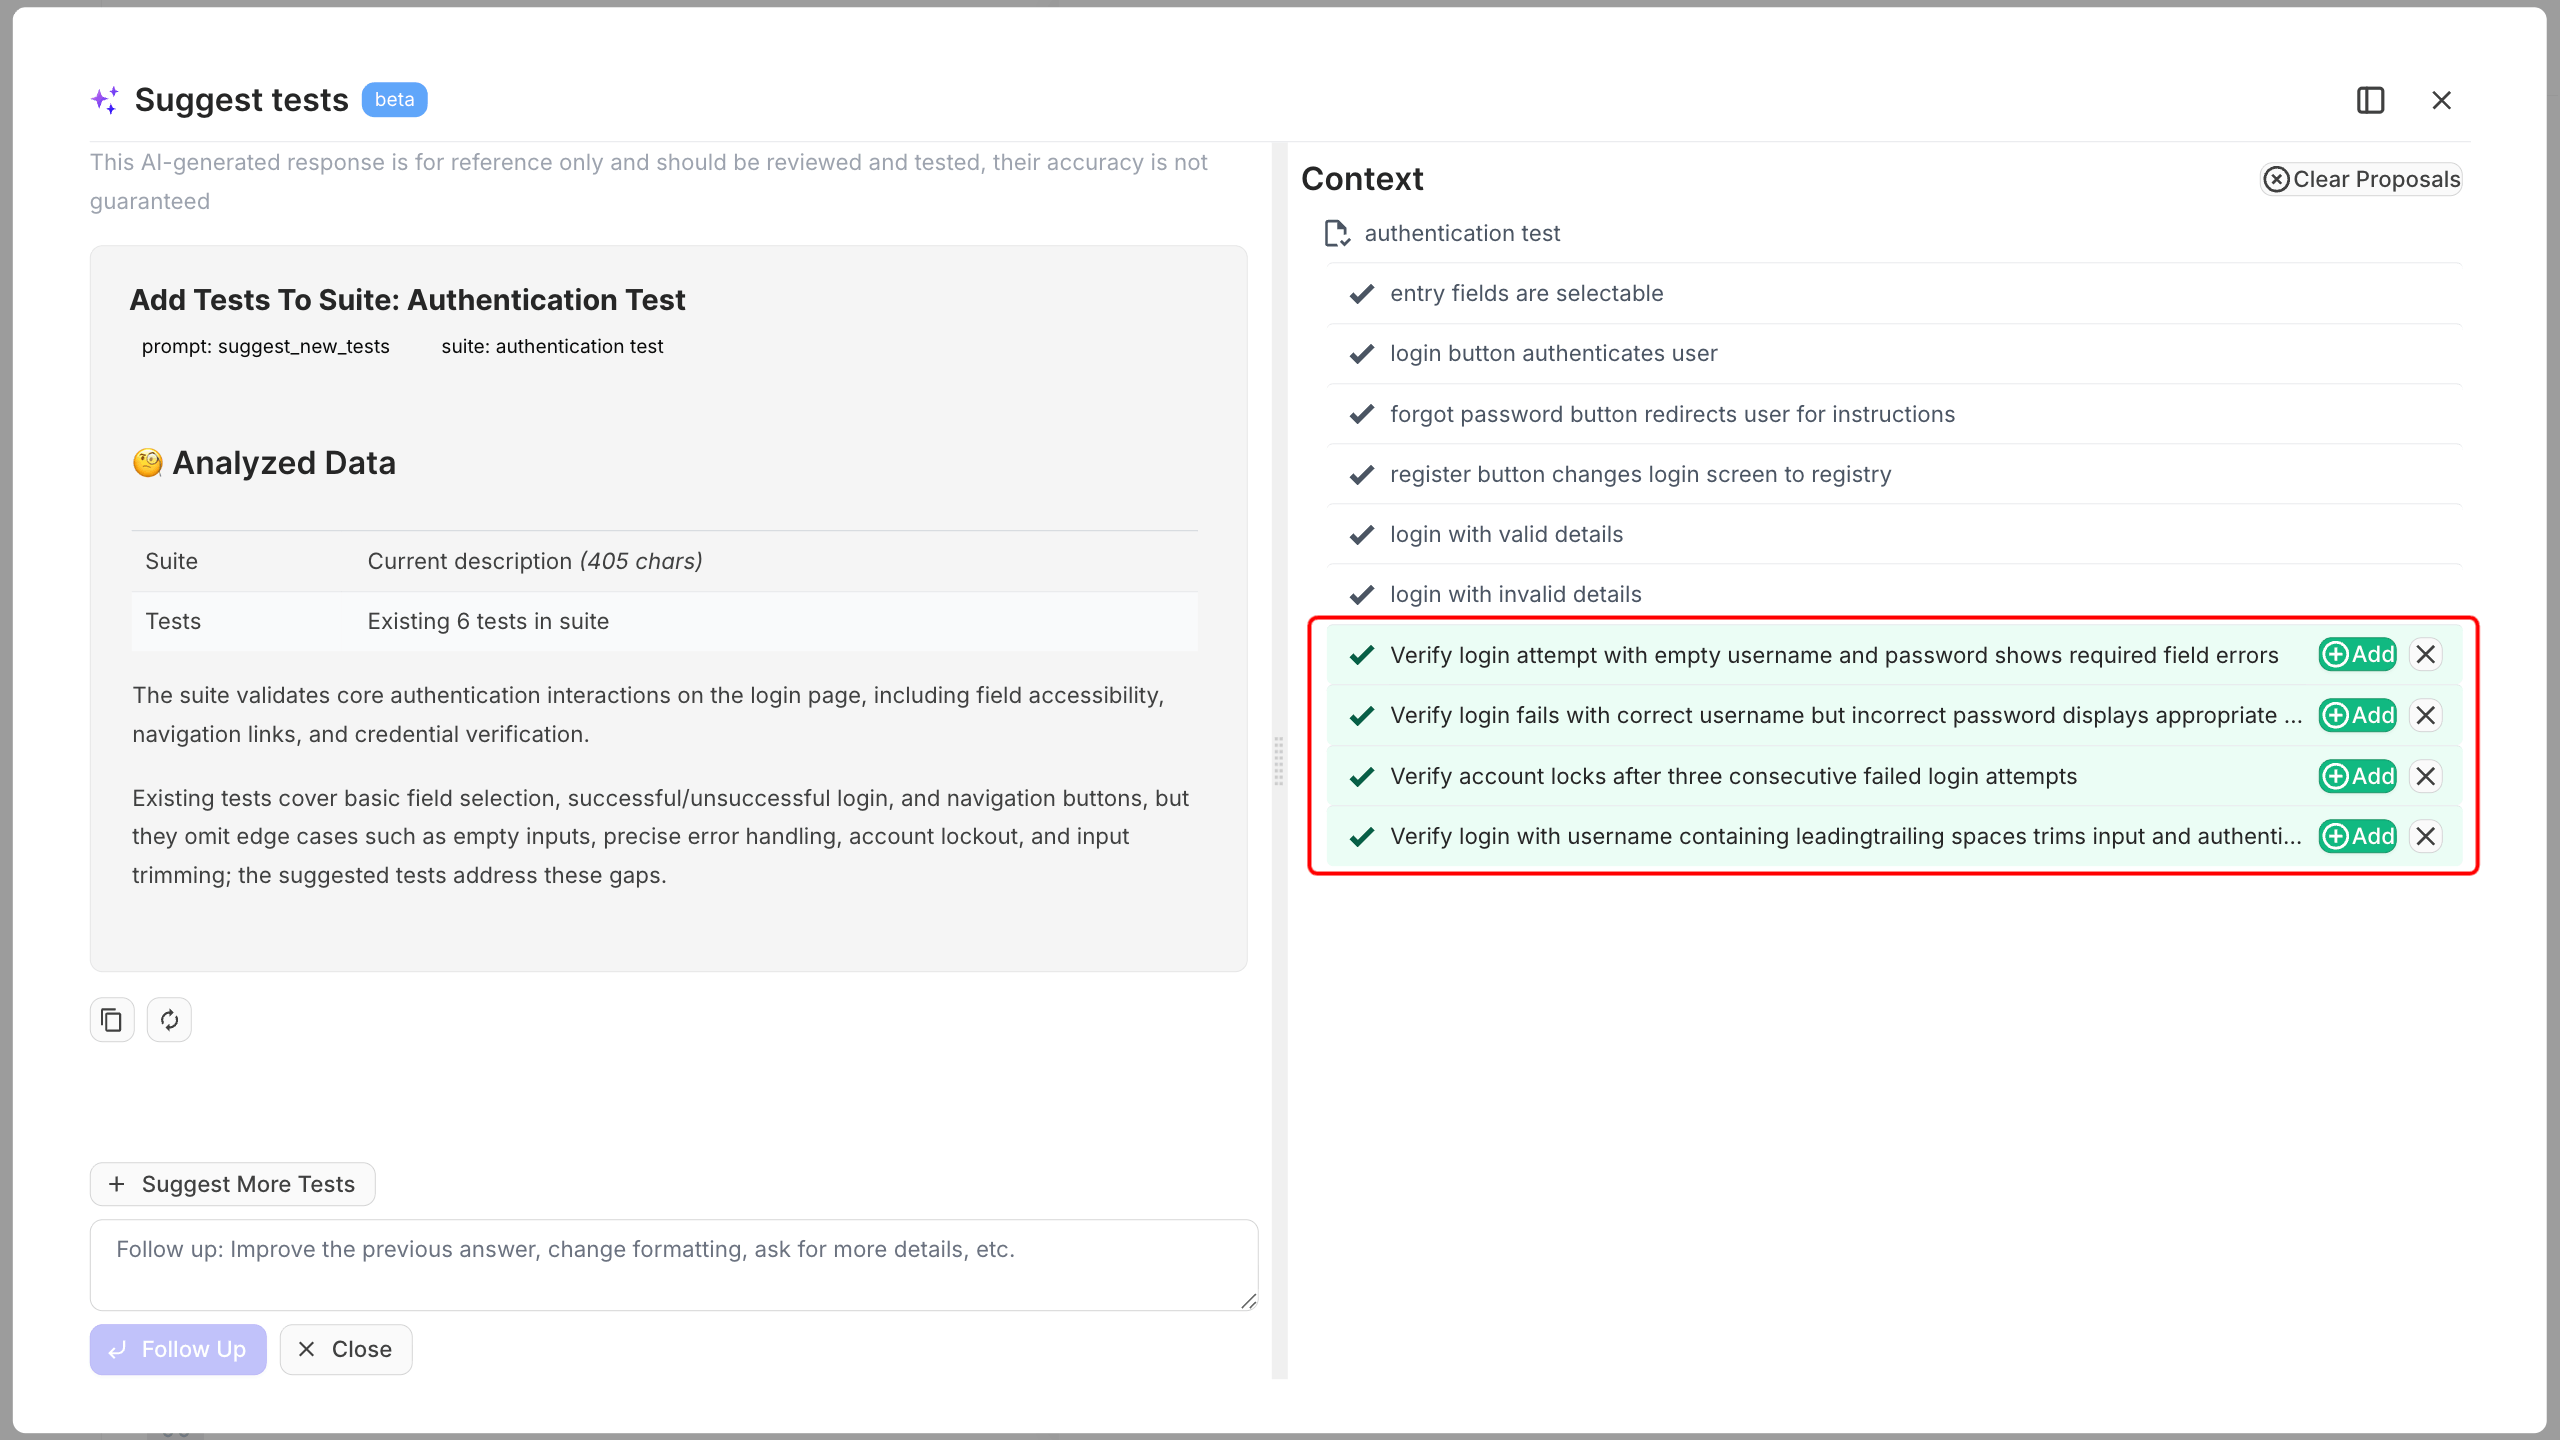
Click Suggest More Tests if you need extra cases, and double-click any suggested title to edit it before adding.
Generate a test description
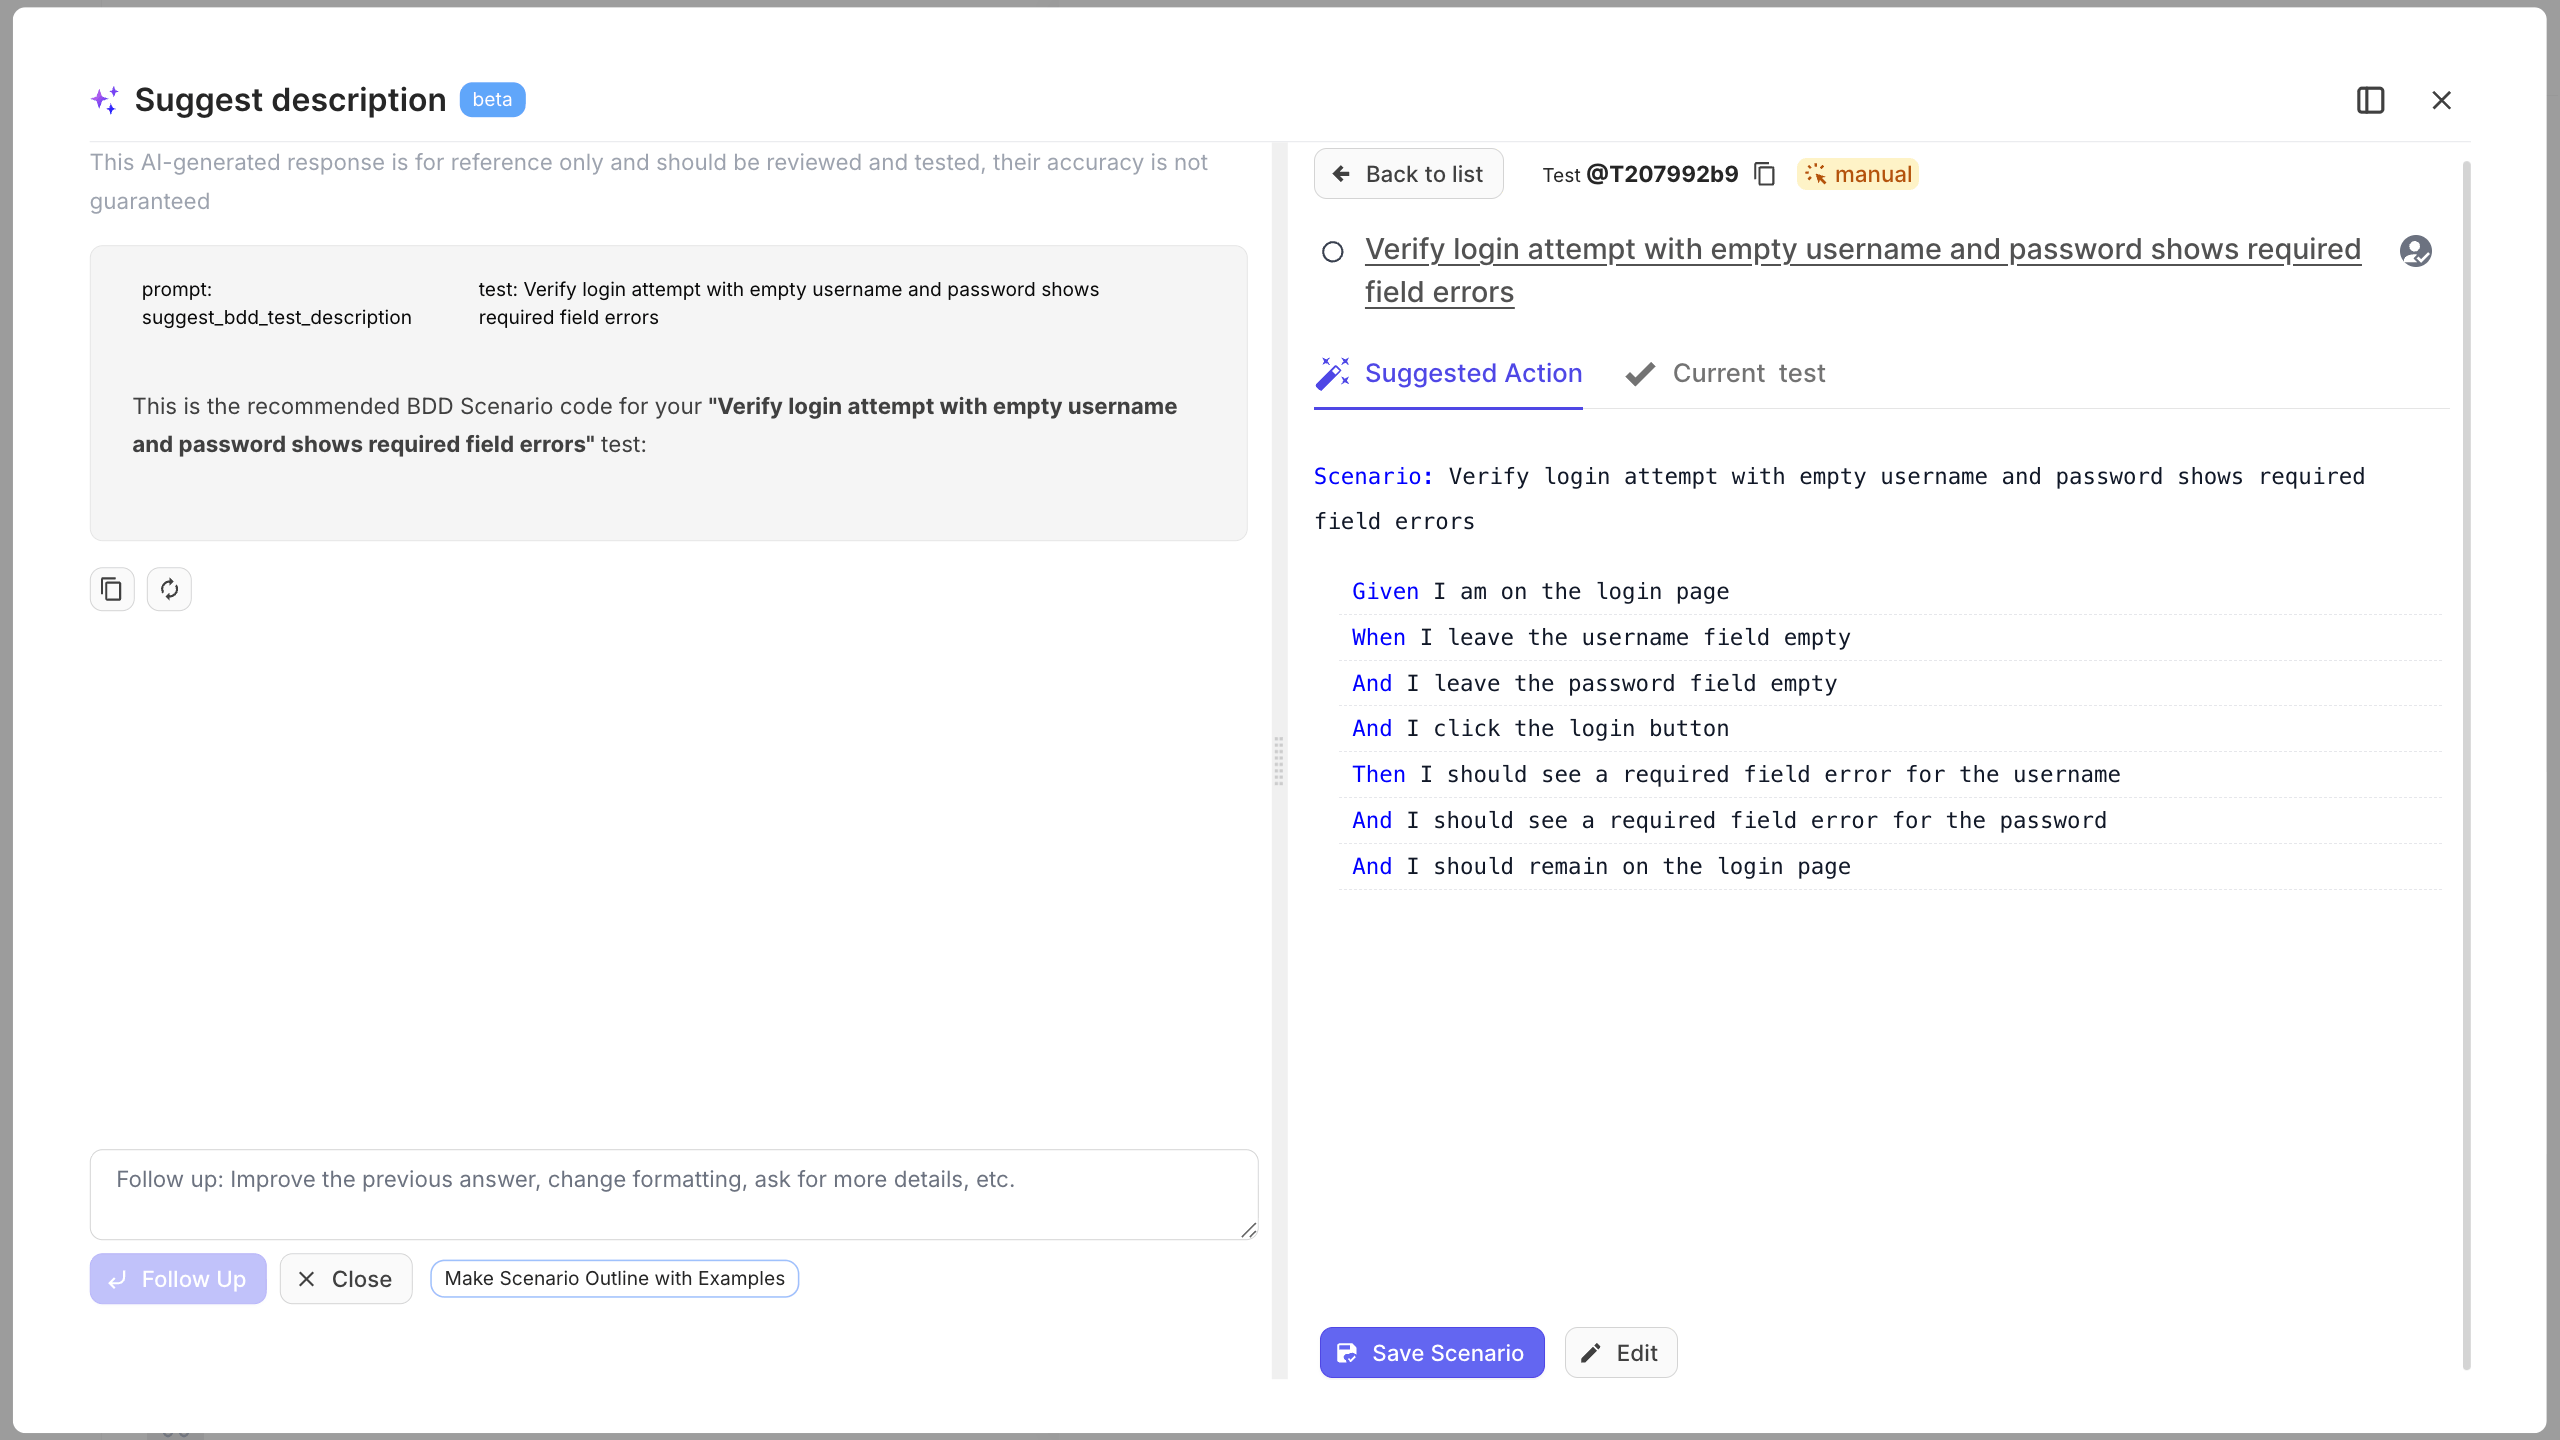
Section titled “Generate a test description”A test name tells you what to check, but not how. AI writes the description from the name, or improves the one you already have.
- Open a test case.
- Click Suggest Description.
- Review the result, edit it if needed, then save.
Analyze a run with AI
Section titled “Analyze a run with AI”Once your tests have run, AI groups the failures so you read a handful of causes instead of a wall of errors.
- Go to the Runs page.
- Open a finished automated run.
- Click Clusterize Errors.
Chat with Analytics
Section titled “Chat with Analytics”Analytics answers questions you already know to ask. Chat with Analytics lets you ask in plain language instead of hunting through dashboards.
- Go to the Analytics page.
- Open Chat with Analytics.
- Ask your question and send it.
Ask things like which tests are most unstable, which areas fail most often, or how execution trends changed over time.
Next steps
Section titled “Next steps”- Want to expand your AI capabilities? Try setting up AI Agents.
- See every generative feature across suites, tests, and code in AI-Powered Features.
- Drive your test design from product requirements with AI-Requirements.