

Migration from Qase
Welcome!
In this tutorial you will export your cases from Qase as a CSV file, import that file, and check that everything works correctly. Qase and Testomat.io store same things, so a migration is simple.
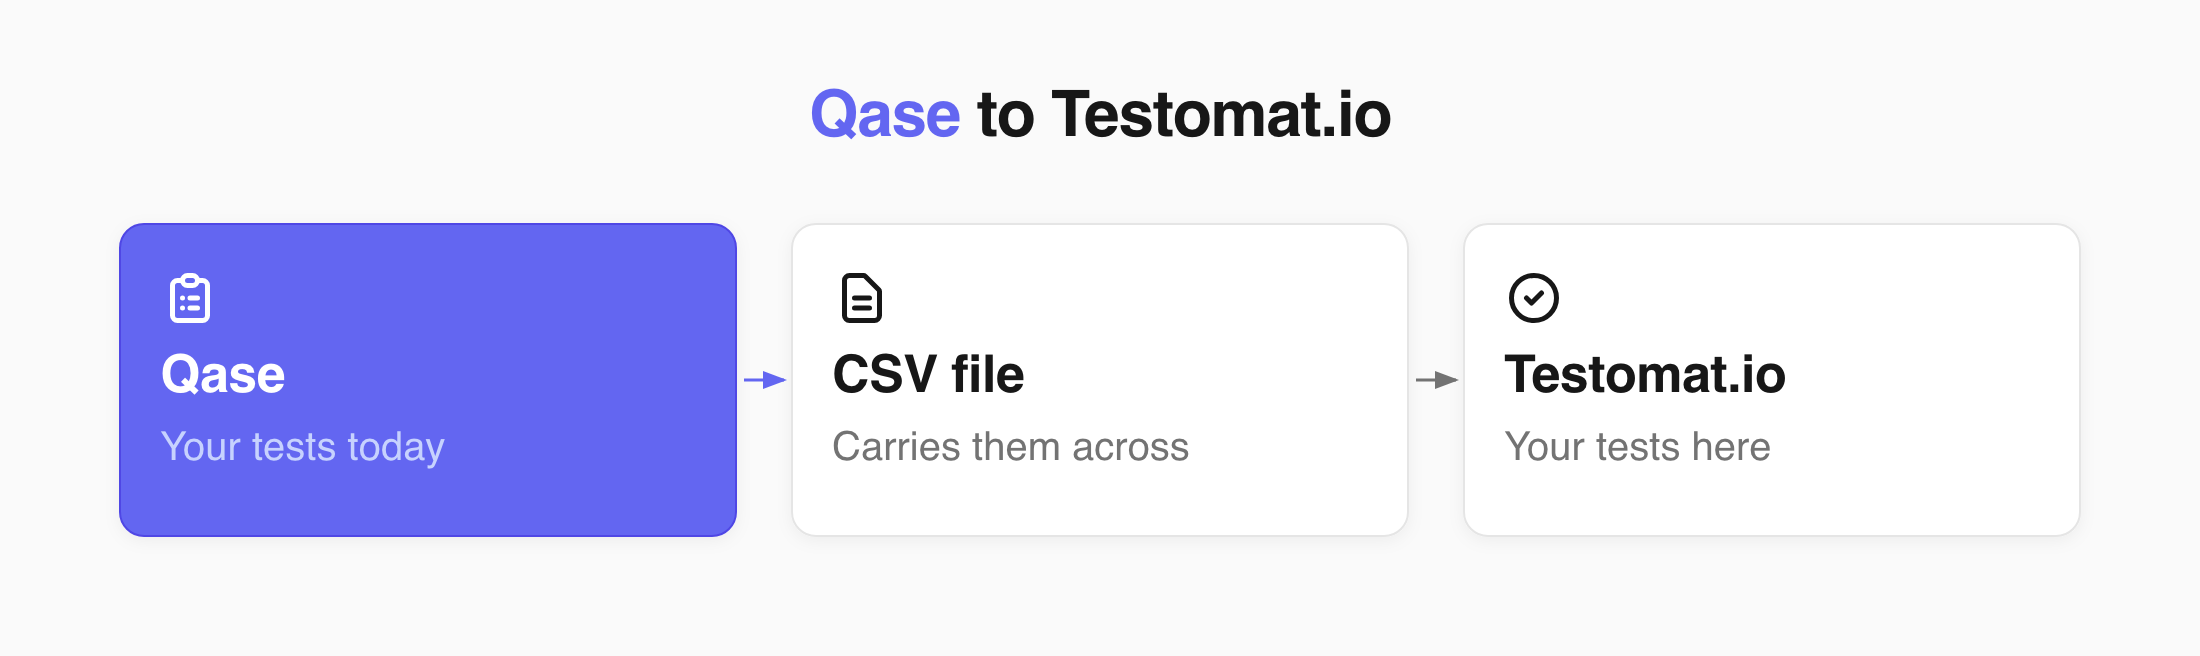
Export from Qase
Section titled “Export from Qase”First, get your test cases out of Qase as a file.
- Open your project in Qase.
- Export your test cases as a CSV file.
- Save the file on your computer.
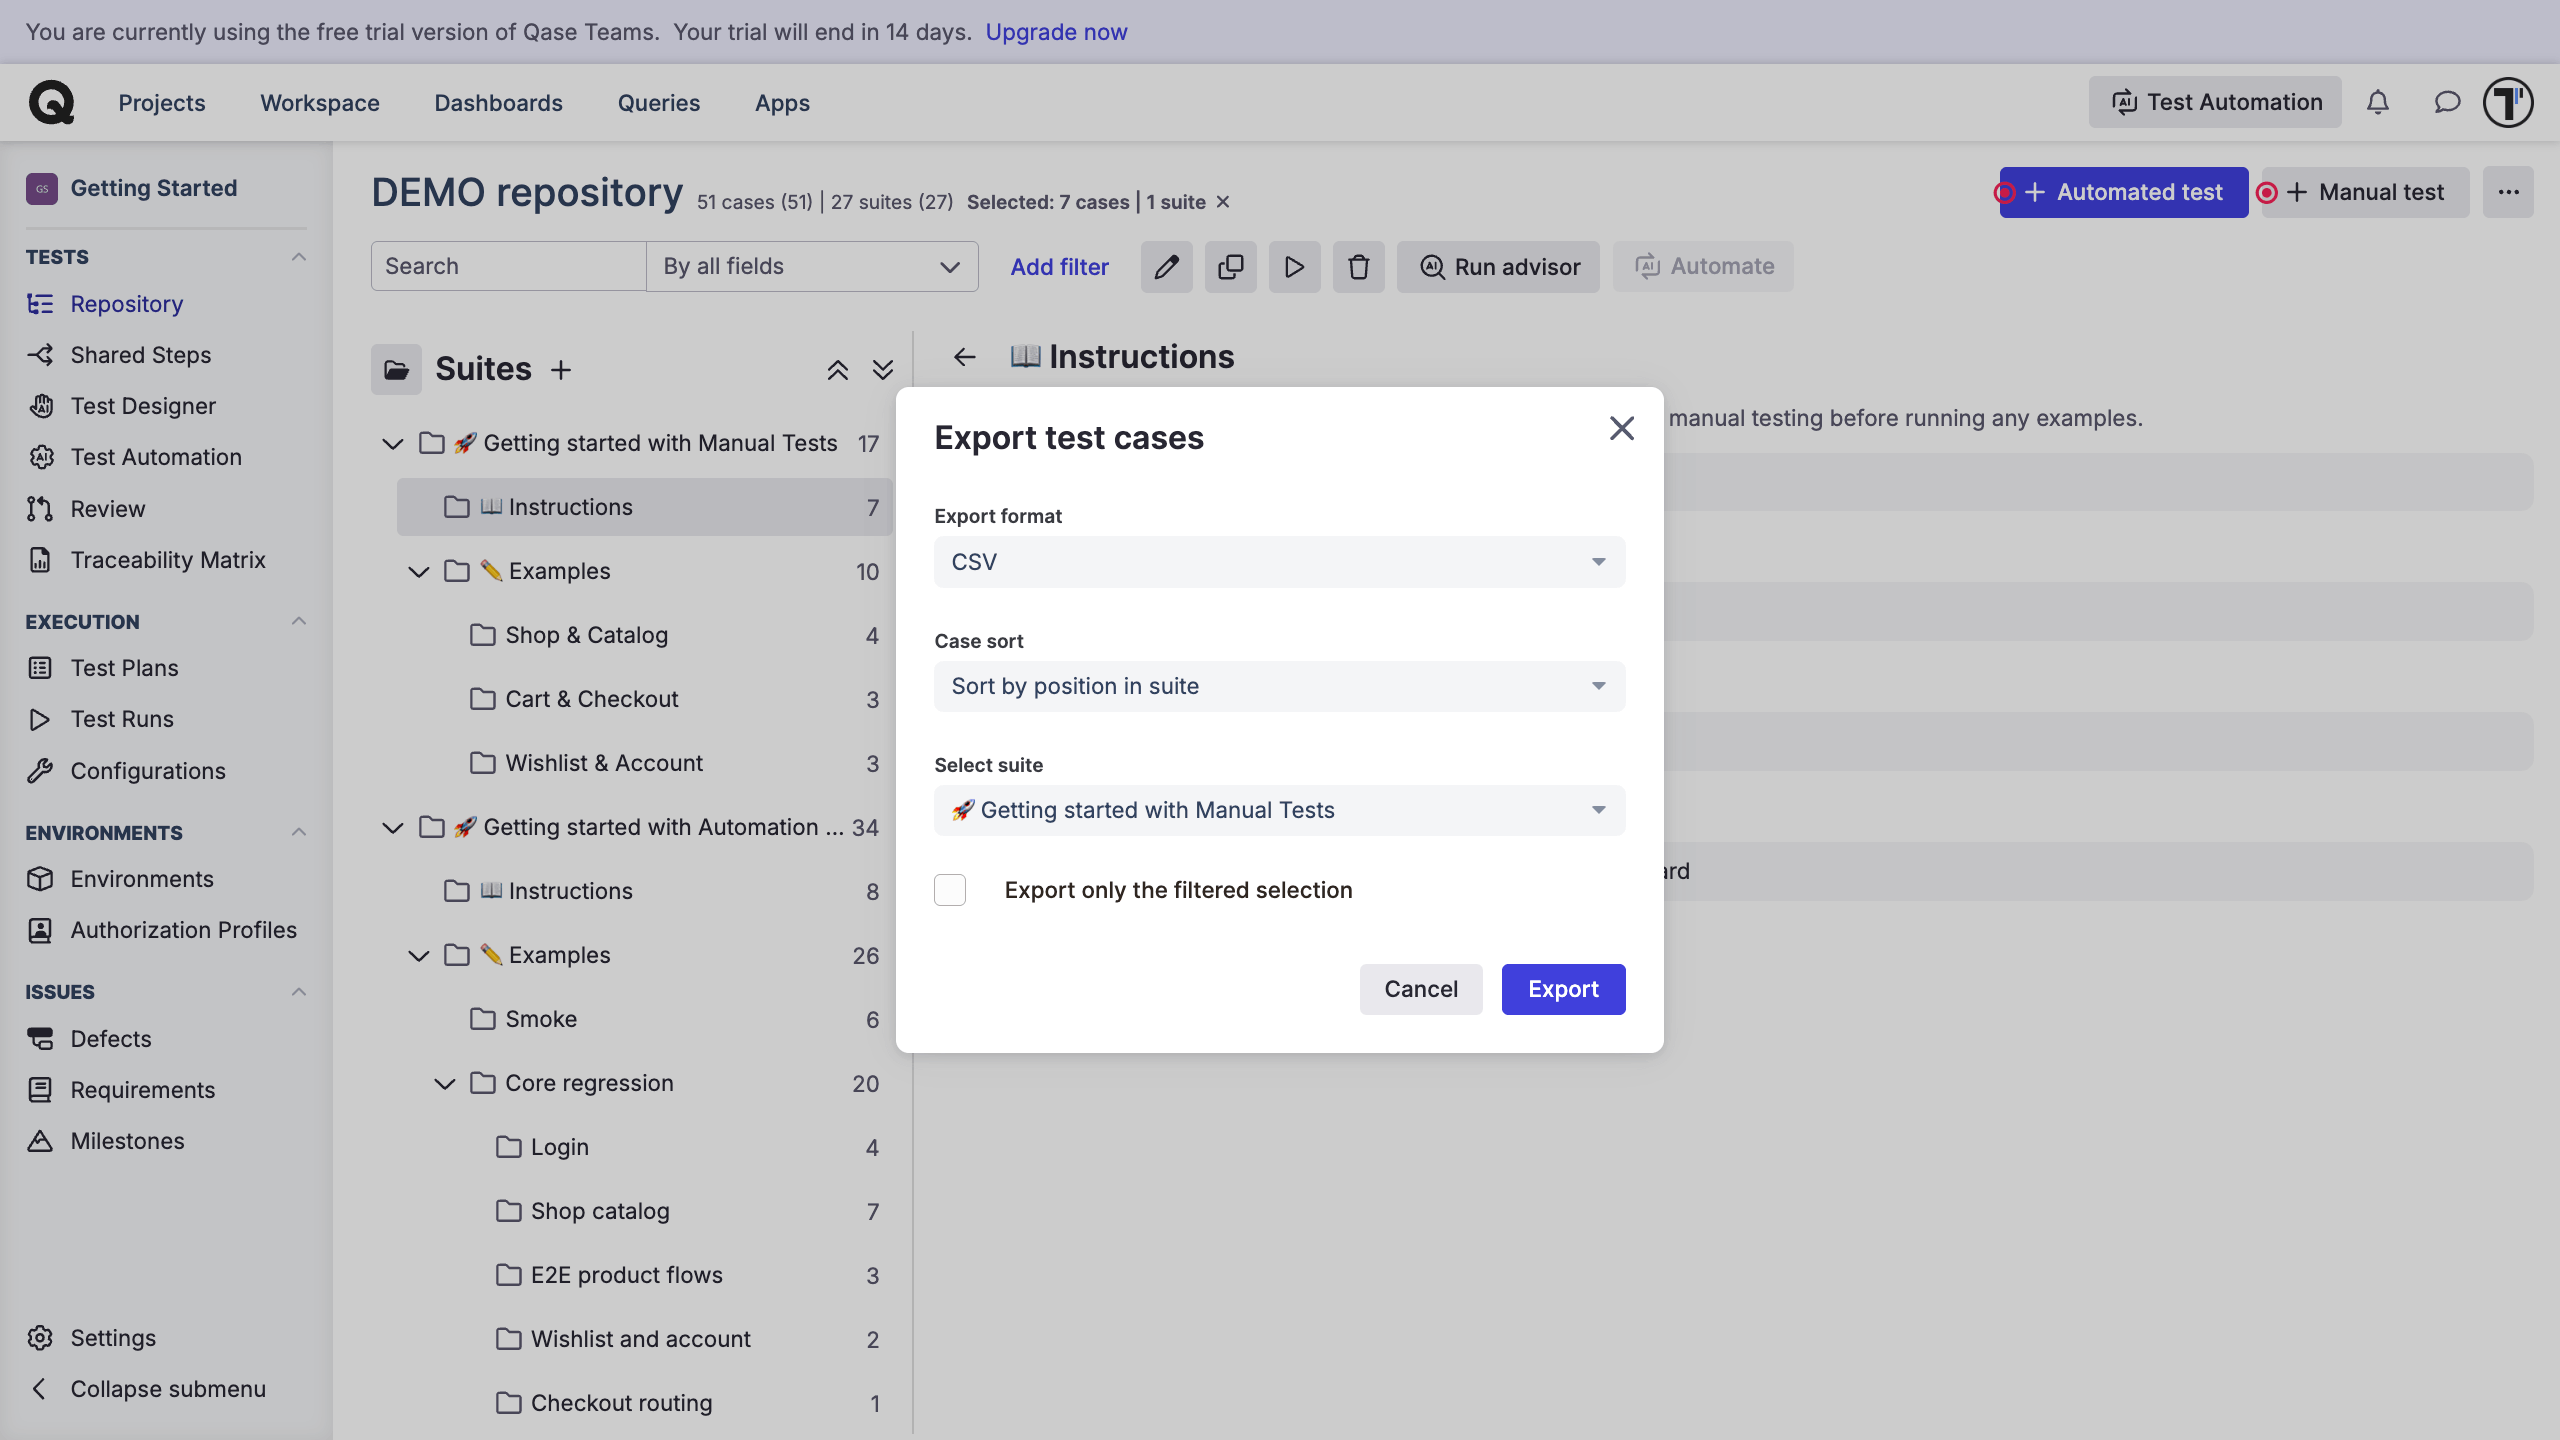
Open the file and check the first row. It should hold column names like Title and Folder - that is how Testomat.io knows what each column means.
Import into Testomat.io
Section titled “Import into Testomat.io”Now you upload a CSV file.
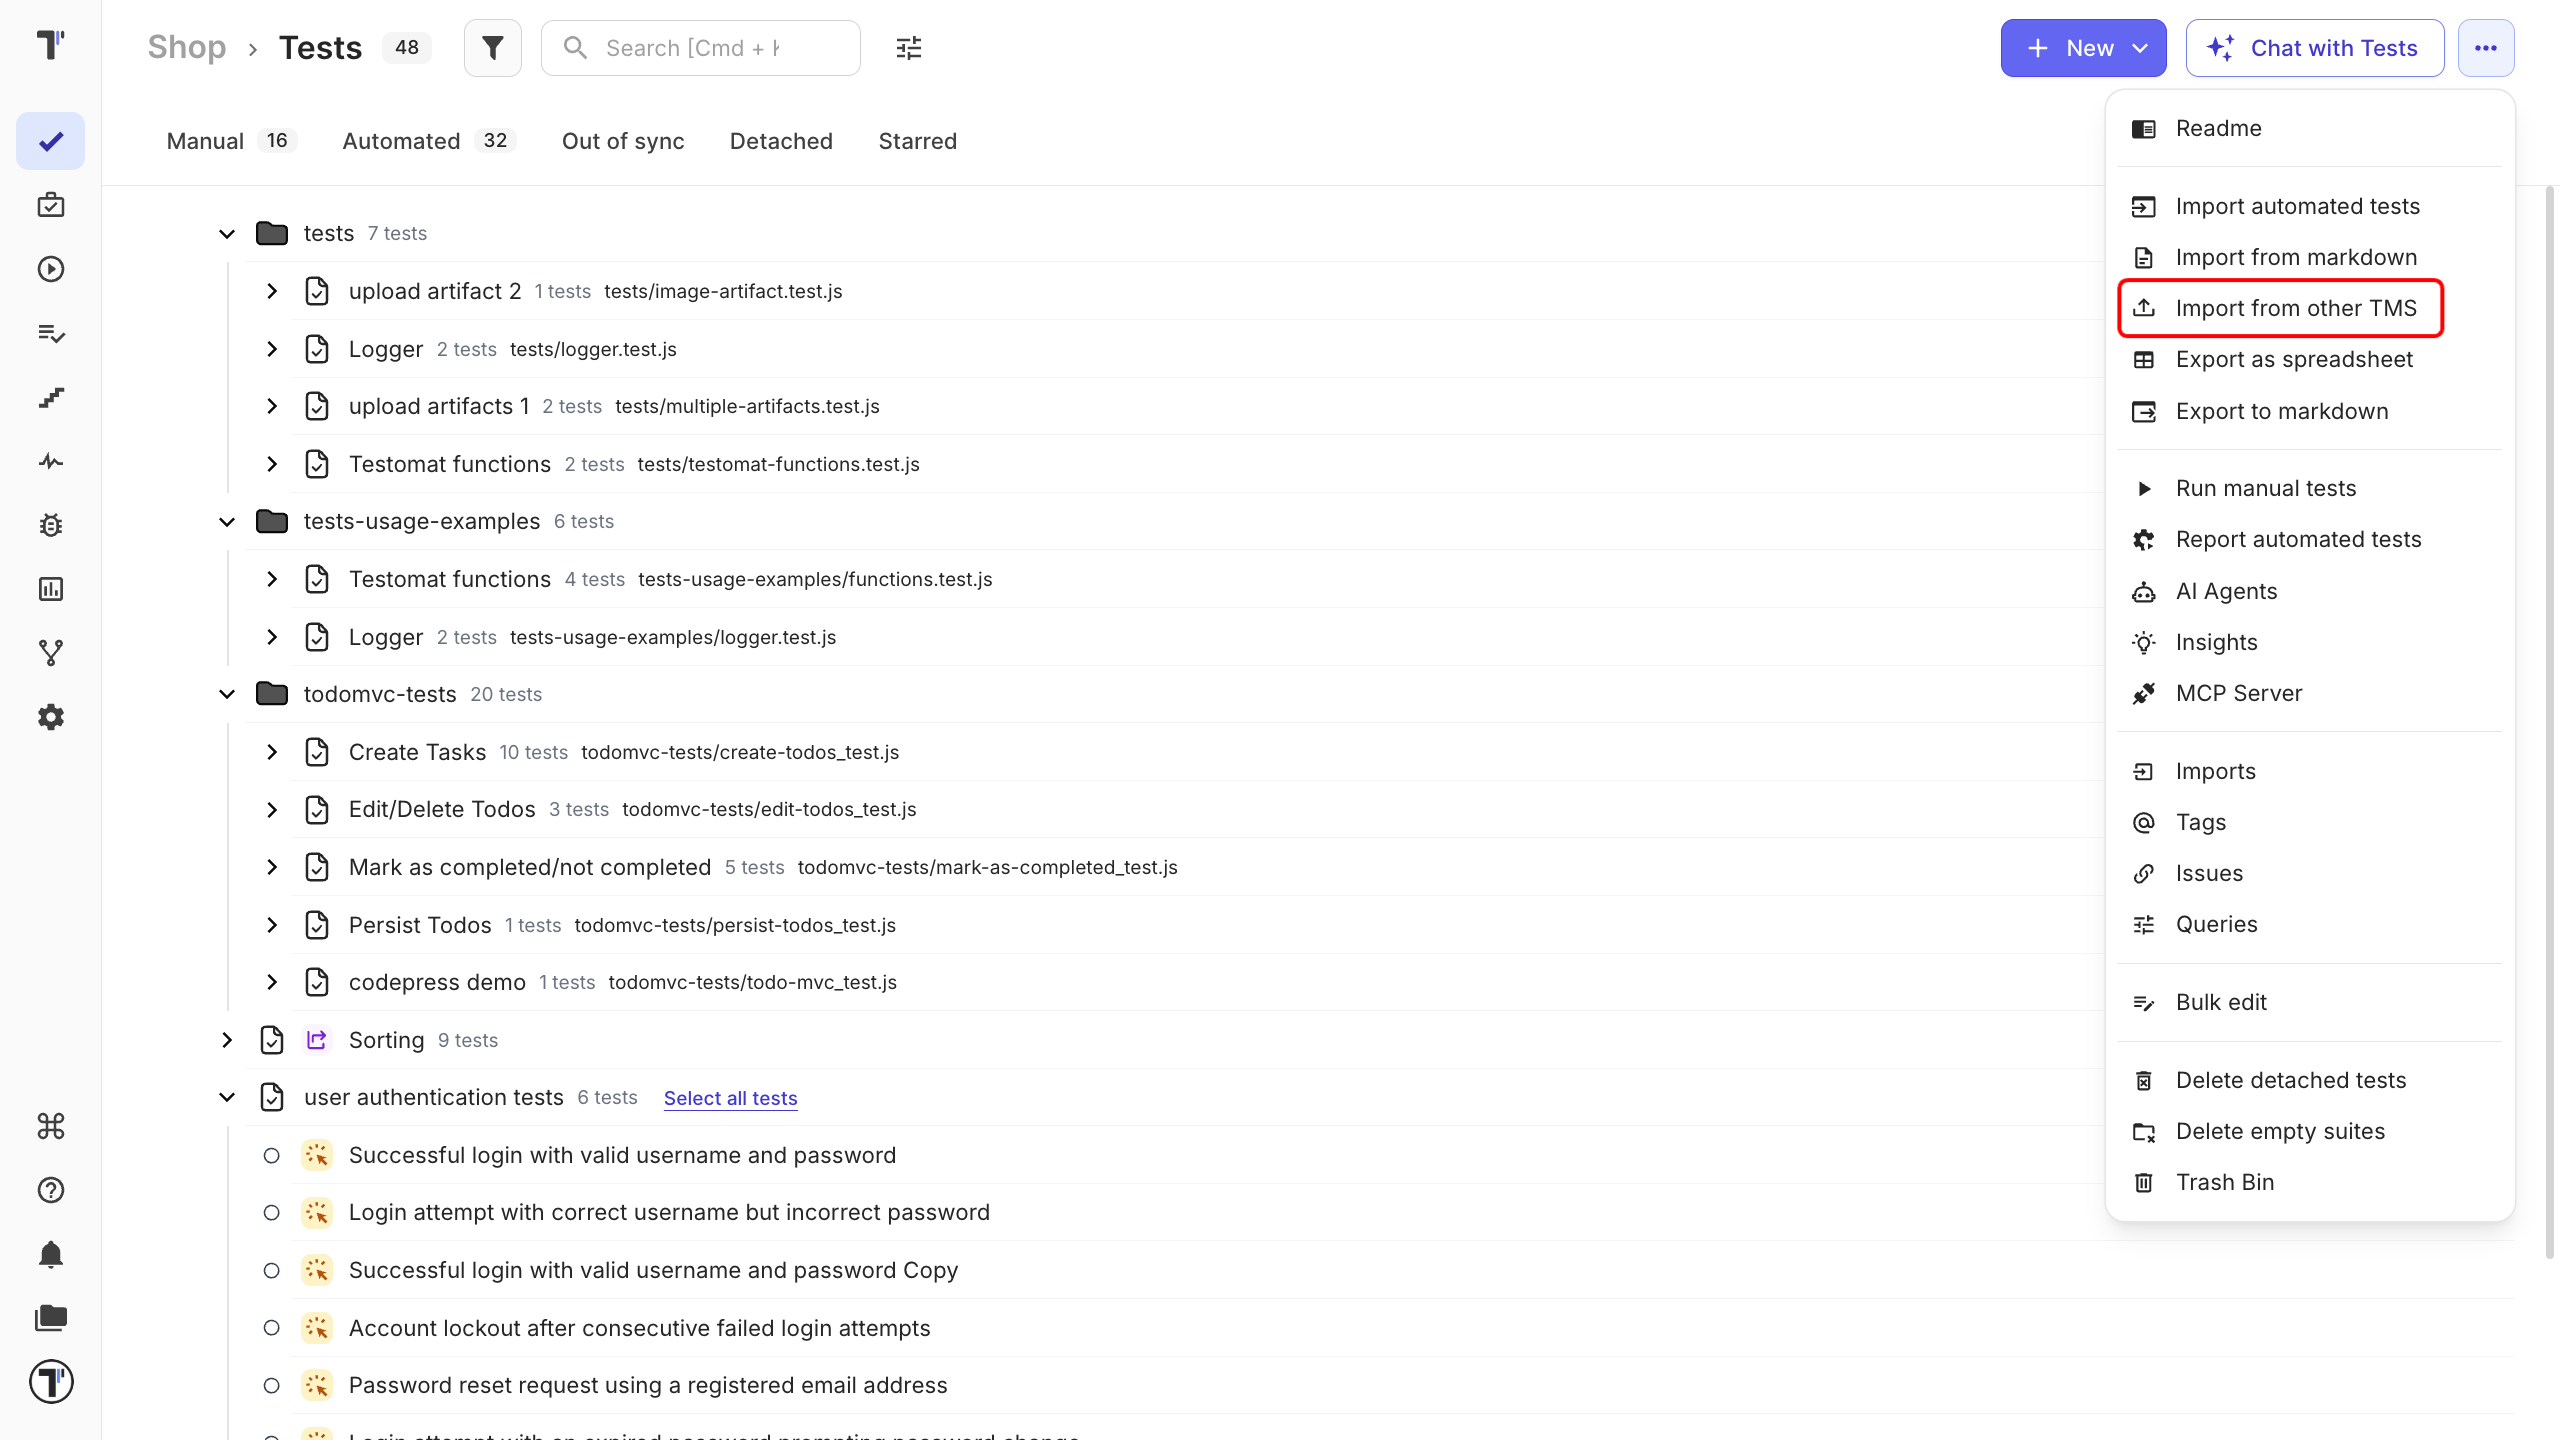
- Open your project and go to the Tests tab.
- In menu (
...), click Import from other TMS and the Imports window will open. - Click Import.
- Choose Import from CSV. Import tests from CSV/XLSX sidebar opens on the right.
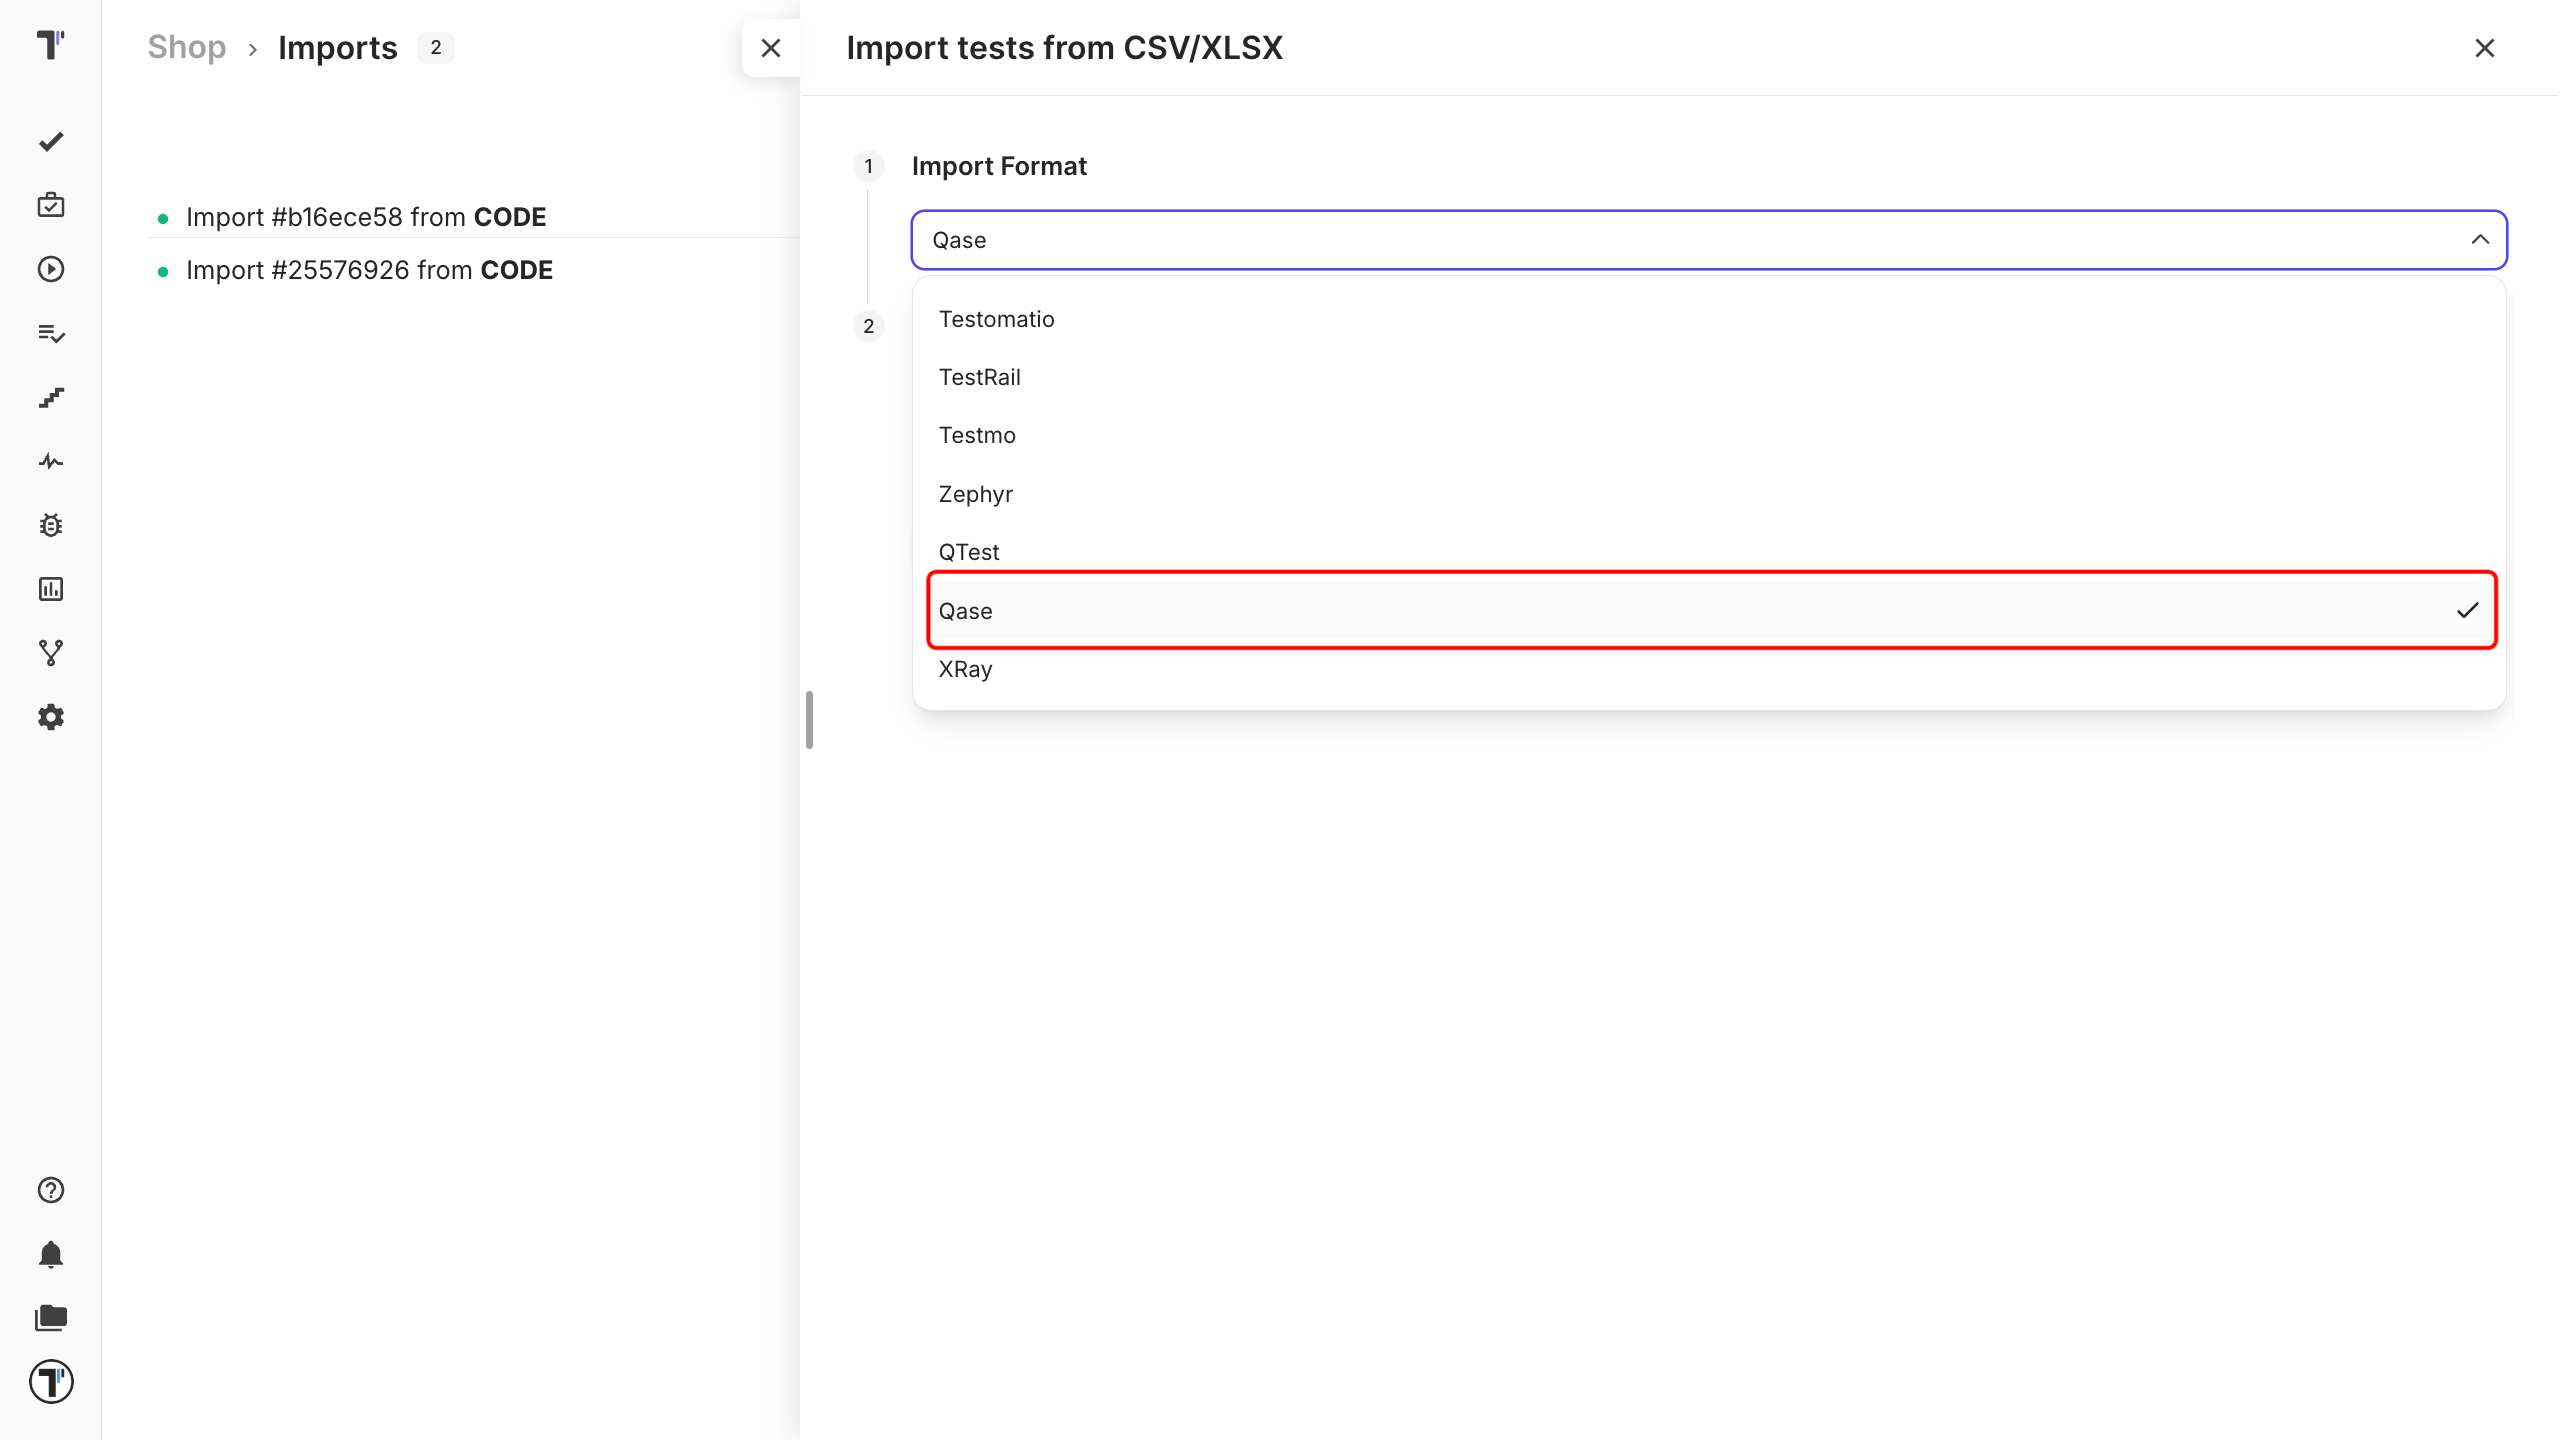
Next, in the Import tests from CSV/XLSX sidebar:
- Choose Qase from the dropdown.
- Select the CSV file you exported.
- Click Create.
After Testomat.io reads the file, your test cases appear on the Tests page.
You do not have to rebuild anything: you picked Qase in the dropdown, Testomat.io knows how your file is built. Your tests are in the same folders they were in Qase, and each test keeps its steps and expected results.
If this doesn’t work
- The import fails with an error. A missing header row is the most common cause.
- Your folders are flat. Confirm you picked Qase in the dropdown - not another format.
- Something is still off. Contact support.
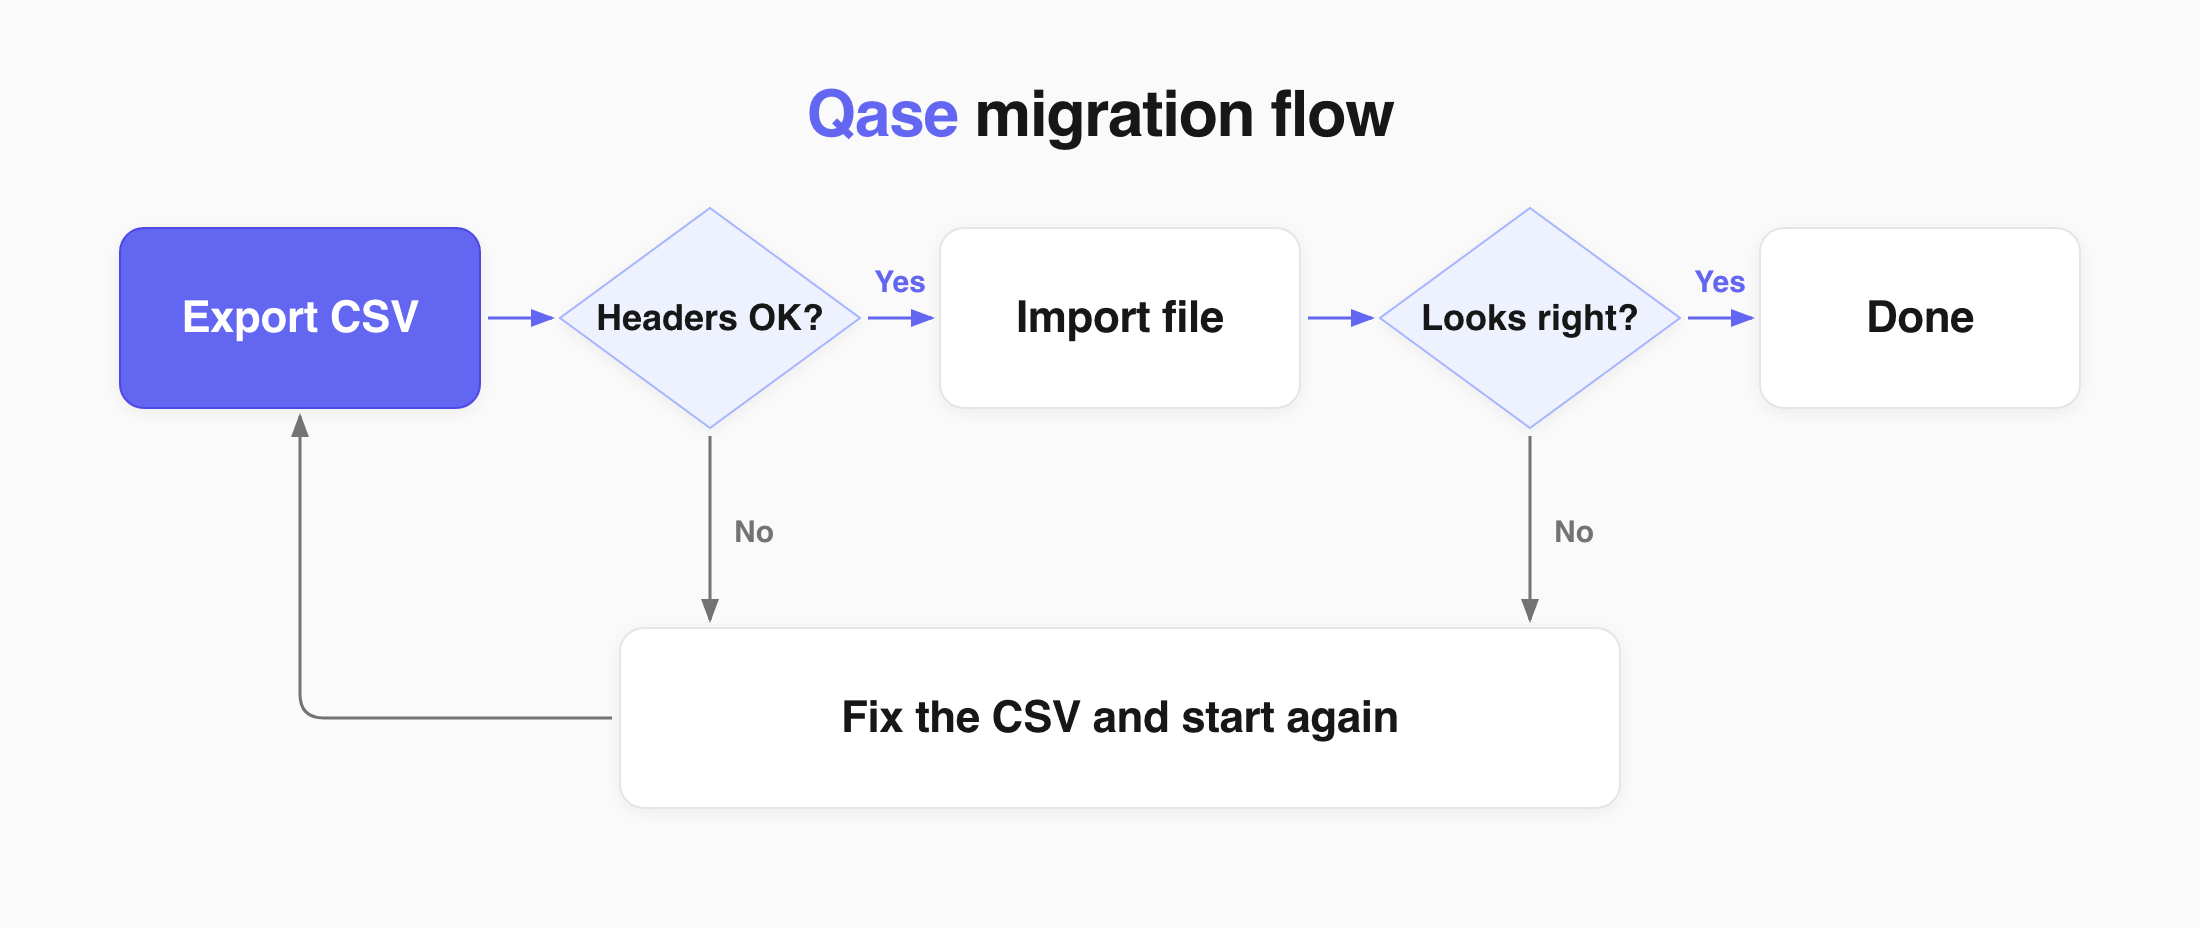
Something missing or in the wrong place? Fix it in your CSV file and import again. That is much faster than editing tests one by one.
Import Qase fields
Section titled “Import Qase fields”Test in Qase have their Properties. To migrate tests from Qase without losing any data, you must create custom fields in Testomat.io. A custom field can be created in the Labes & Fields tab. Each label = property in Qase test.
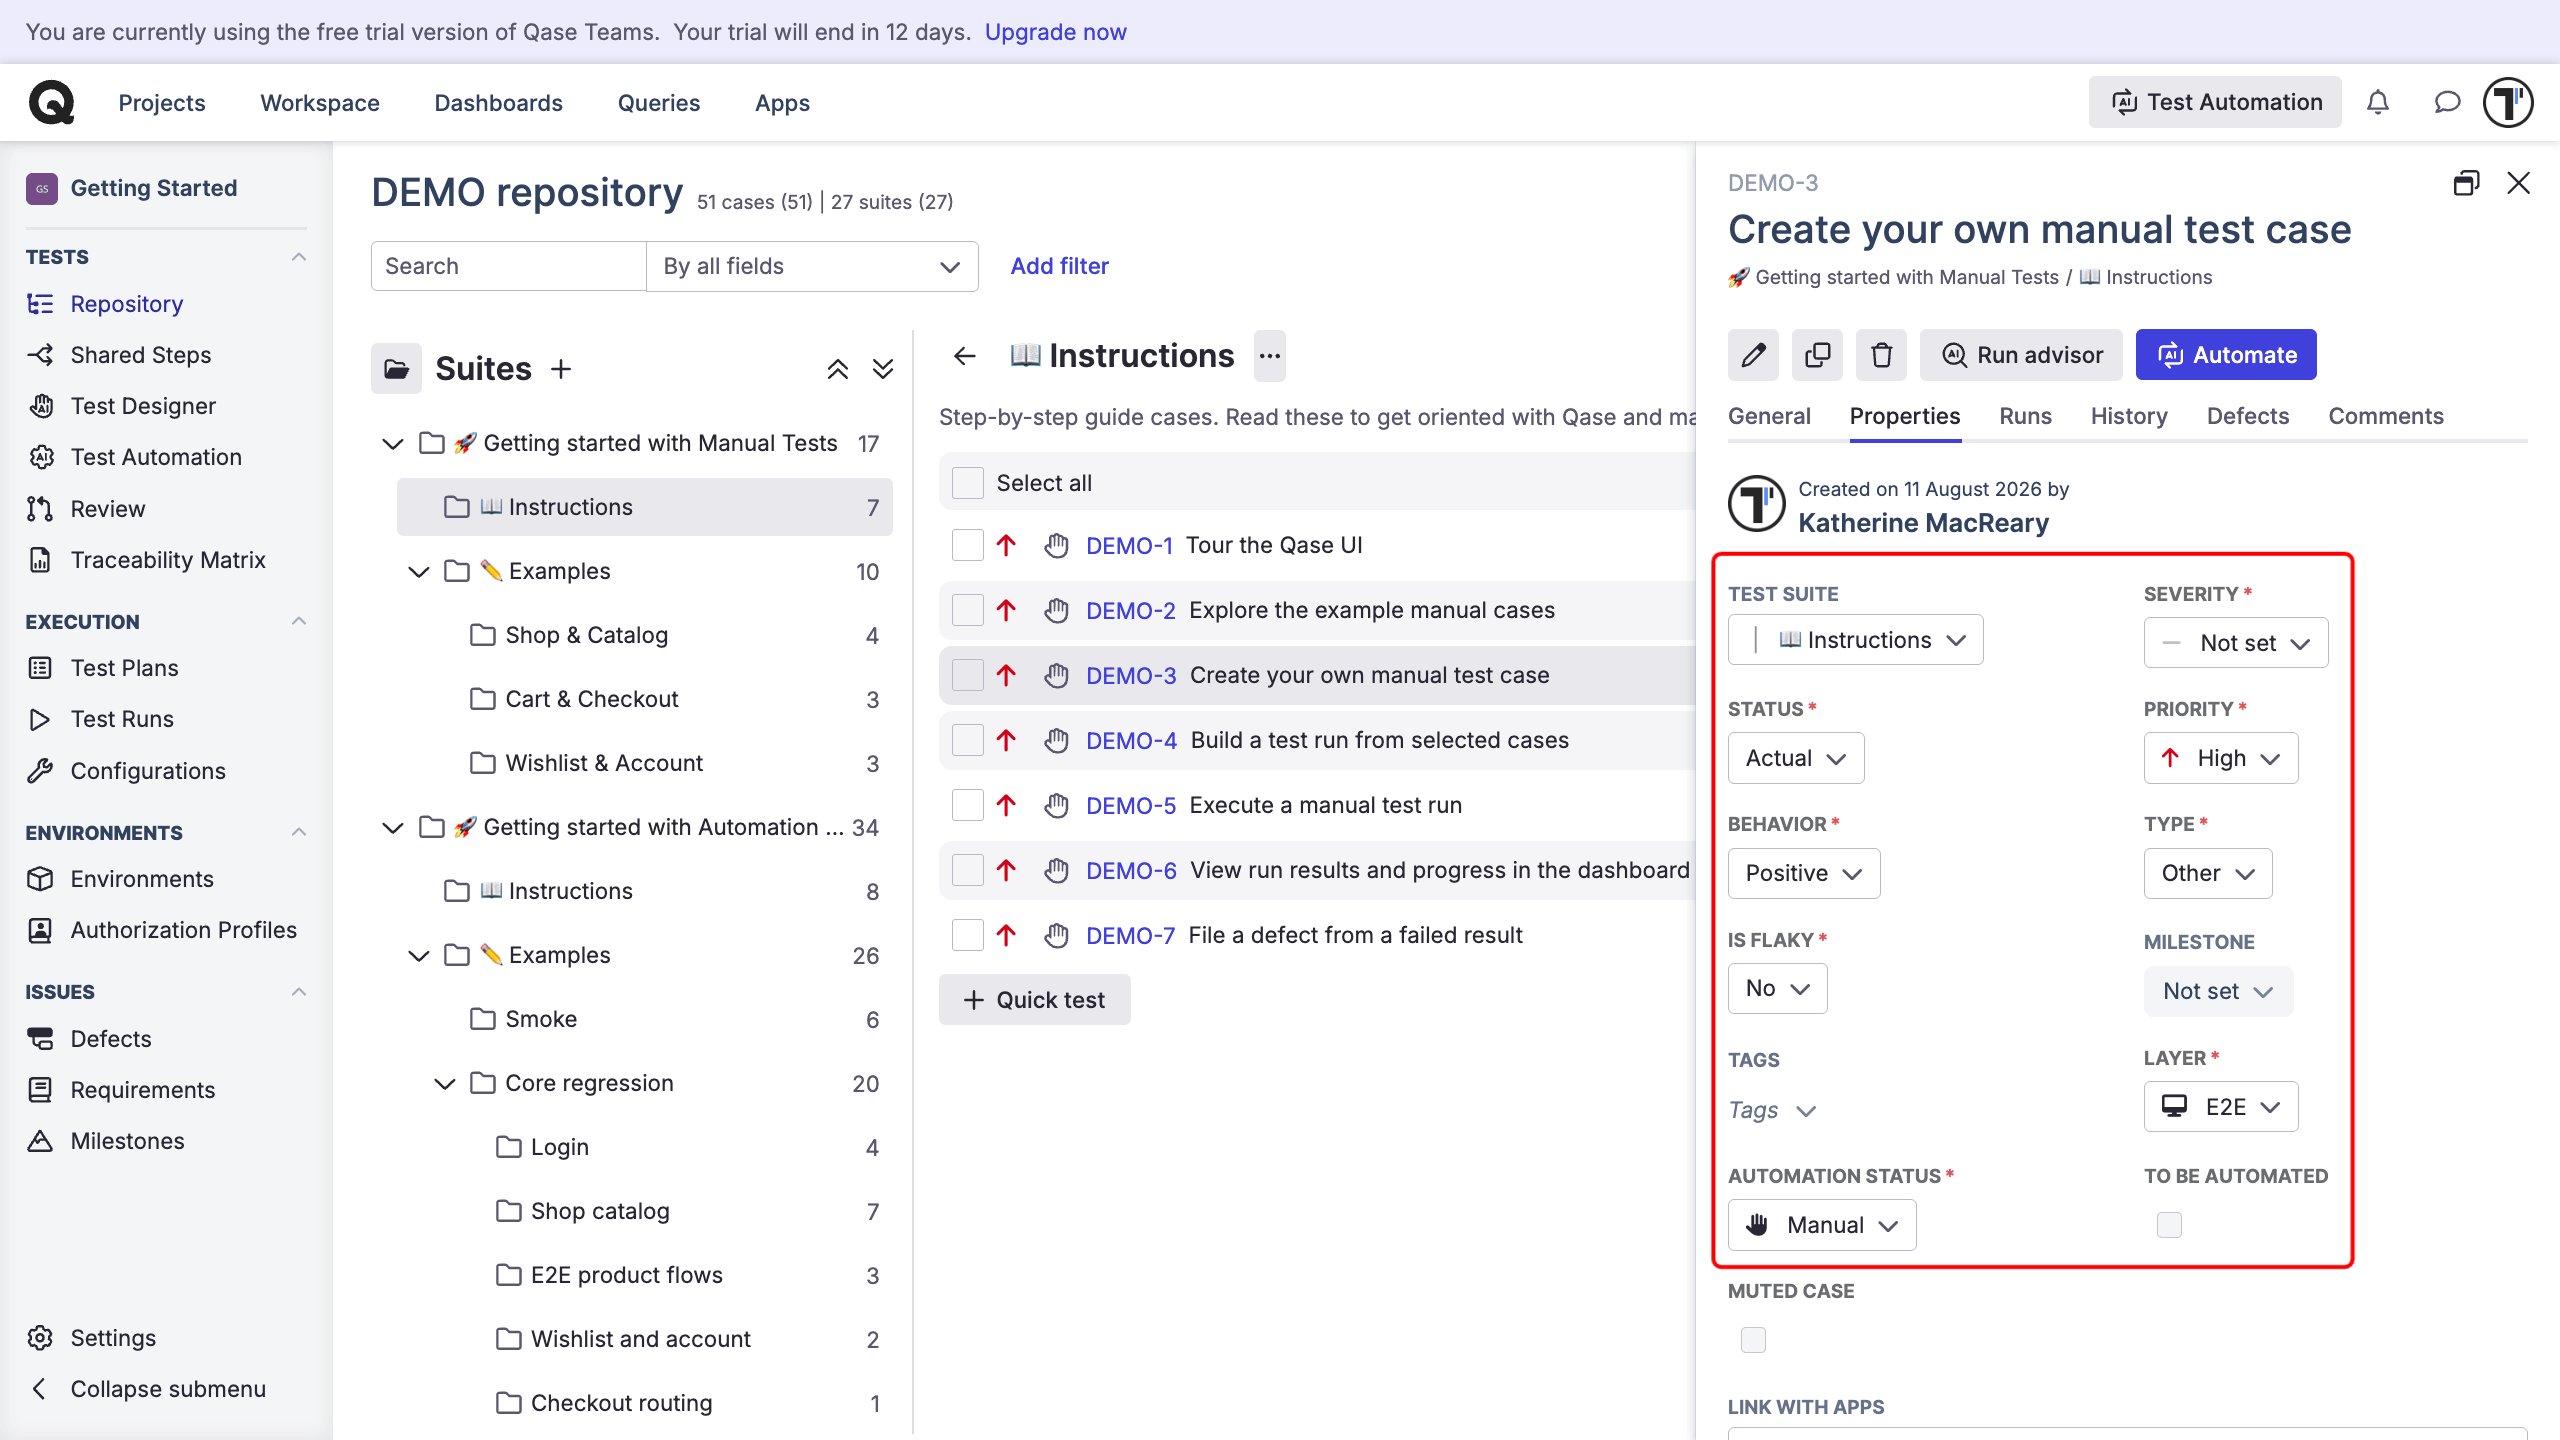
A label in Testomat.io works as a keyword for test properties in Qase. To keep a value like Status, turn the label into a custom field. You create the label first, then set it up.
- Go to Testomat.io.
- Open your project and go to Settings.
- Select Labels & Fields.
- Enter a title, such as
Status, and click Create.
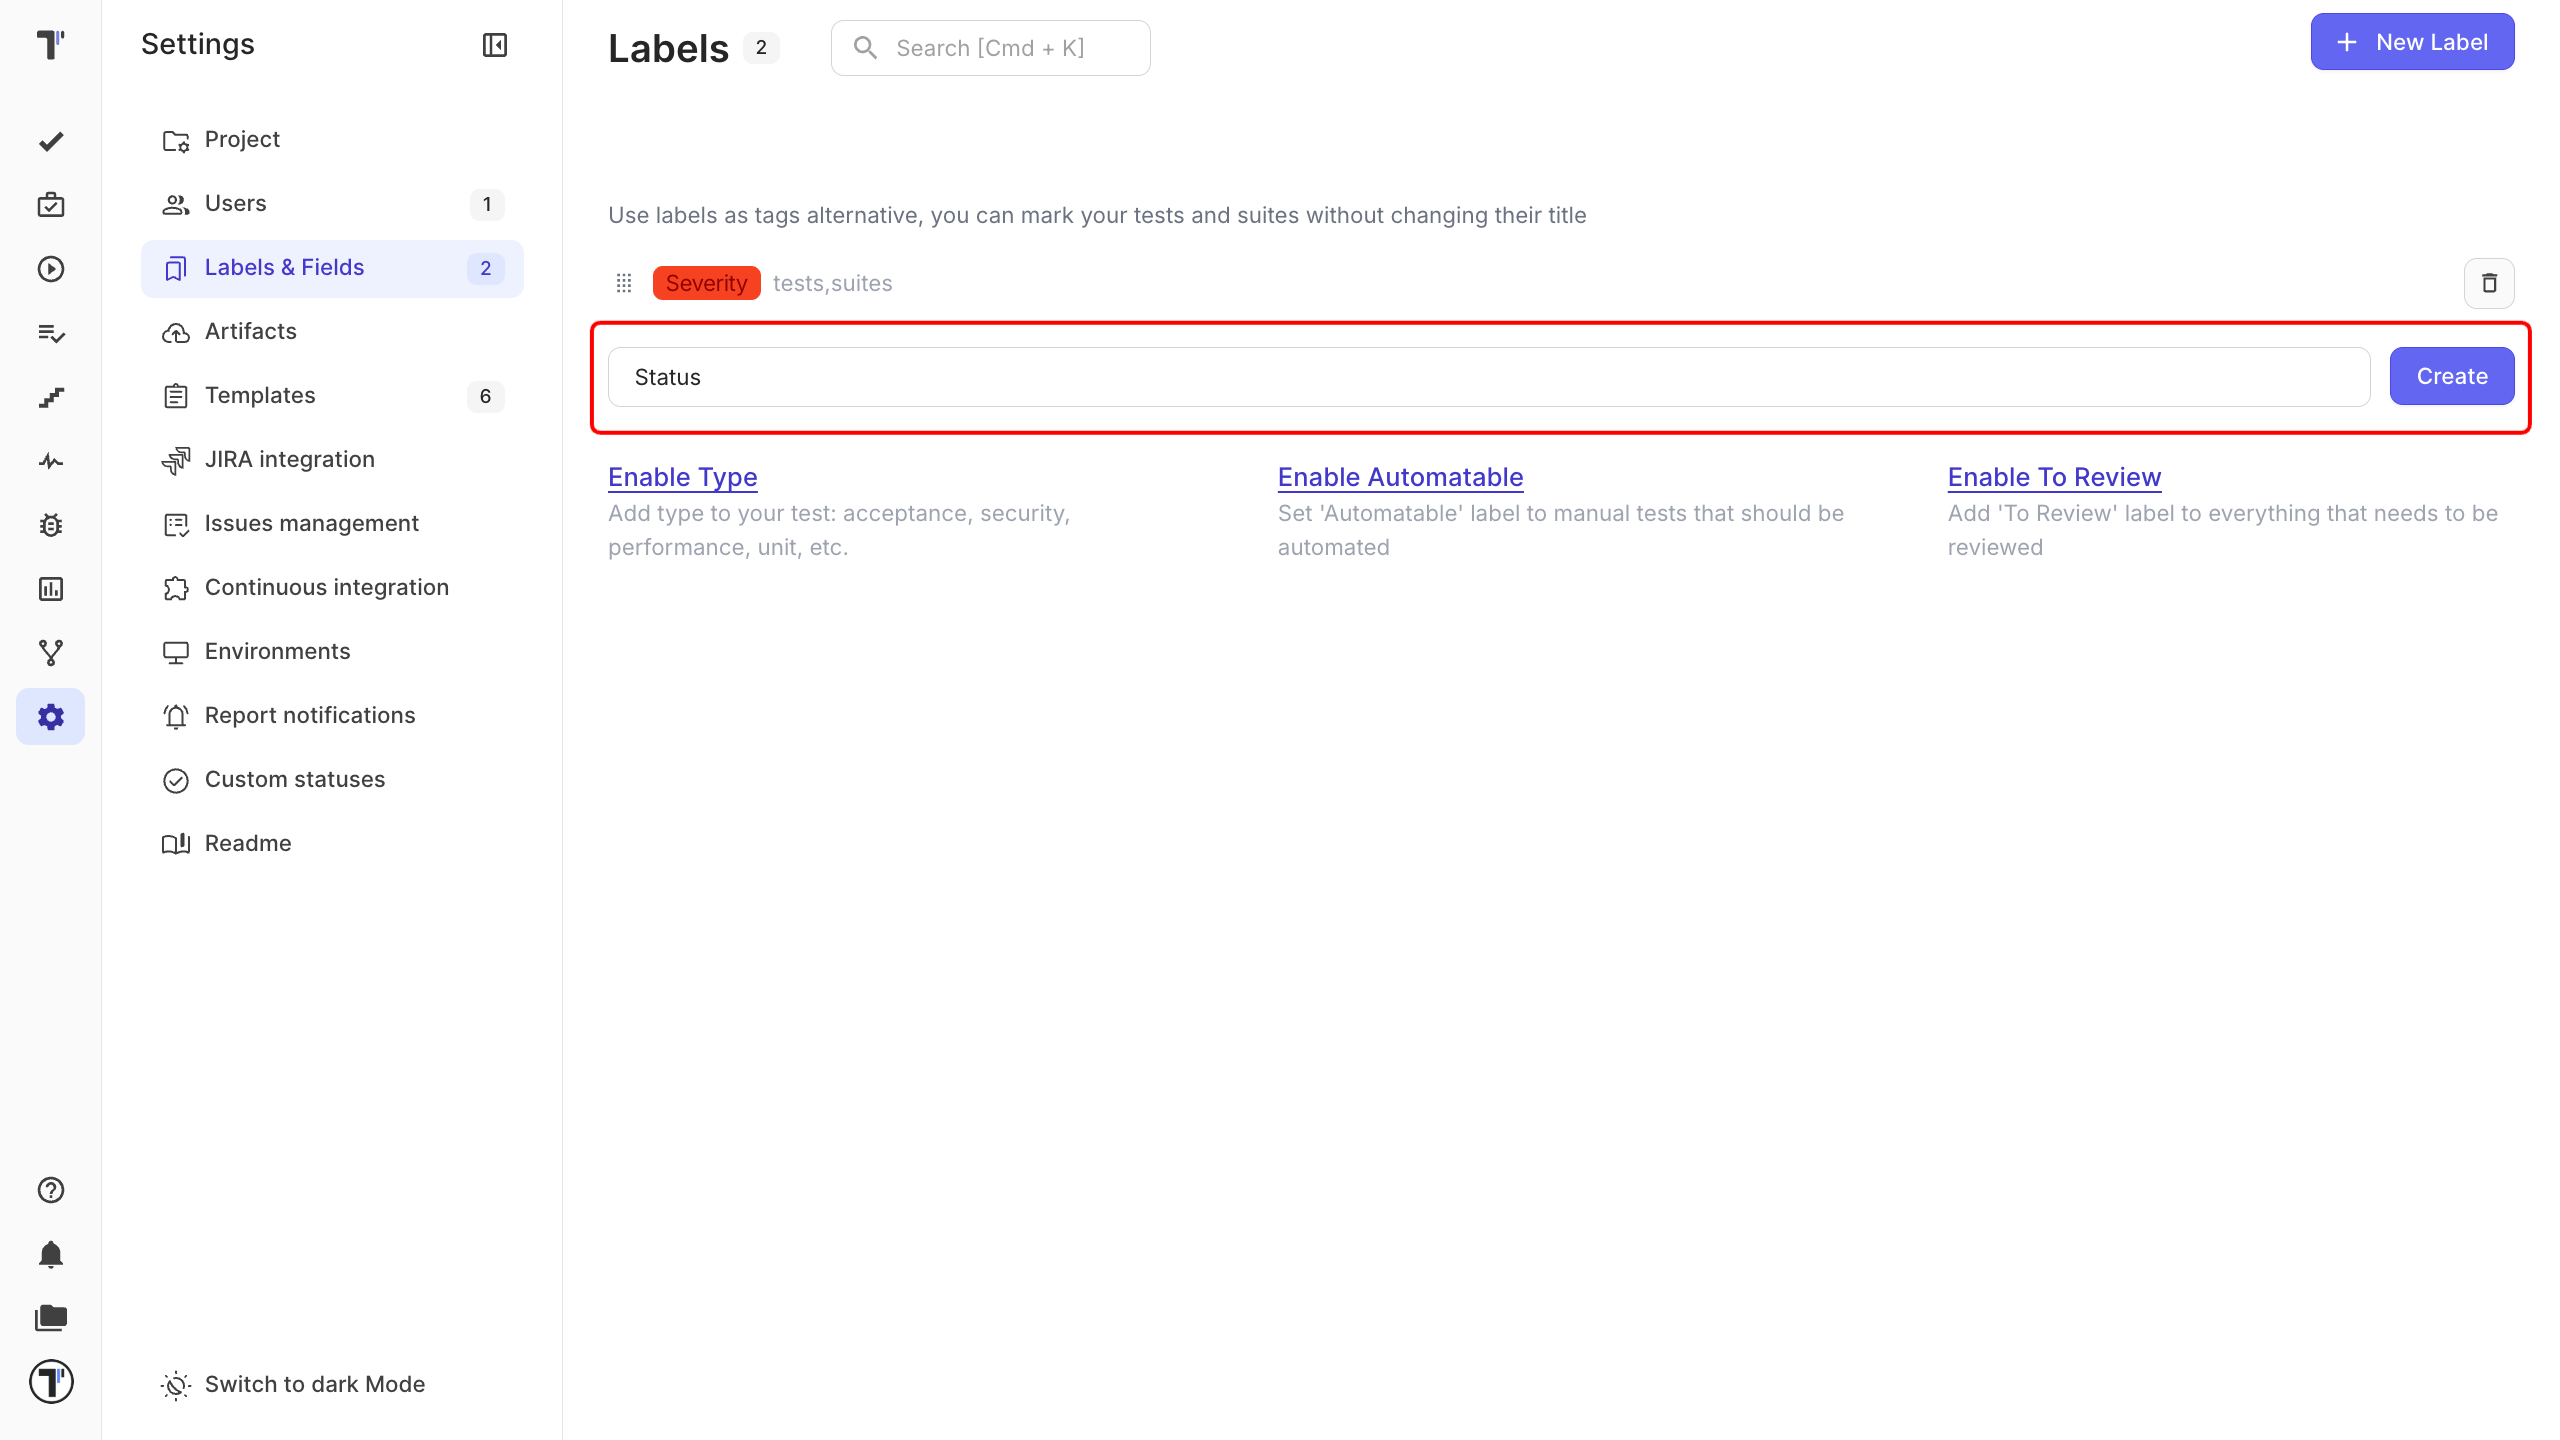
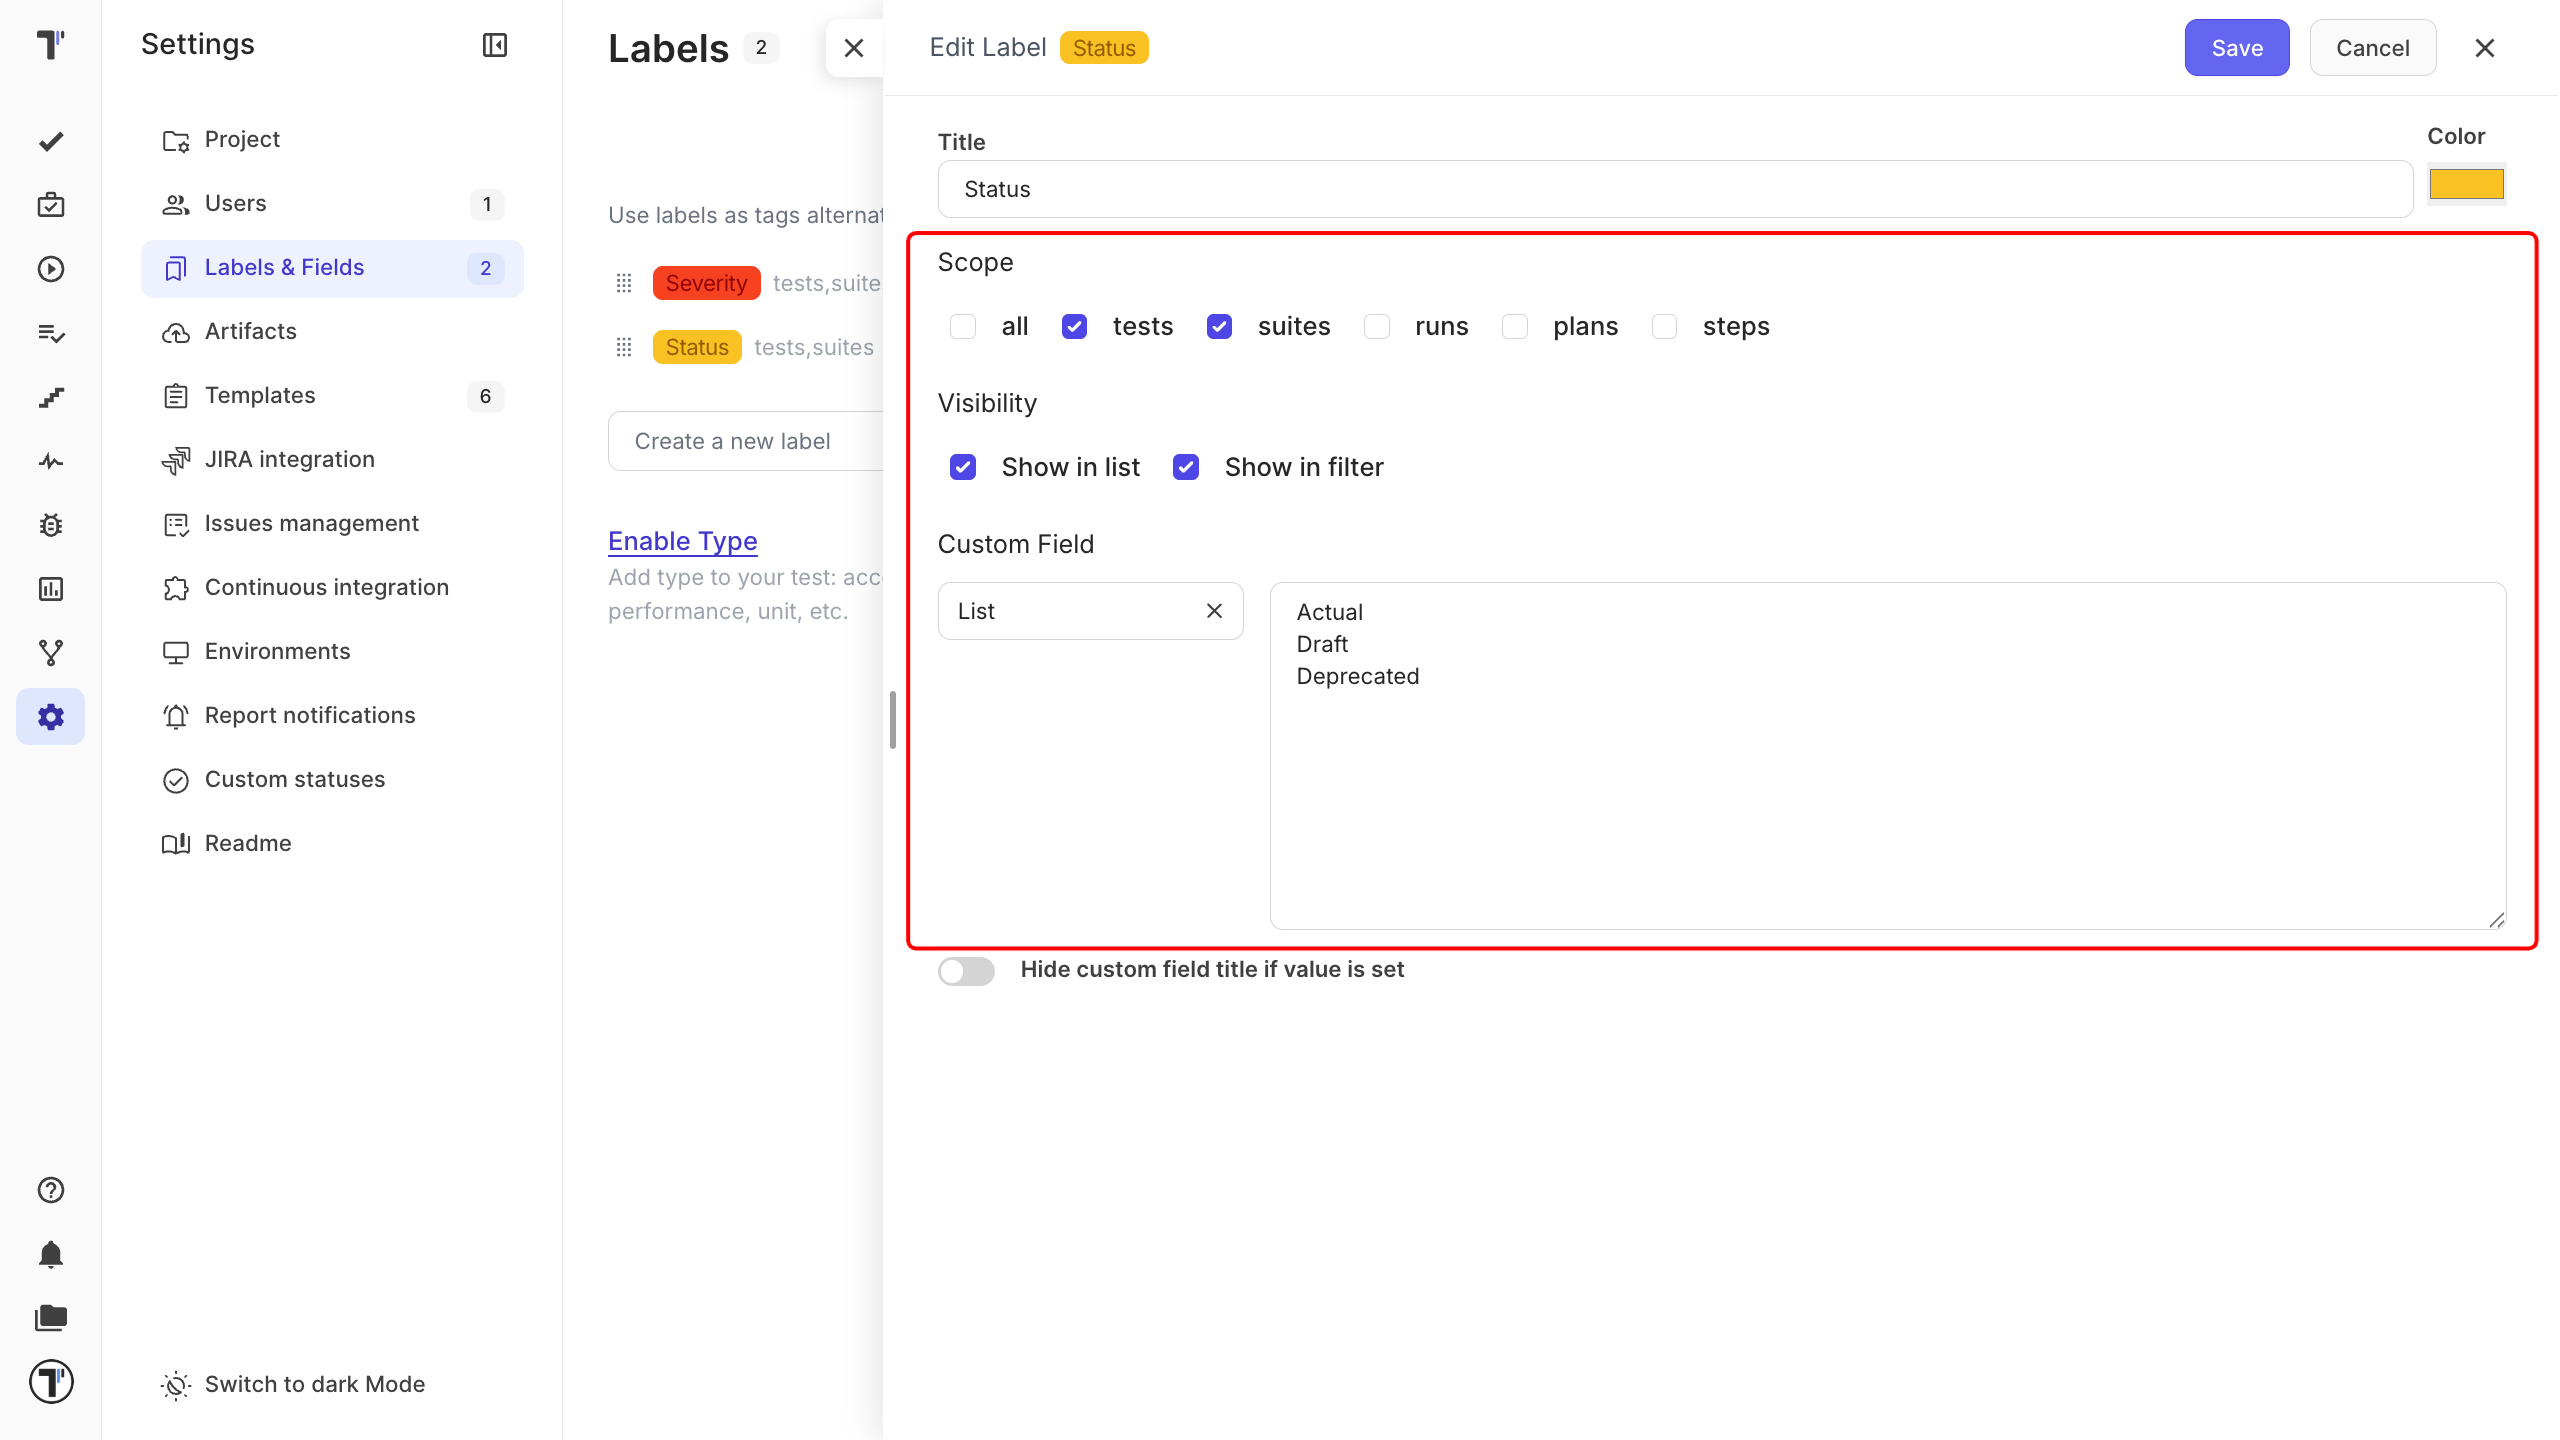
Next, click the label you just created. To Edit:
- Under Scope, pick tests and suites. Scope is the list of pages where the label can be used.
- Under Visibility, pick Show in filter and Show in list to use it on the Tests page.
- In the Custom Field dropdown choose List.
- Add the Qase values, one per line (Actual, Draft, Deprecated and so on).
- Click Save.
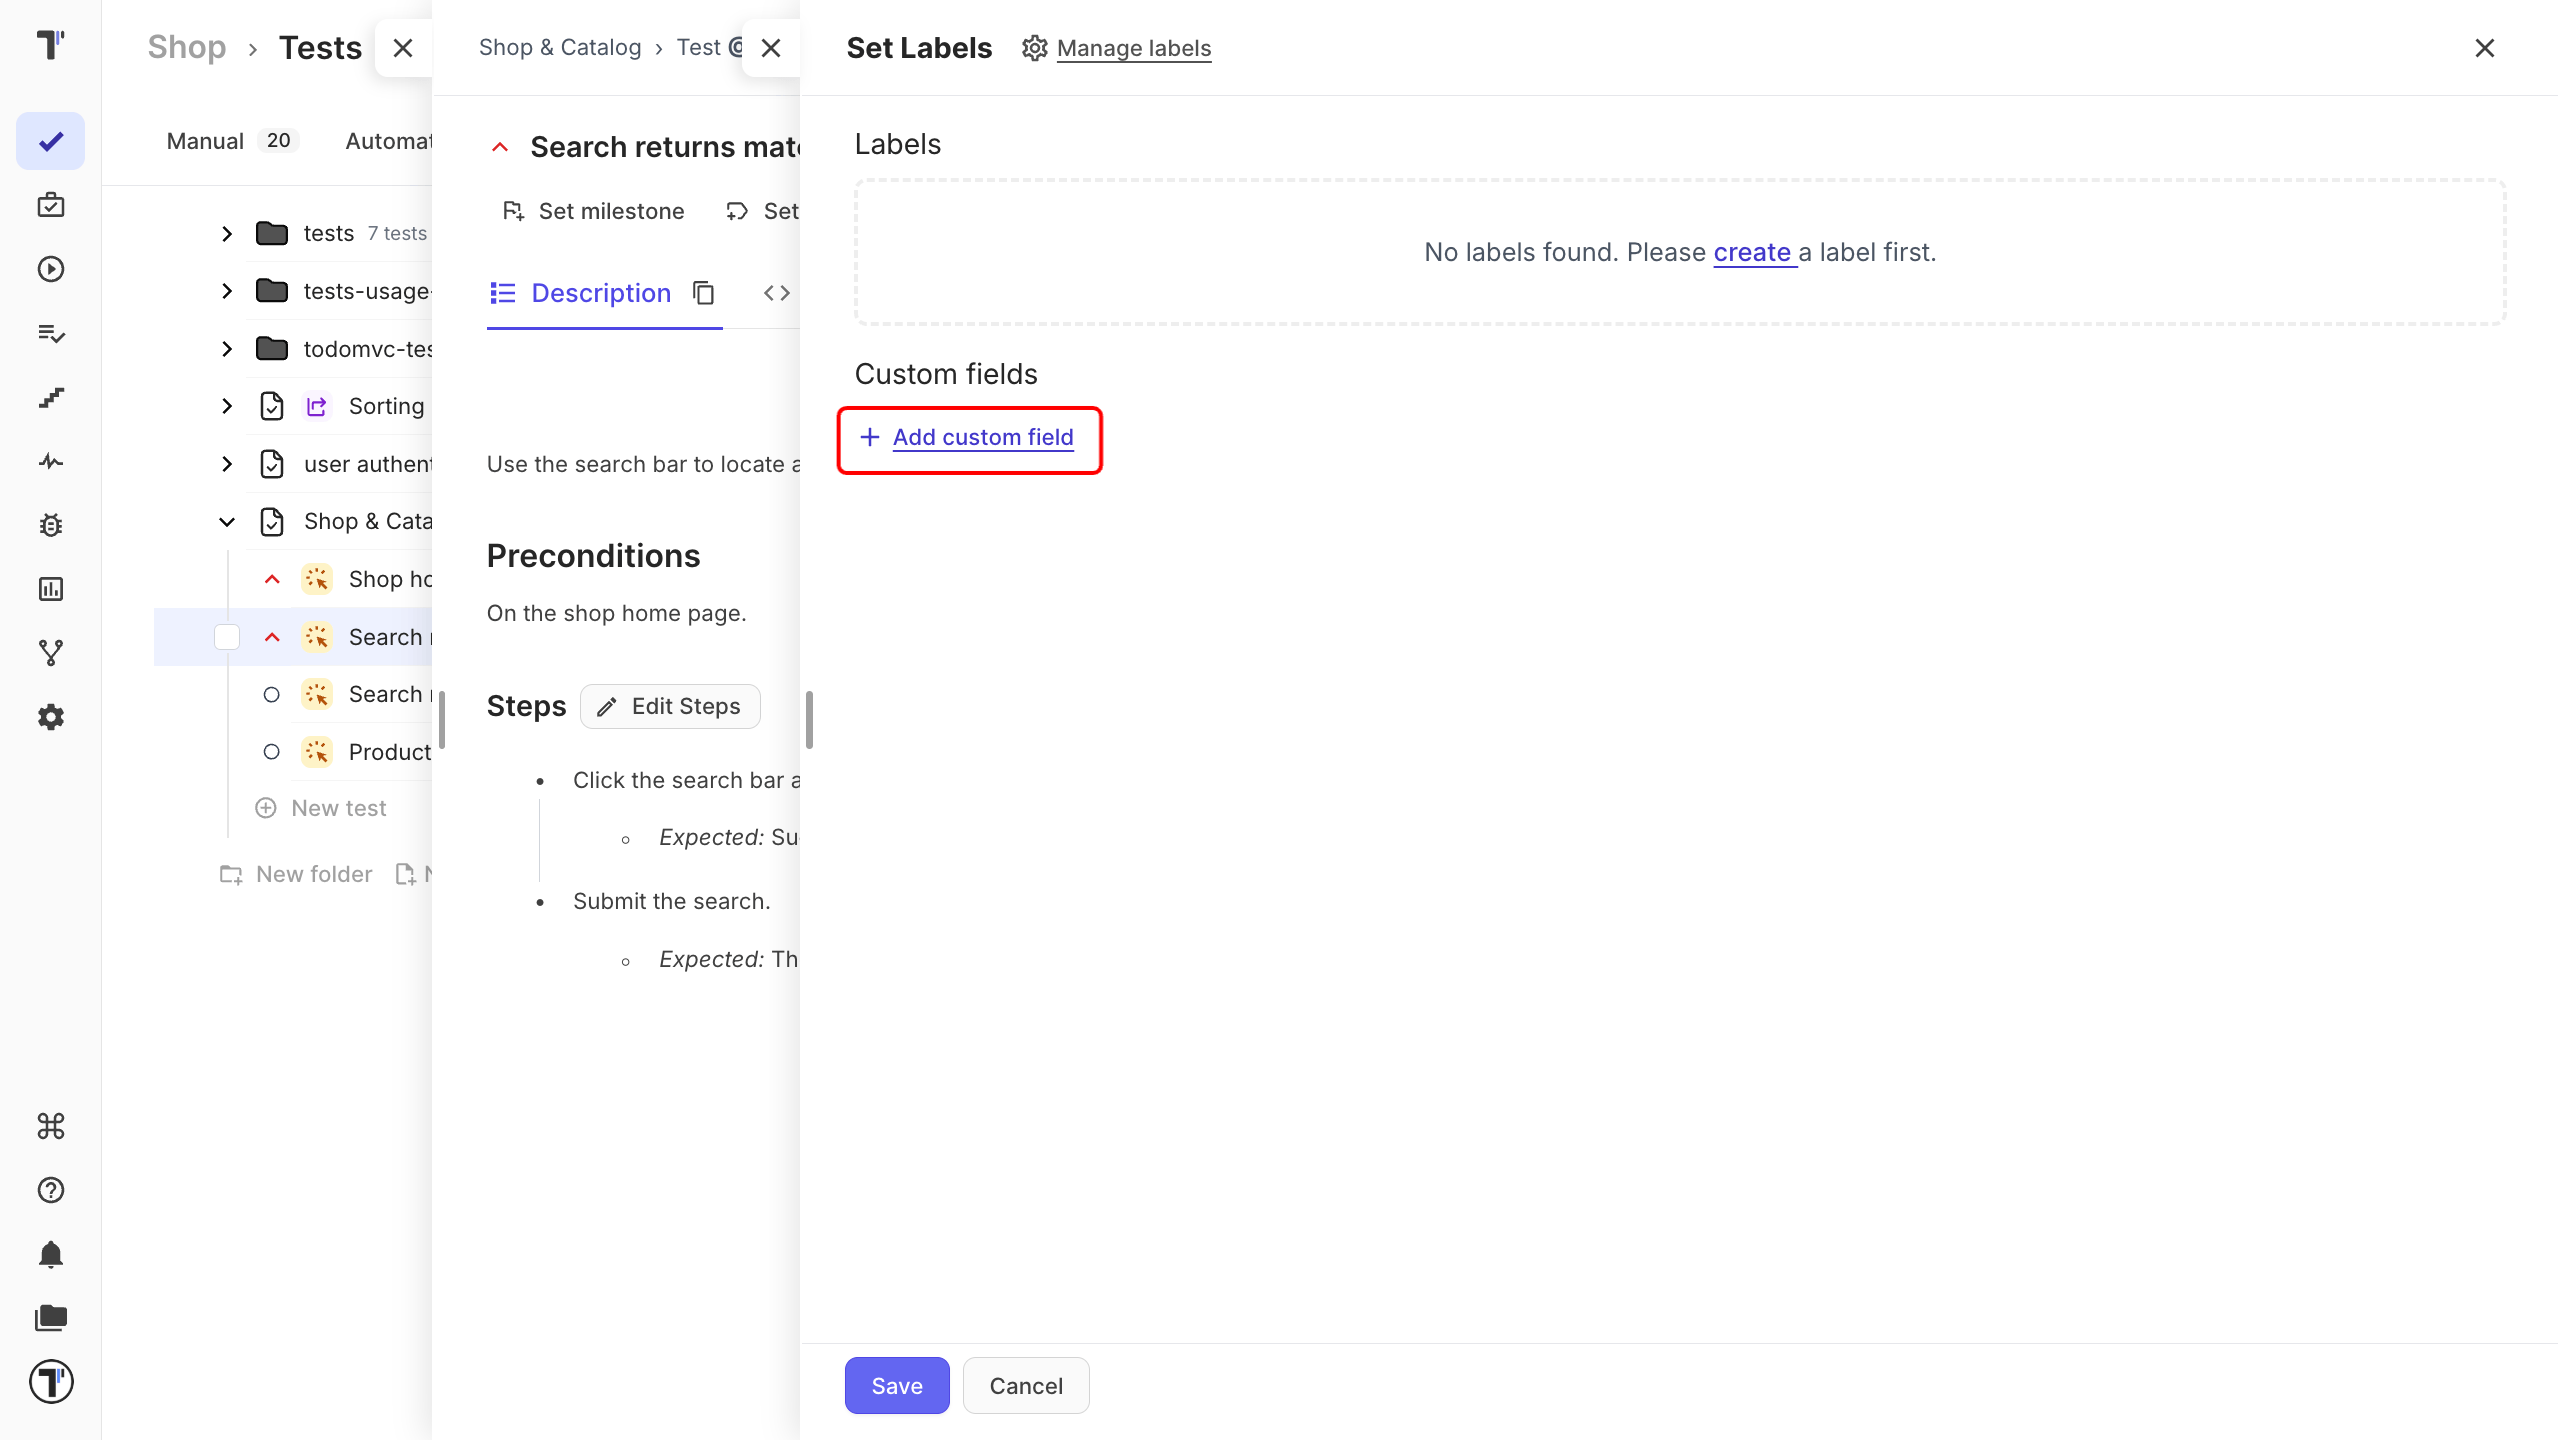
Open any test and click Set labels. In the new modal window, click Add custom field in the Custom fields section. All values appear in a dropdown.
Next steps
Section titled “Next steps”- Moving from another tool? See Import Tests From TestRail, Import Tests From QTest, and Import Tests From Testmo.
- Connect automated tests in Import Tests From Source Code.
- Connect an AI assistant to your project with MCP - Connect AI Assistant.